Do you have set processes for frequently recurring activities? If not, we highly recommend starting with project templates in Freelo. You can use the template as simply just a checklist of steps. It will help you keep the same course of action every time and never forget anything important.
Project templates help you to create projects with established processes quickly. To make everything even easier, they can also have already set due dates or sub/task assignees.
How to create a template
In order to use templates for individual tasks, To-Do lists, or projects, you first need to create a project template.
1. New project template
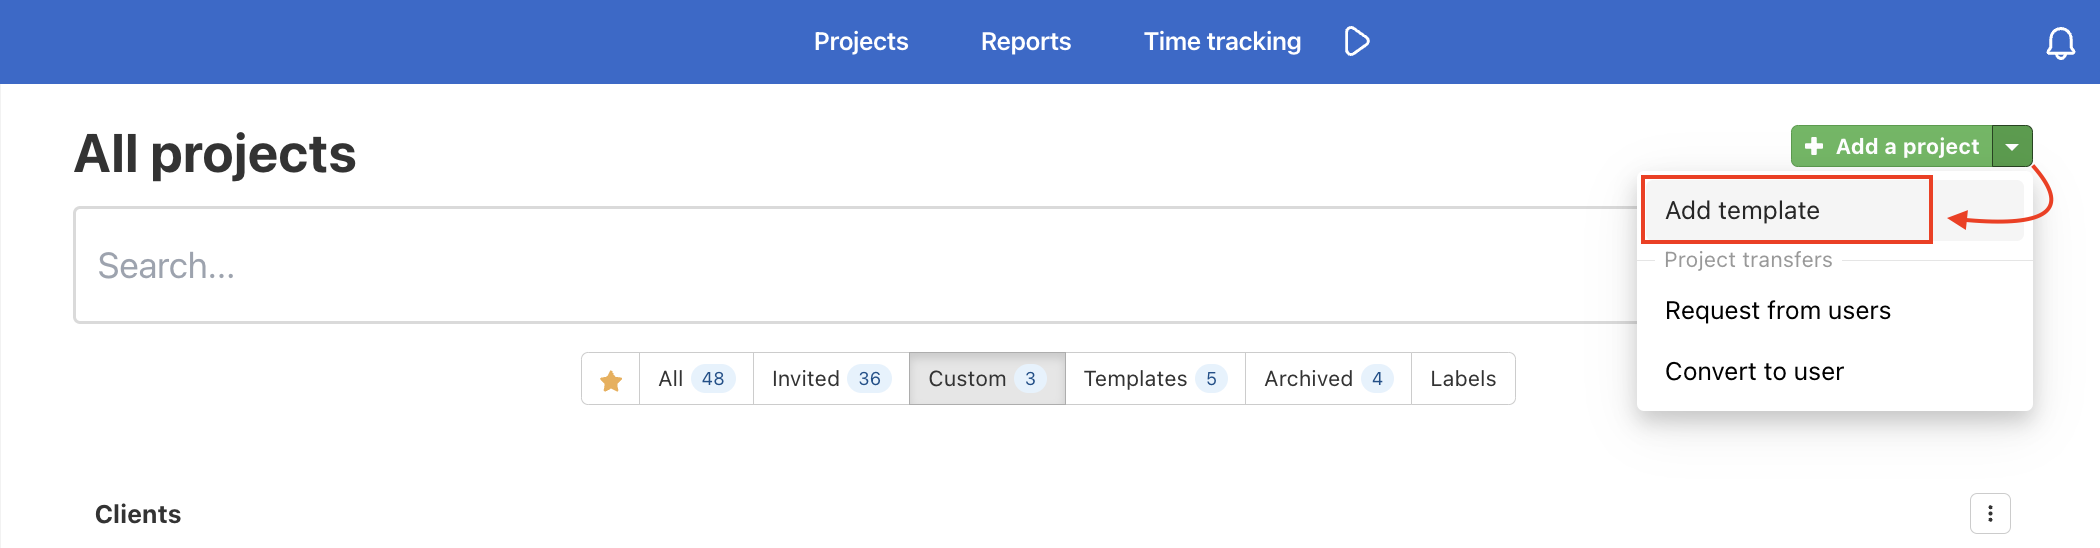
You can create a brand new project template and define the procedure by adding To-Do lists, subtasks, and subtasks. Go to Projects > All projects > click Add template.
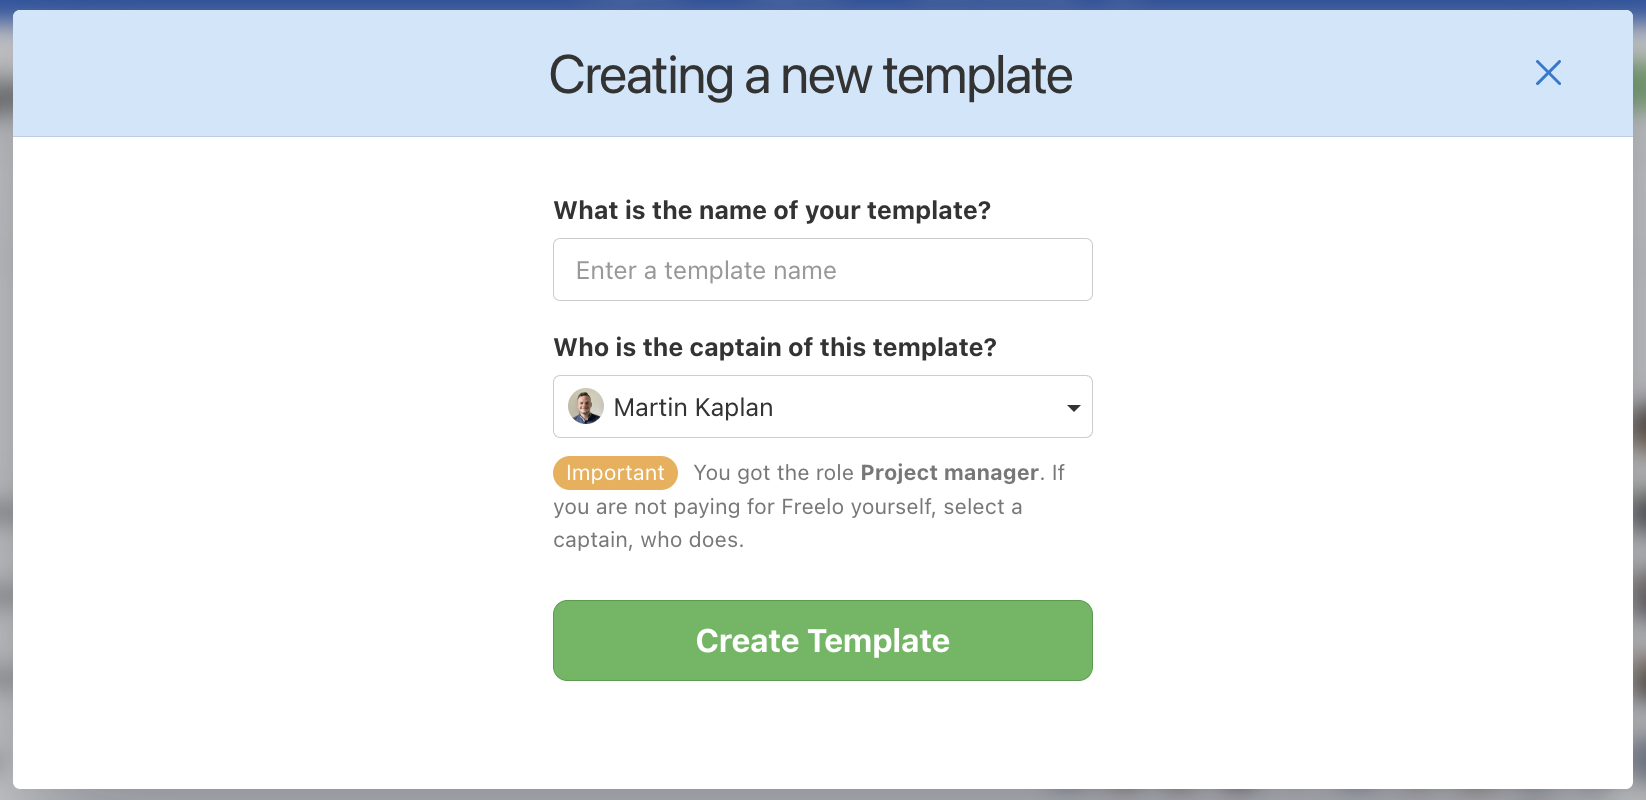
After clicking Add template, you will see the form. It is similar to creating a new project. Add in your chosen name of the template and the captain.
The captain of the template should always be the user who is the owner of the paid plan and who possibly assigned you the Project manager.
Now you have a project template where you can define To-Do lists, tasks, and subtasks. You can also invite other users, assign them tasks, or preset due dates to the tasks.
2. Template from an existing project
In case you have a well-structured project and you know the tasks are recurring, you can create a template from it. In this case, a new project template is created. It includes:
- To-Do lists
- Incomplete tasks and subtasks
- Task labels
- Invited users and their hourly rates
- Followers of To-Do lists and tasks
- Optional task and subtask descriptions
- Assignees
- Files and notes
- Relations between sub/tasks
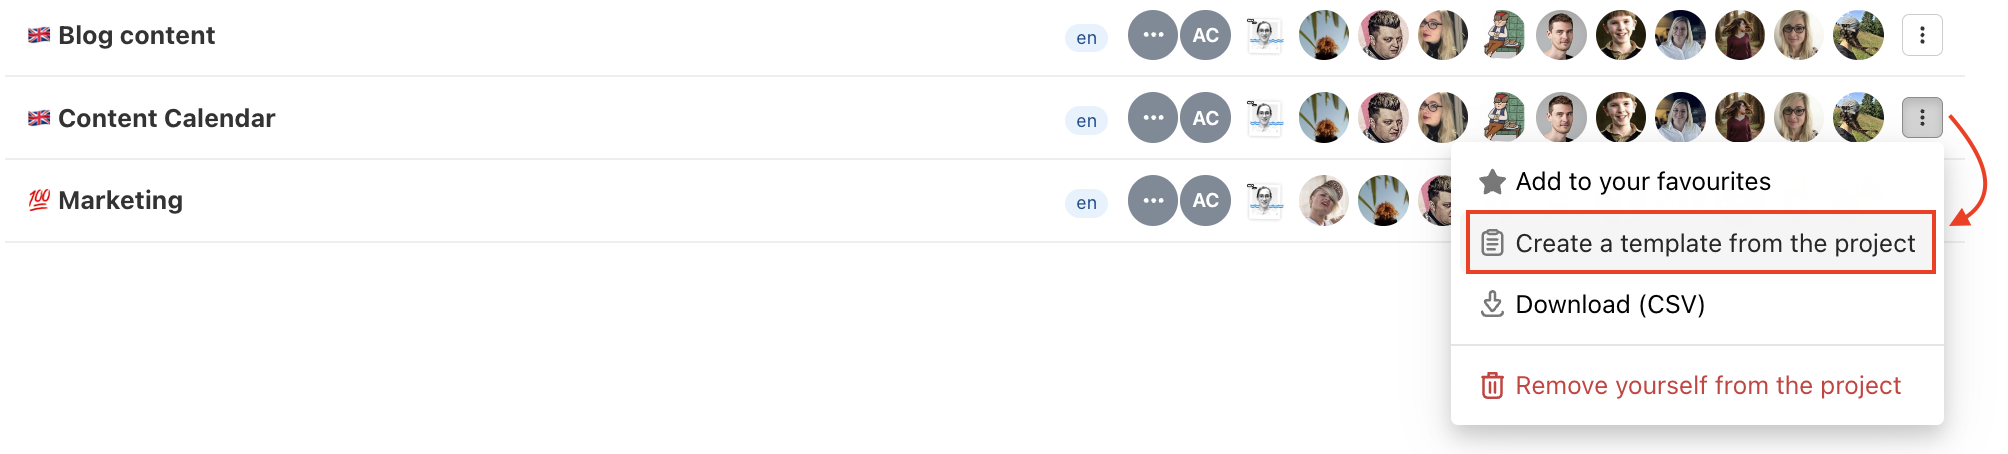
Go to All projects and in the three-dot menu on the right click Create a template from the project.
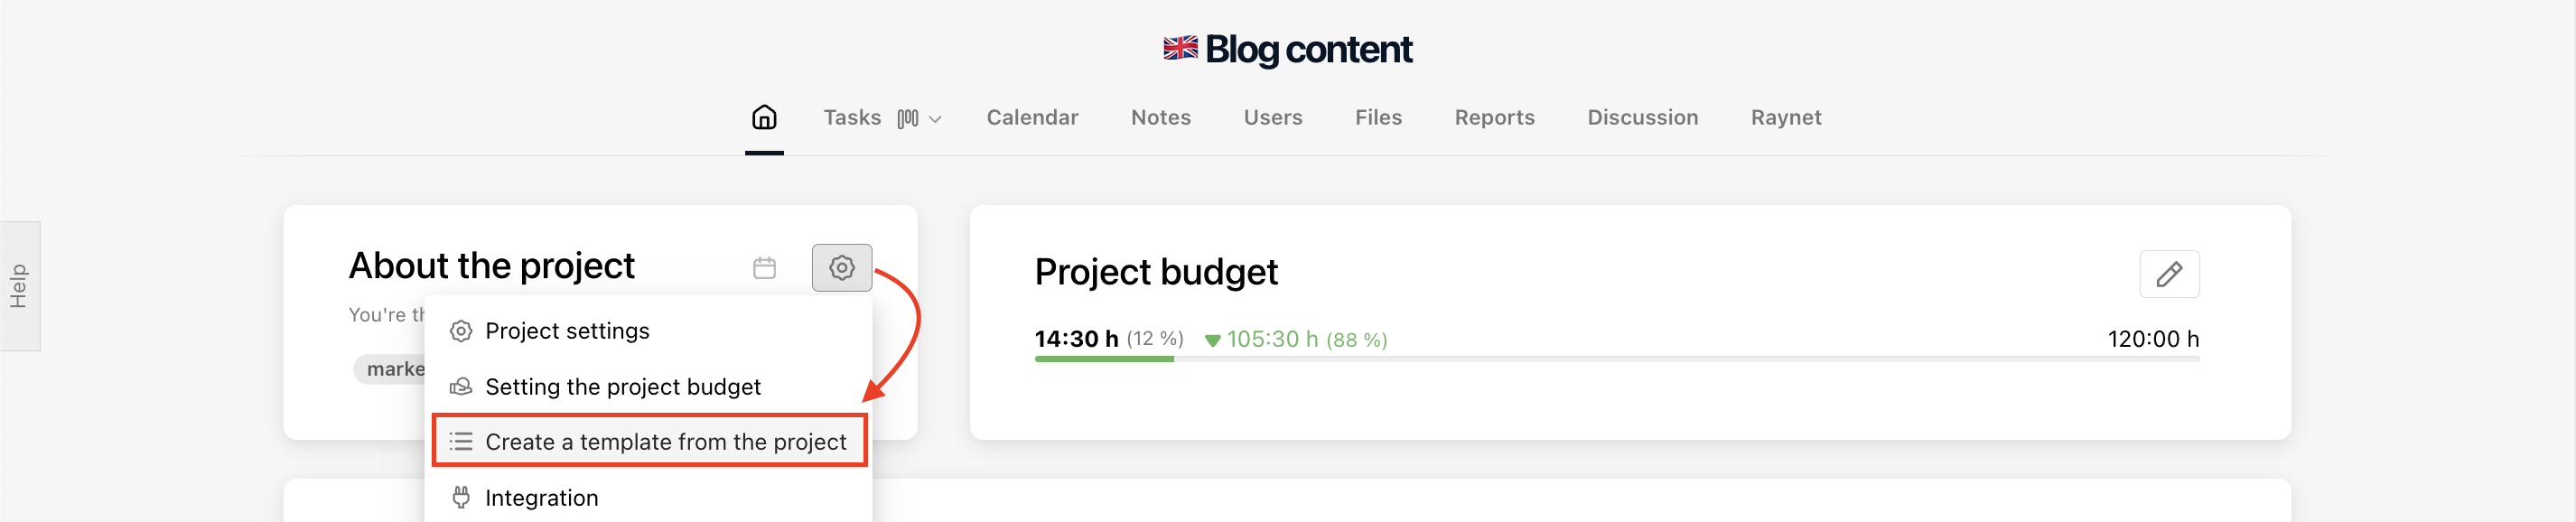
If you’re creating a template from your own project, you can do so in the project detail. Click the settings icon and then Create a template from the project.
3. Template from an archived project
If you archive a well-structured Project, you can easily create a Template out of it. This way, all this information is transferred into the template (just the same as when creating it from an active project):
- To-Do lists
- Incomplete tasks and subtasks
- Task labels
- Invited users and their hourly rates
- Followers of To-Do lists and tasks
- Optional task and subtask descriptions
- Assignees
- Files and notes
New project from a template
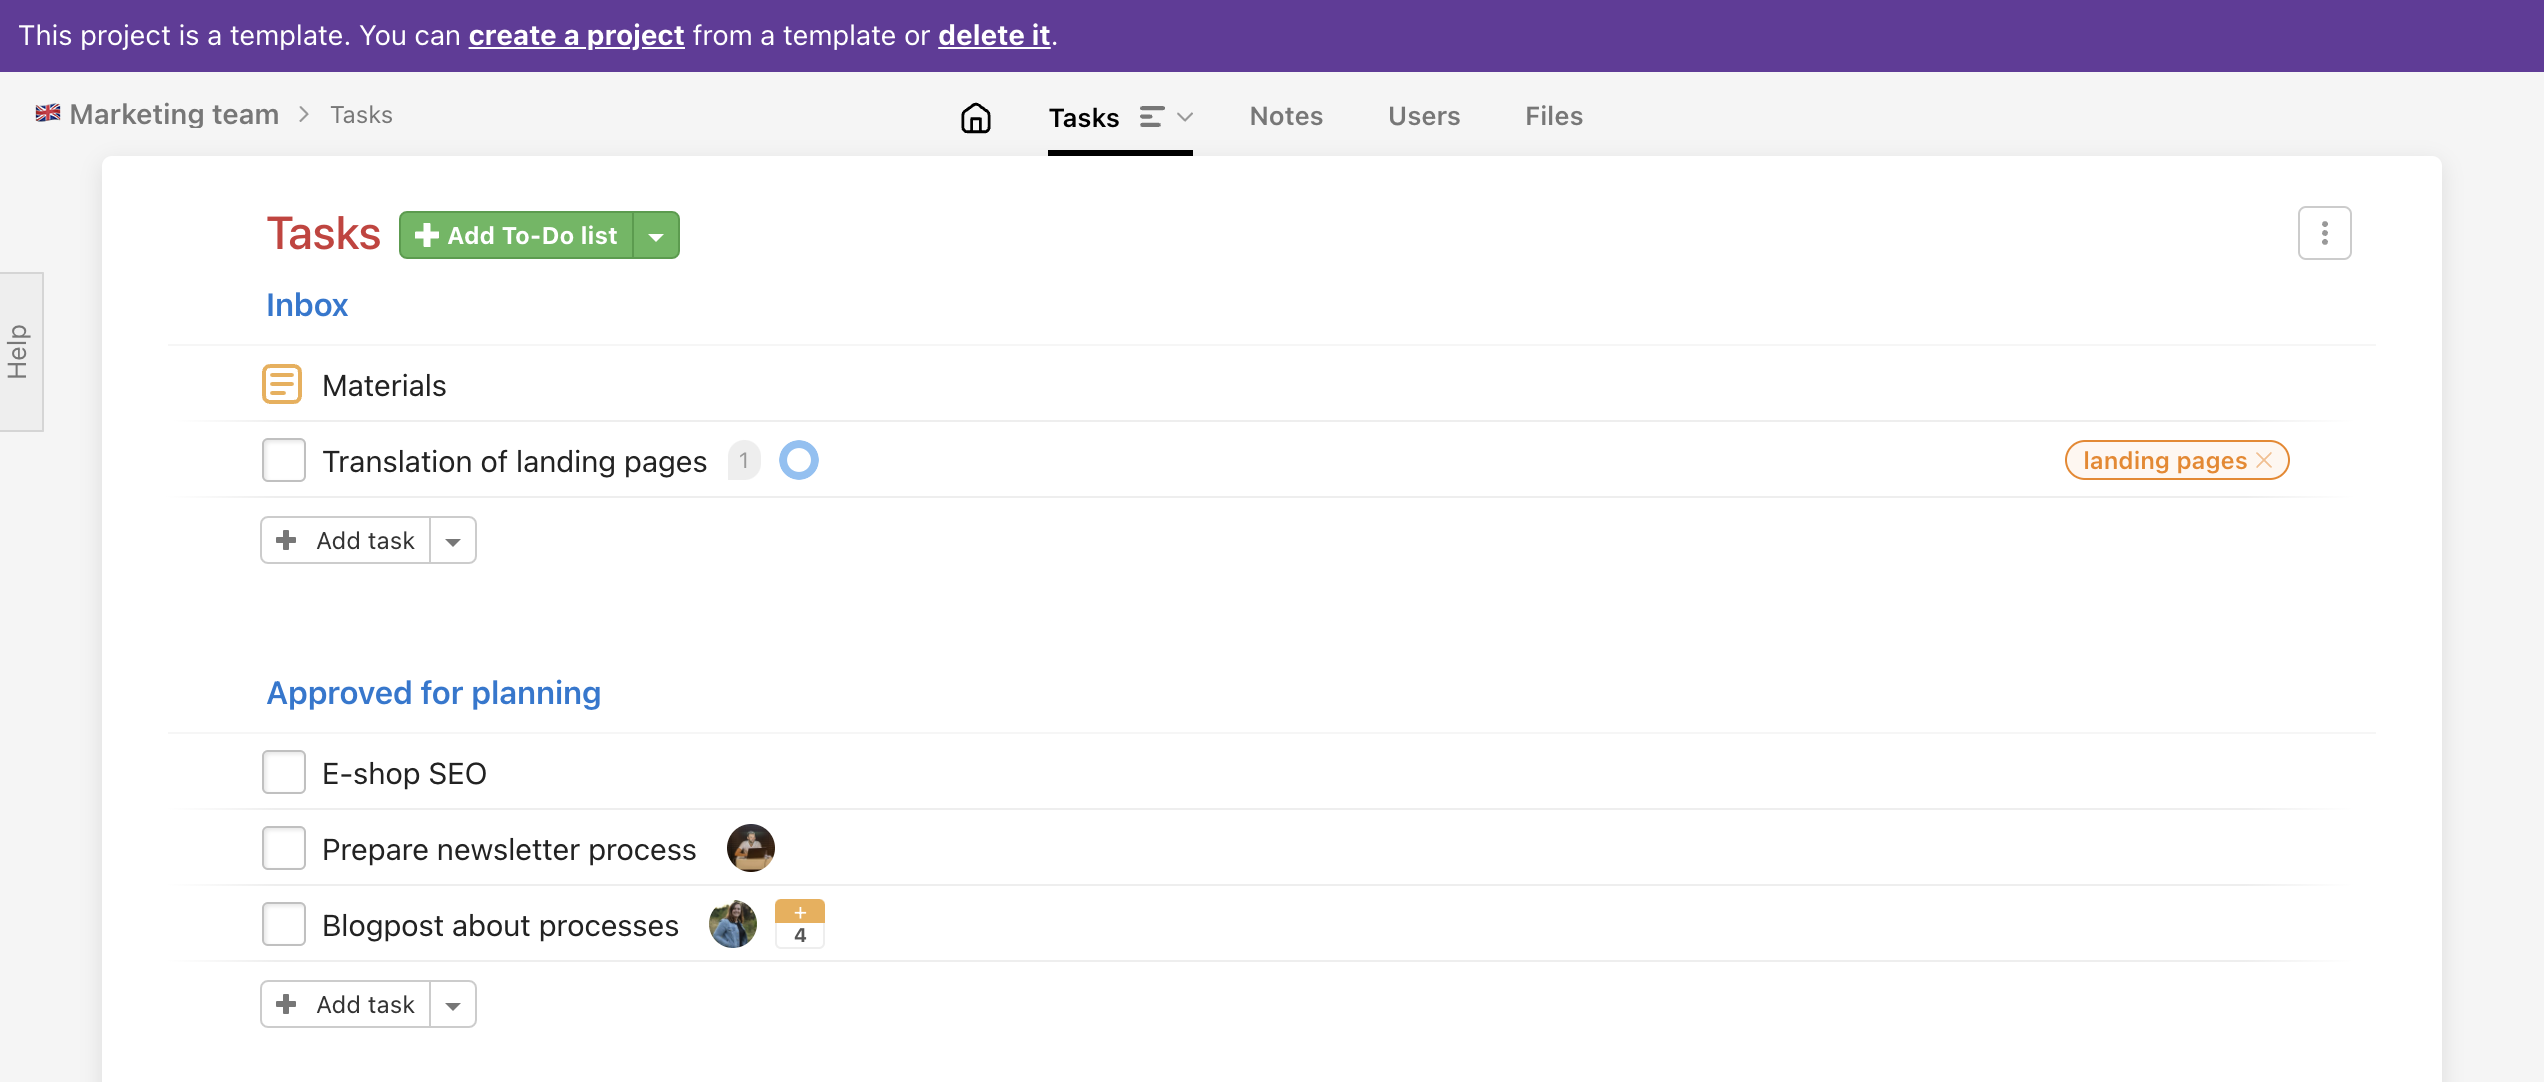
To create a new project from a template, click Create a project in the top purple section.

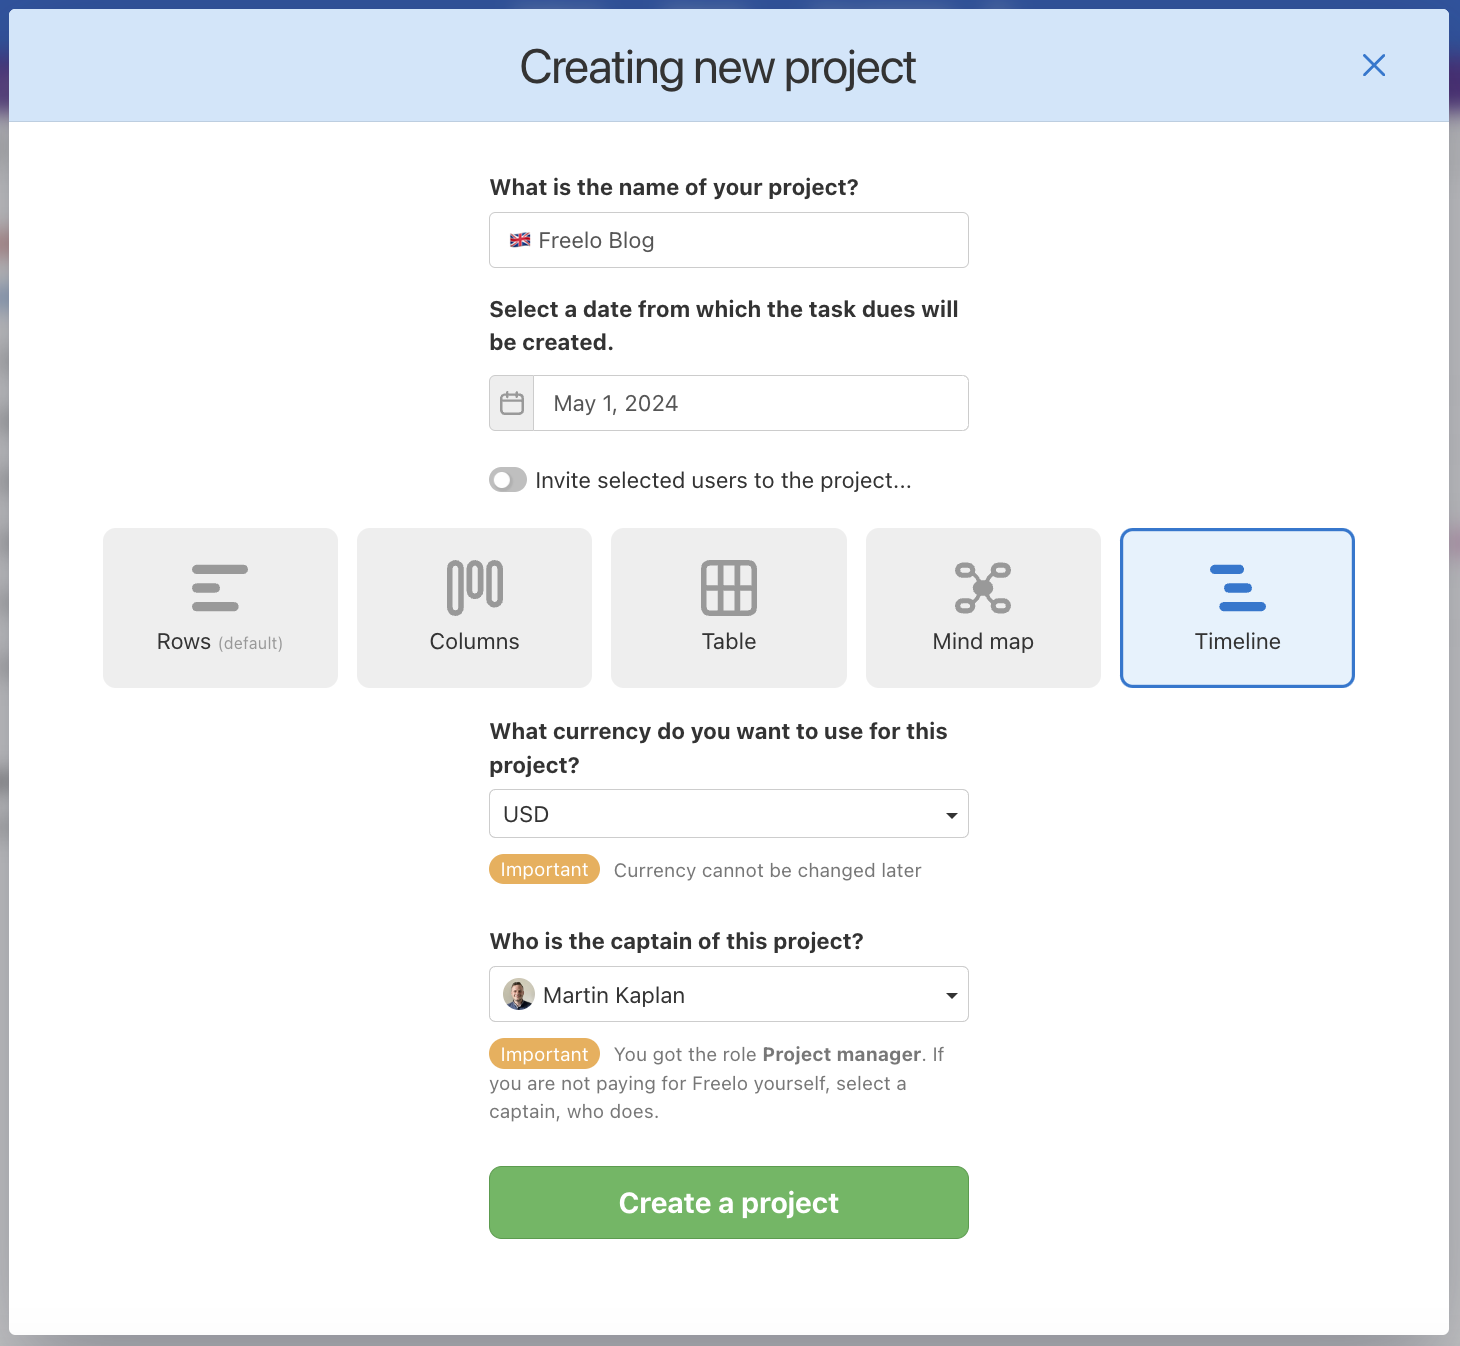
After this, a form will appear where you can fill in the details of the new project:
- The name of the project,
- The date from which the deadlines of tasks and subtasks you have preset in the template will be set,
- The users who will be invited to the new project (by default, users who are assignees of sub/tasks in the template will be selected),
- Default view of the project,
- The currency (cannot be changed later),
- The captain (owner) of the project – this should always be the user who pays for the plan.
Confirm by clicking Create a project.
Date for creating task deadlines
In the form, there is a part called Select a date from which the task dues will be created. That means you should select a date when the task’s and subtask’s deadlines start to create.
For example, today is the 5th. I set the date from which the task dues are created on the 15th. In some tasks, I have preset due dates of -10, -5, -1, +1, +5, and +10 days. The real due dates of these tasks will be on the 5th, 10th, 14th, 16th, 20th, and 25th.
New To-Do list from a template
You can add one or more To-Do lists from the project template with:
- tasks and subtasks,
- assigned users,
- due dates.
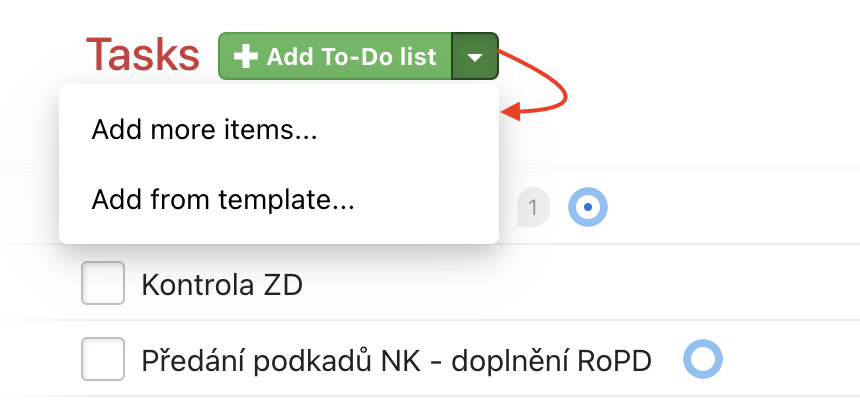
Go to the list of tasks, click the arrow, and then click Add from template… All you need to do now is just select one or more To-Do lists from the templates.
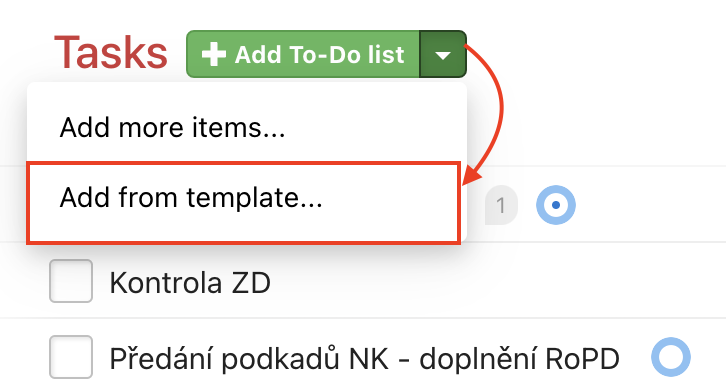
Confirm this step by clicking Paste Selected Tasks.
New sub/task from template
From the project template, you can add a task with a checklist or a procedure in subtasks. They can have a pre-assigned users, due date, and assignment in the first comment.
Go to the list of tasks and via the arrow next to the Add task button, select Add from template… and just select one or more tasks from templates.
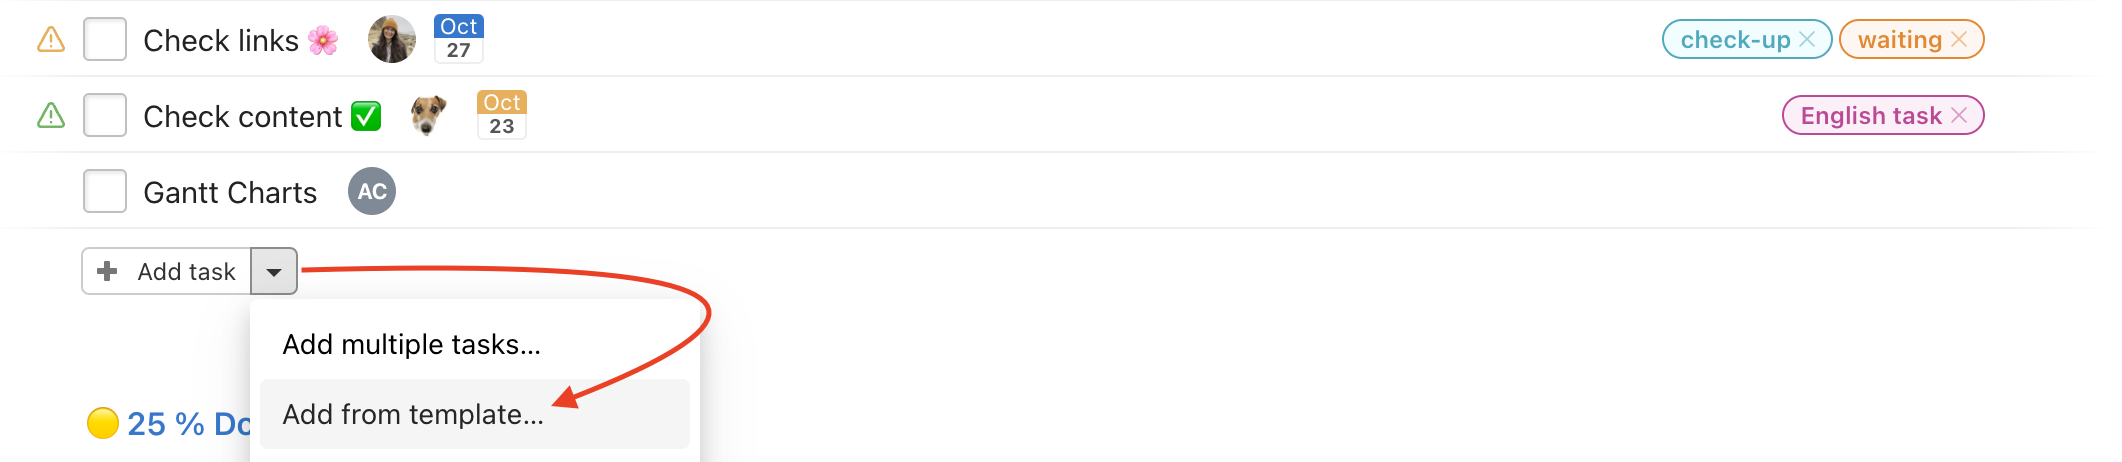
Select the tasks you want to add from the list. They can also contain subtasks. If you have a due date defined in the template, set the Set up due dates from the date at the bottom and they will count from that date. Save the tasks by clicking on the Paste Selected Tasks button.
How to add a subtask
You can add an entire list of subtasks to an existing task in bulk. Go to the task detail and click on the arrow next to the green Add subtasks > Add subtasks from template…
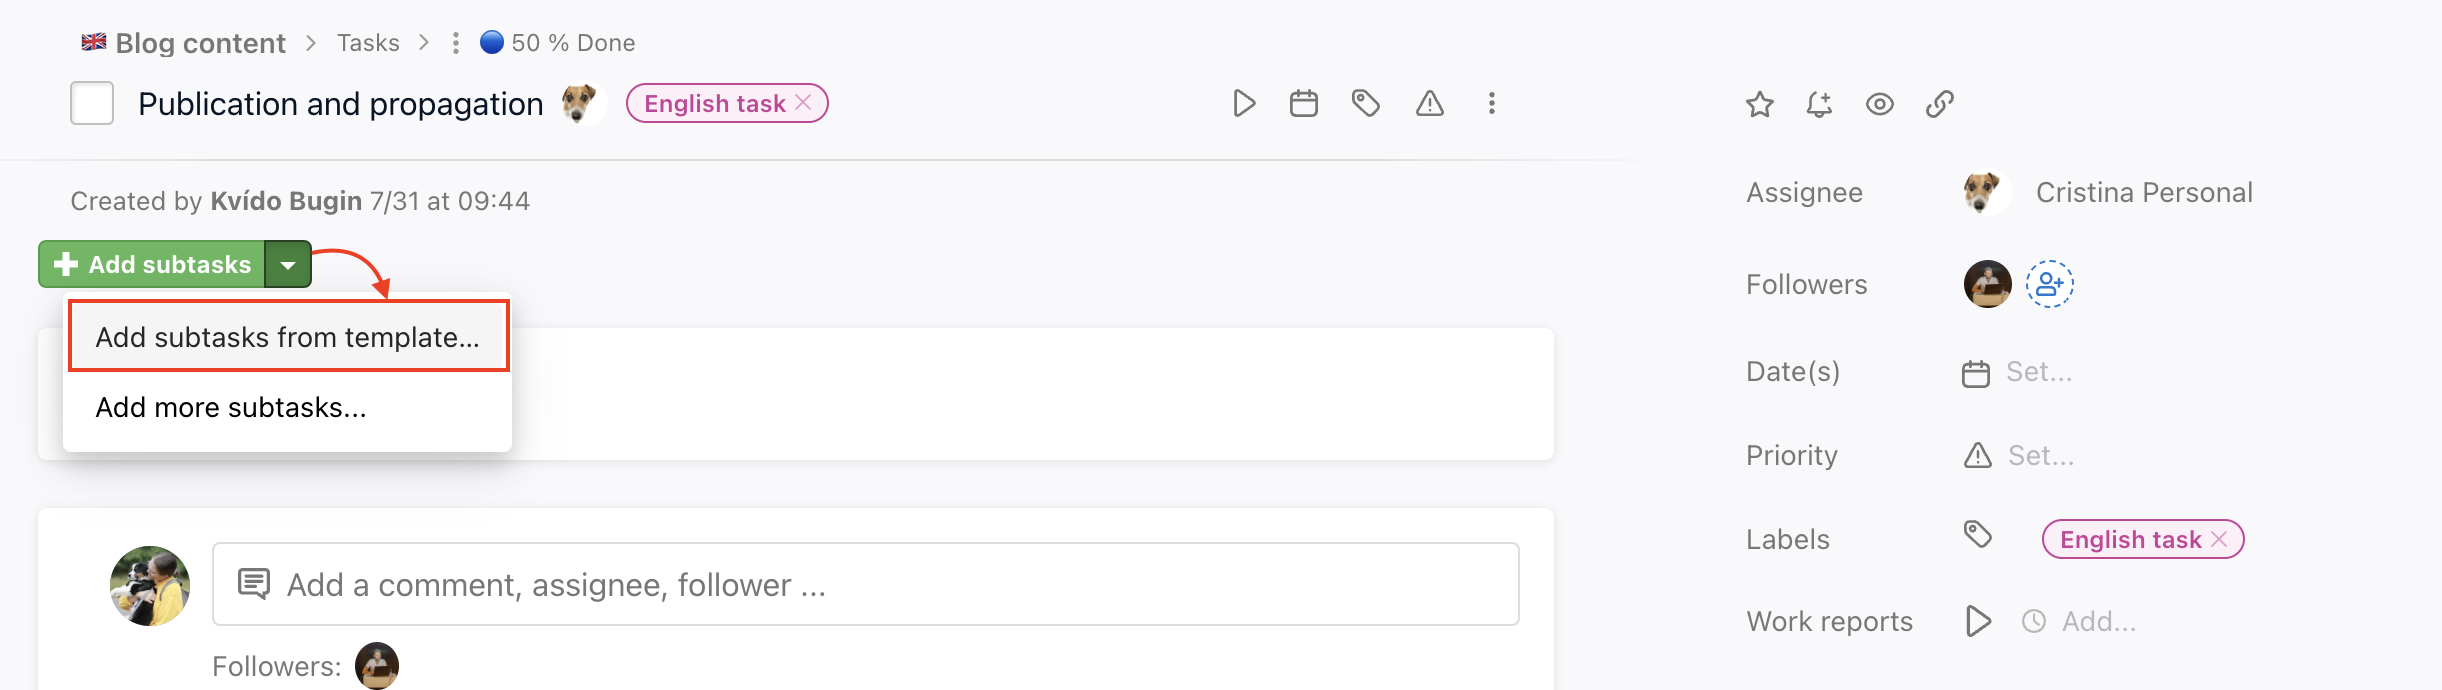
Similar to adding a task, you will see a list of tasks that have subtasks. Select which subtasks you want to add to the task and confirm with the Insert selected subtasks button.
How to use templates
As soon as you have some project templates, you can find them in the section All projects > Templates.

Then you can add particular To-Do lists or tasks with the defined processes for running the project. Also, it helps you create multiple tasks more quickly and efficiently.
Invite users to a template
It is also possible to invite users to a template of a project. This allows you to share the template with other users who can afterwards freely use it as well.
Go to the section Users via the template detail or in any task view via the top menu section.

And click the green plus icon to invite others.
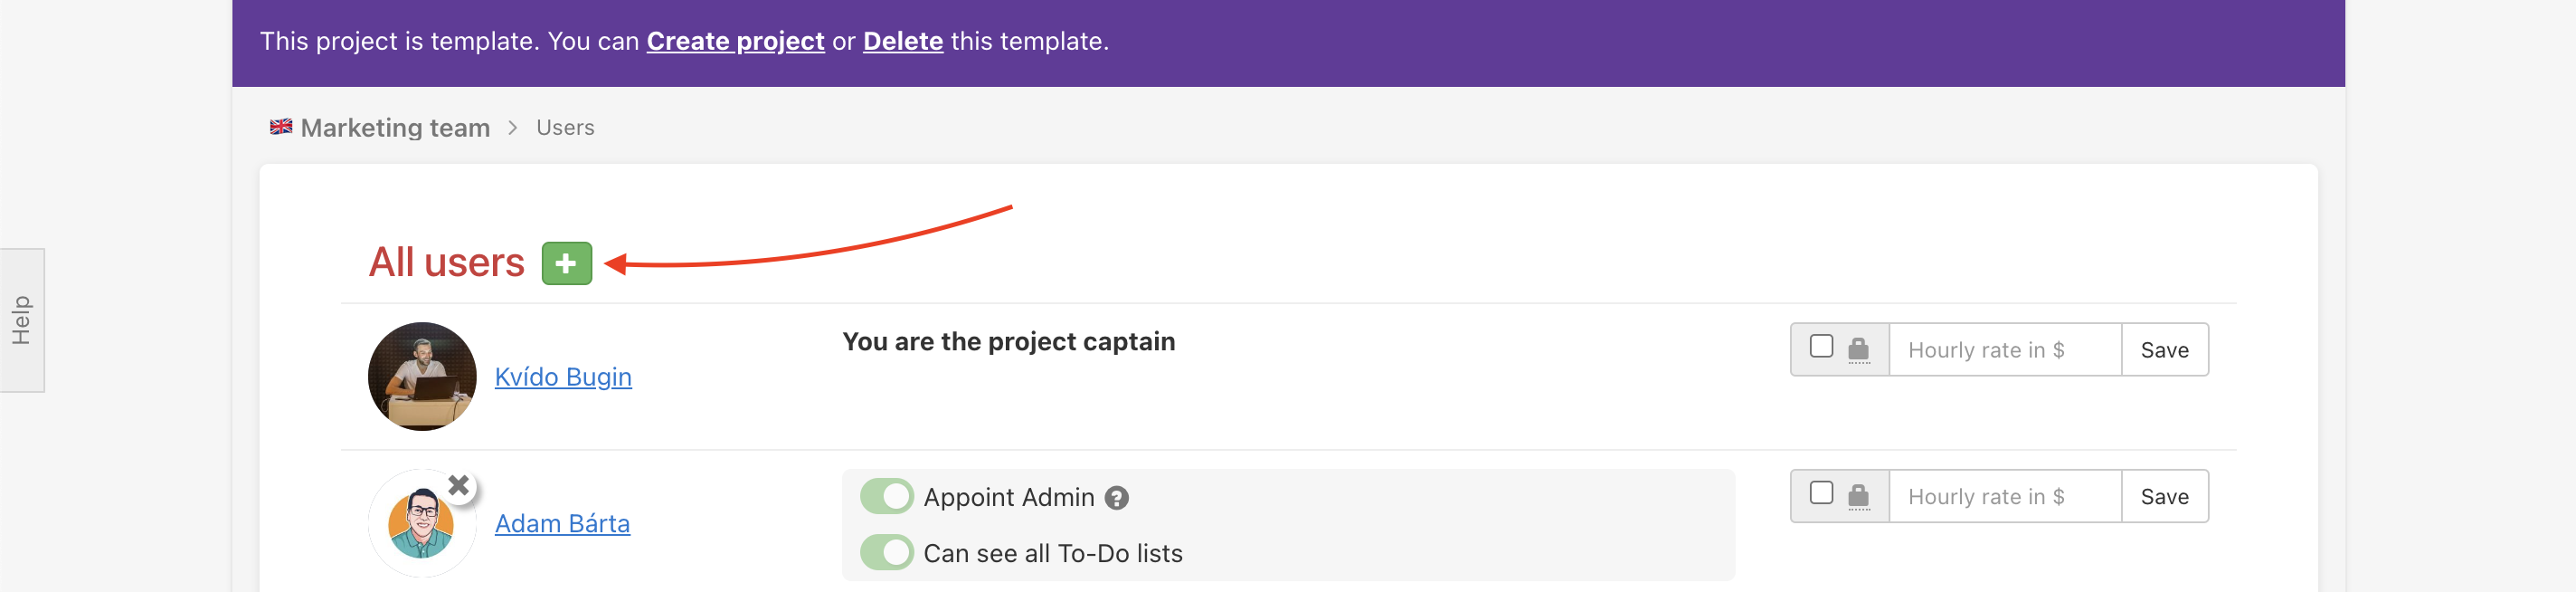
You can set the user’s hourly rate or appoint admin users in the template, both of which will be transferred to the project when being created from the template.
As soon as you invite users to the template, you can assign them tasks and subtasks. When you create a project from the template, the users will still have tasks assigned to them in the newly created project.
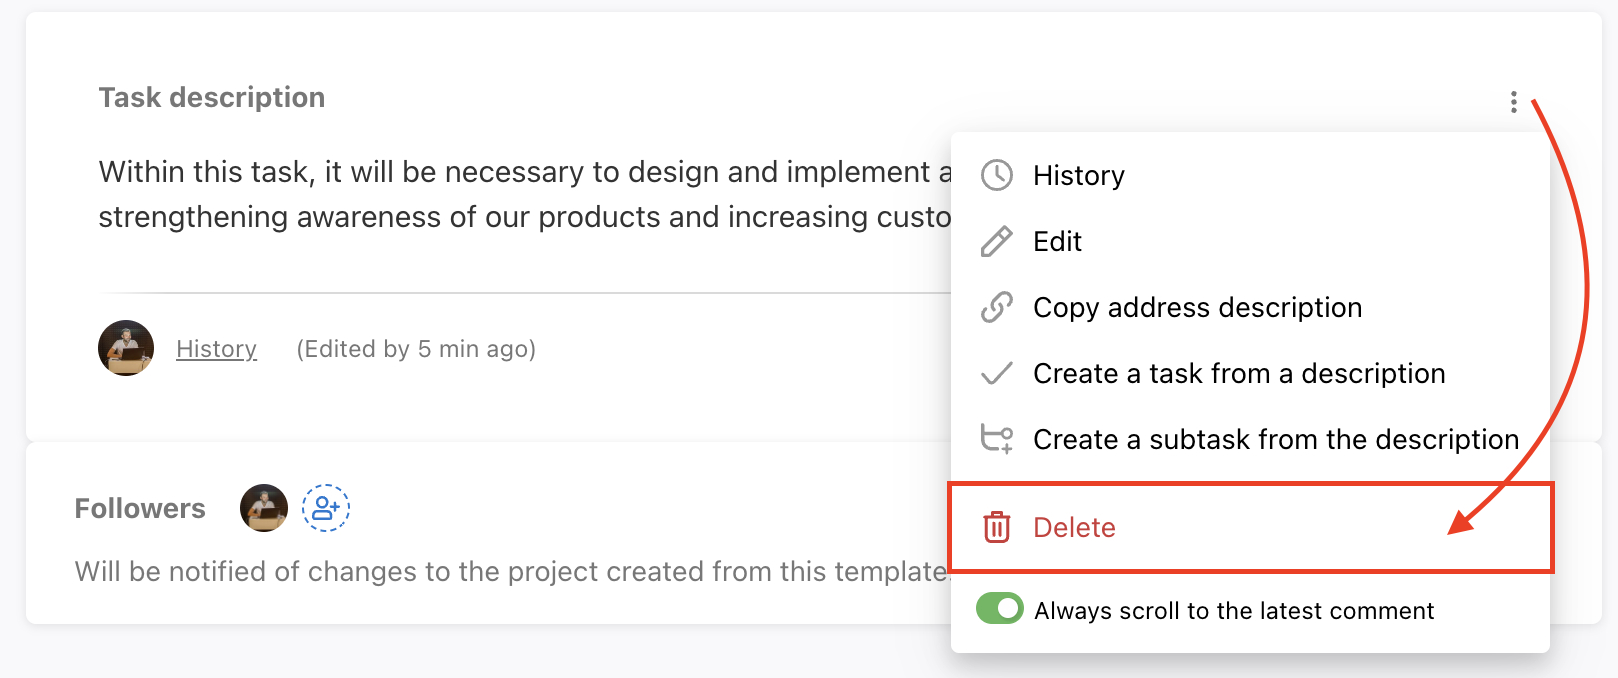
Task description in templates
In templates, you can add a Task description. You can delete or edit it whenever you wish. If you decide to delete the Task description, the field will remain blank. However, you can still view full history of all changes even after its removal.
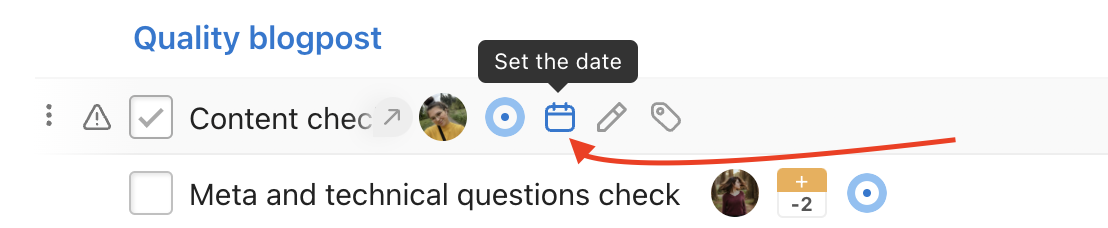
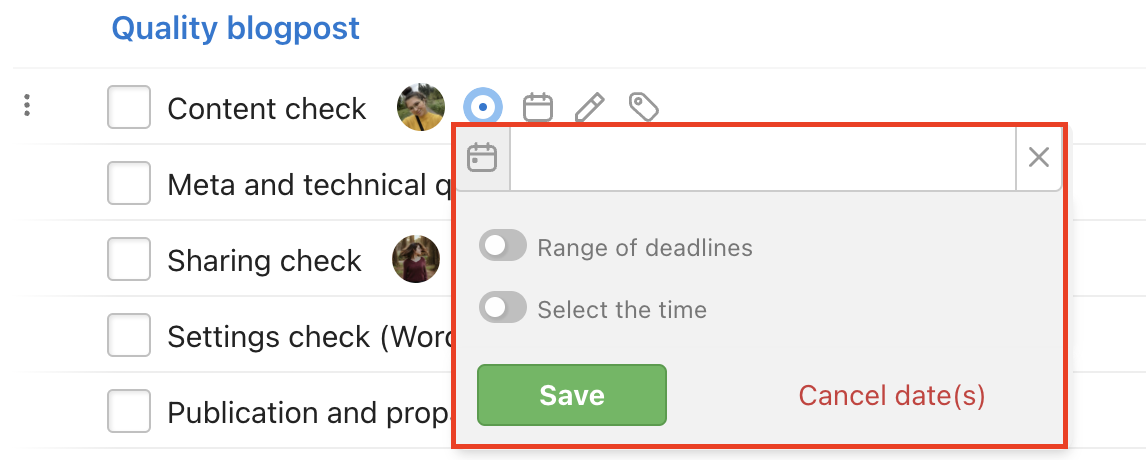
Set up due dates
You can set up floating due dates, for example + 7 days or −7 days from the date you choose when creating a new project from a template. In the template, you preset the deadline for a task or subtask.
Add a due date just as in a normal task. Click to the calendar icon and add a due date. Or use the keyboard to shortcut the cursor on the task + T.

What is carried over from the template to a new project?
- The structure of To-Do lists, tasks, and subtasks
- Task descriptions
- Sub/task assignment to other users (assignee must be invited to the template and the new project)
- Pre-set floating due date based on the date you chose when creating a new project from the template
- User’s hourly rate
- Admin role
- Relations between sub/tasks
- Custom fields
The text form of the template
You can have every template ready in a text form.
Creating multiple To-Do lists
Go to a particular project and click the arrow icon next to the red title Tasks > Add more items…
In the following form add the To-Do list, tasks, and subtasks in the precise form:
= To-Do list name
Task name
– Subtask name
–– Checklist item name
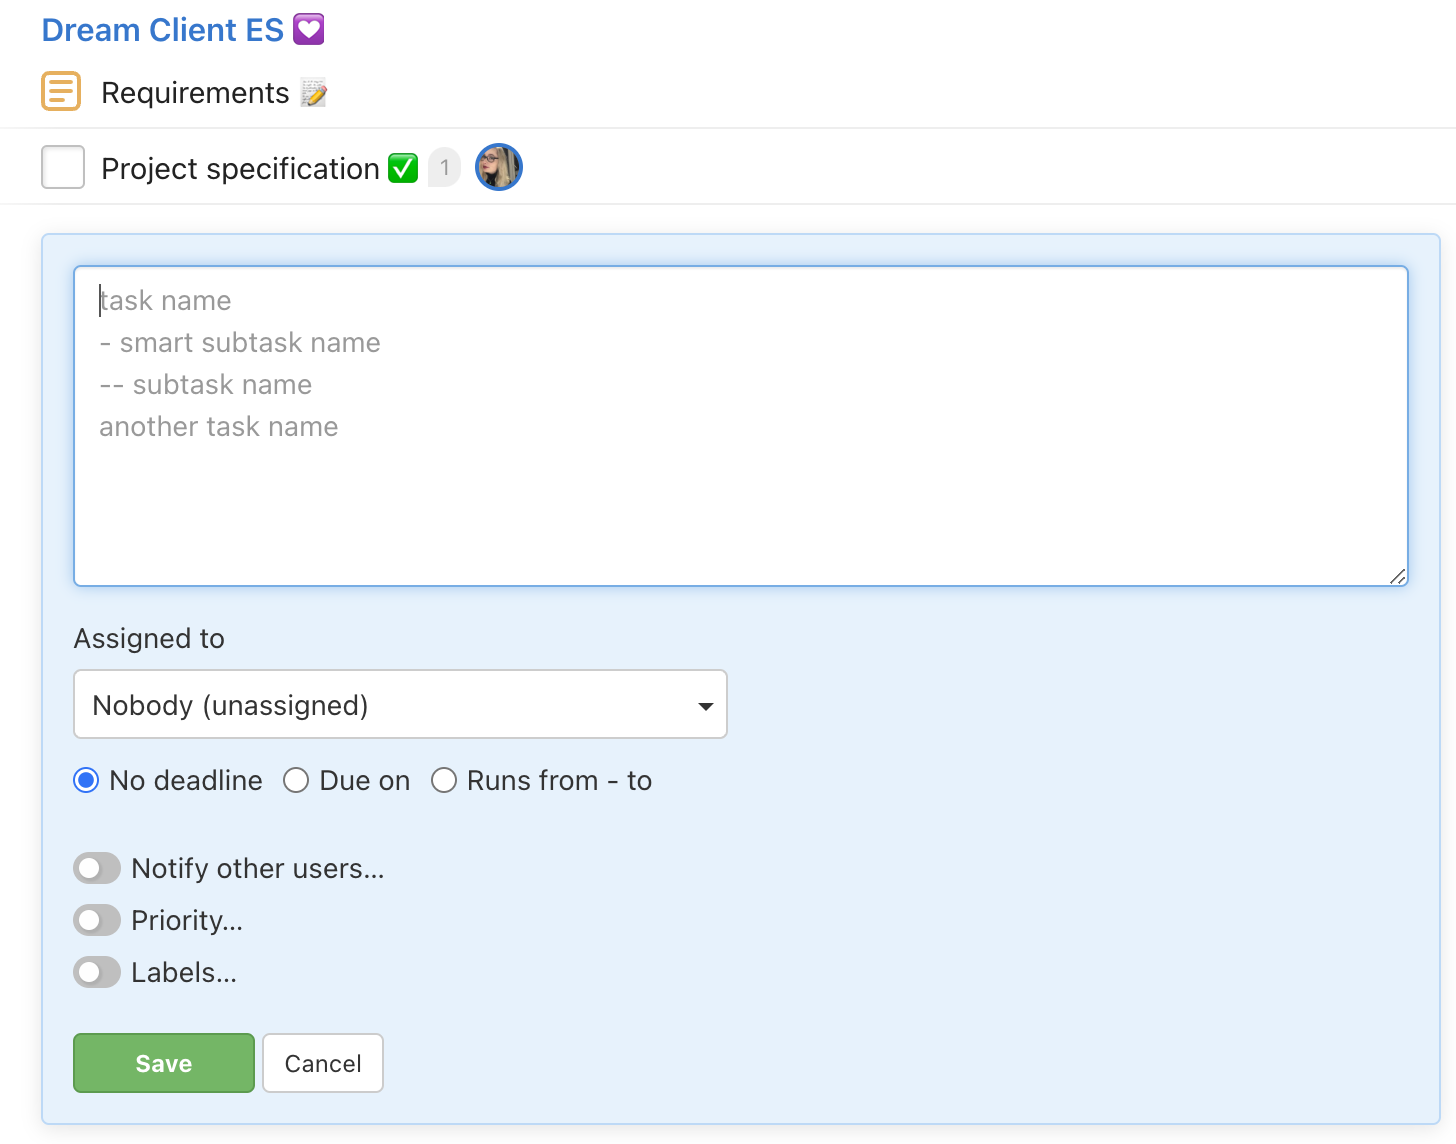
Multiple task creation
Click the arrow next to Add task > Add multiple tasks…

In the following window add the tasks and subtasks. Enter a list of task names without any marks. Enter one task per each line. In case you want to add a subtask, use a dash in front of the name of the subtask and use a double dash for the subtask in front of its name.
You can also assign all of them to a user via Assigned to or add a due date. Confirm via Save.
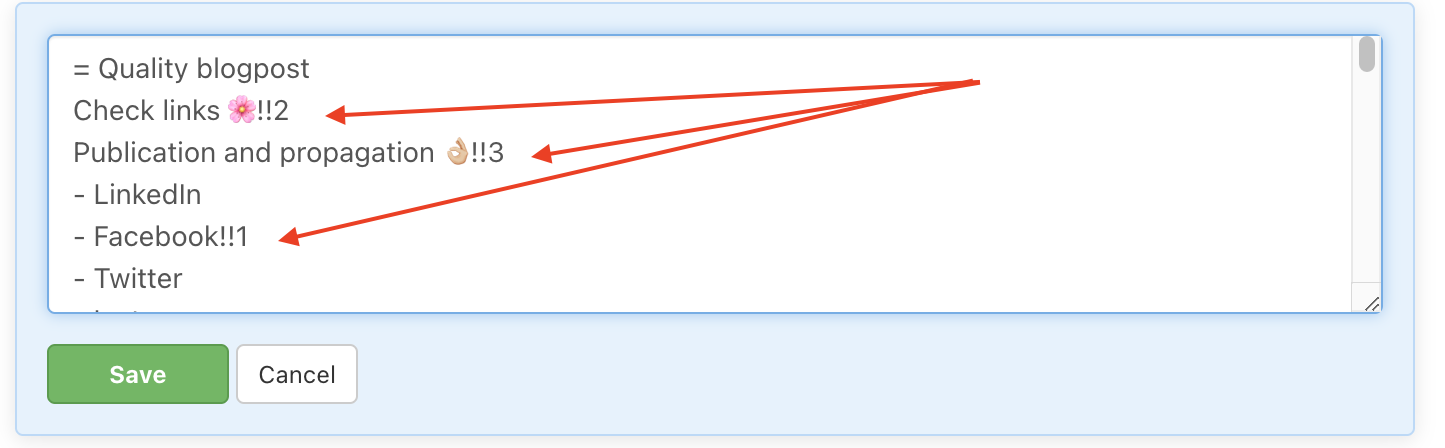
Setting the priority, assignees, due date and comments
If you want to set up the priority just add !!number 1 to 3 behind the sub/task name. Number 1 means low priority, number 2 stands for medium priority and number 3 is a high priority for the task.
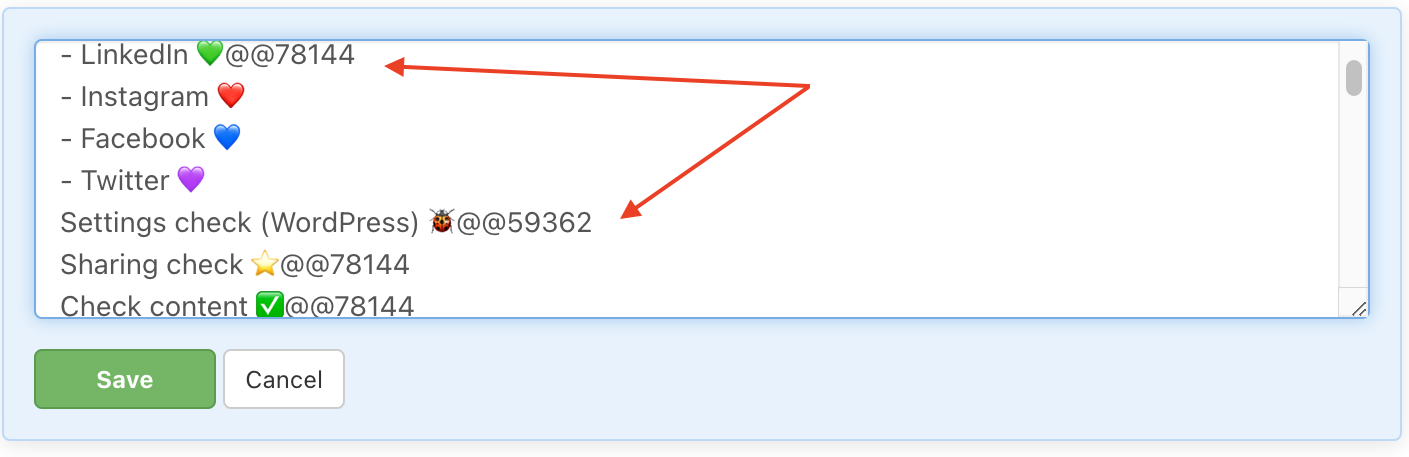
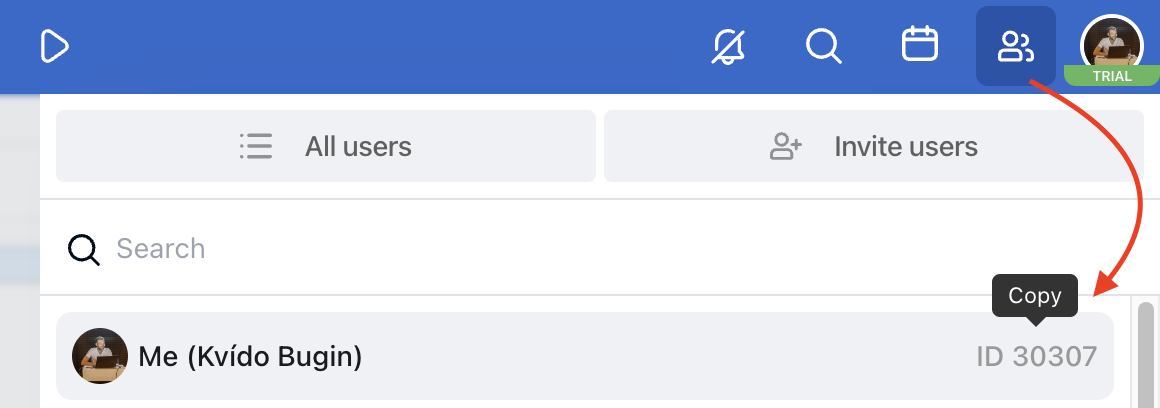
To assign the task to a user, add @@the user ID behind the sub/task name.
For adding the due date just put //due date (the number of days from today for which the due date should be set OR simply add the date, which can also contain the exact time).
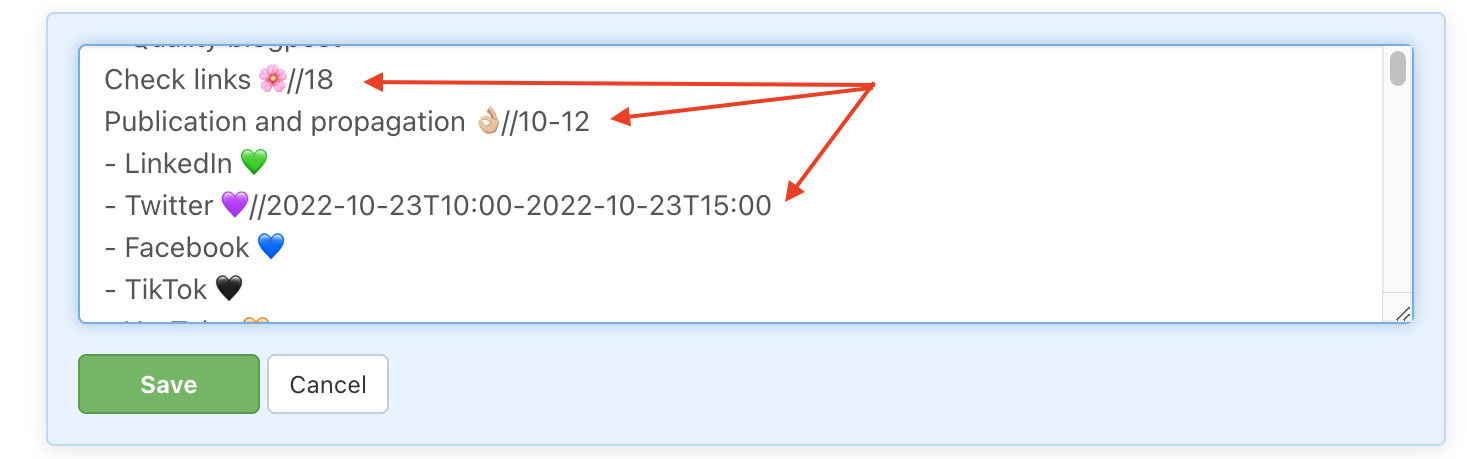
You can find more information about setting the due date via text here.
In case you need to add a task description to your sub/tasks ready in the text template, add::text of a task description behind the sub/task name.
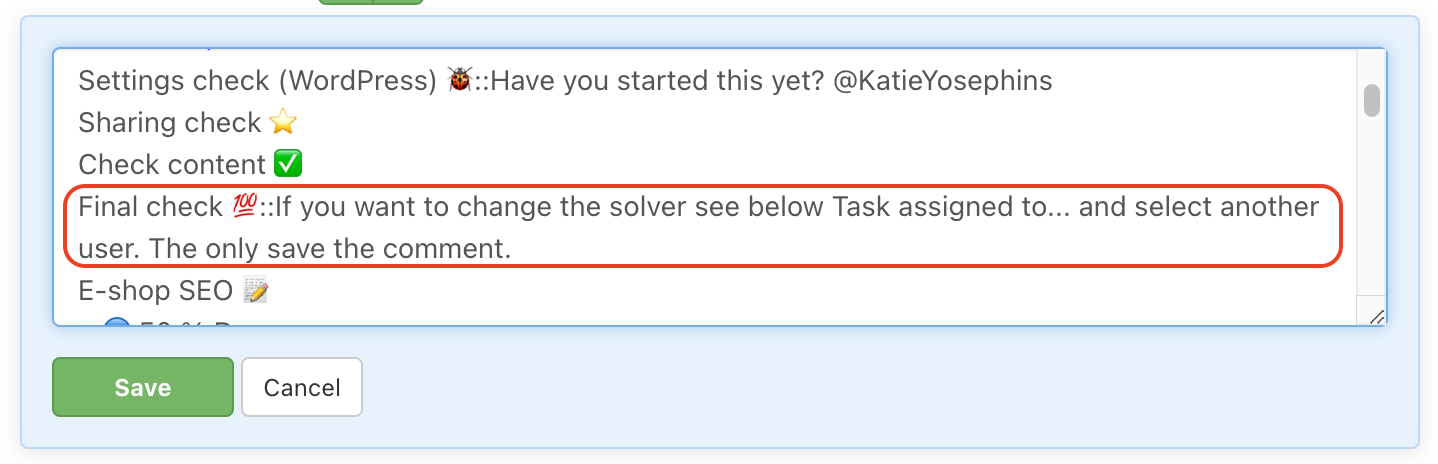
You can even use HTML to prepare templates for task descriptions.
Template transfer
The template transfer works the same way as the project transfer. It might come in handy when Project managers accidentally create templates under their accounts or when you have a new team captain.
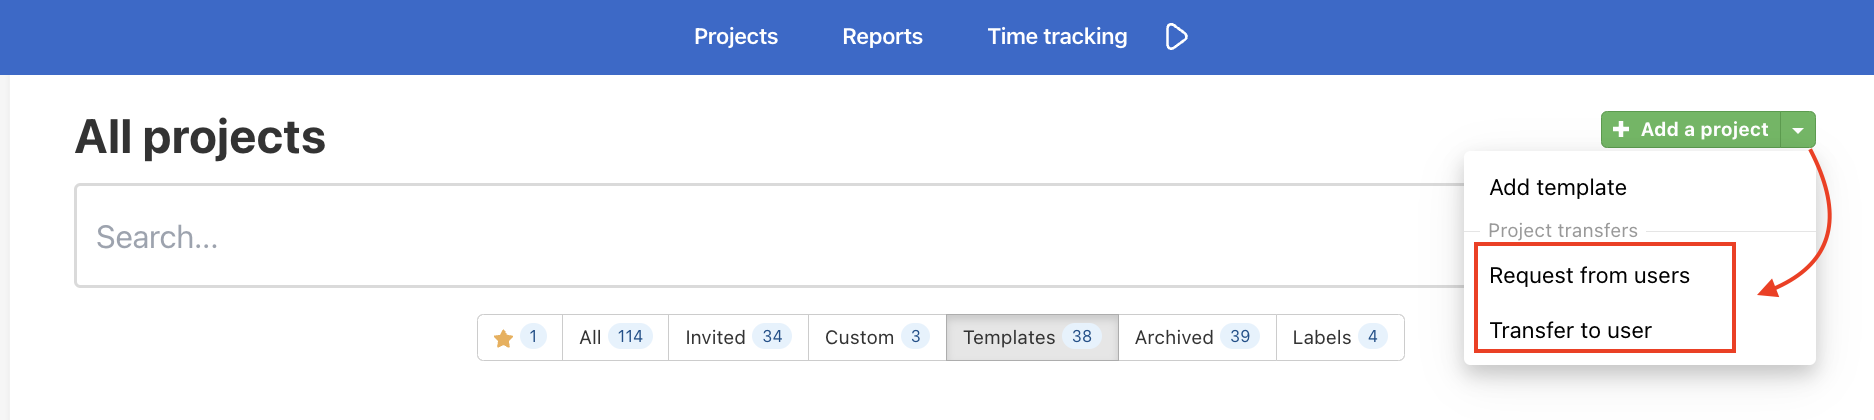
Go to section Projects via the top blue bar > All projects > go to the Add Project button and open the menu under the arrow > Request from users/Transfer to user.
You can transfer your own templates to another user – ideally the captain with the paid account plan – via Transfer to user. Another way is to request template transfer from the current owner to you (only if you are invited to the template) – Request from users.
Template transfer to another user
In case you want to transfer your own template to someone else, you have to click checkboxes next to the template name. Below select the new template owner > Who do you want to transfer your projects to? and confirm via Transfer selected projects.
Request a template from a user
You can request a template transfer only if you are invited to the template. Via checkboxes, select the templates that you want to own. Confirm via Request project transfer.