You can attach files and documents to tasks when adding a new comment or you can upload a file to a project as such (without the need of adding it to a particular task) using the section Files. Comments and projects can contain any type of a file – picture, document, PDF, MP3m MP4, .doc, .xml etc.
Uploaded files and documents in the discussions can be seen straight away with a preview. Audio and video can be played directly in Freelo so there is no need to download it.
Examples of using files:
- Company’s WIKI or knowledge base – sort files, notes, links and documents with instructions and procedures using folders. All the know-how will be easily accessible for the whole team.
- Do you upload “files to process“ to Freelo? You can upload them to a folder called for example To be processed and after the required changes are made, you can move them to a folder called for example Done, Finished or Processed.
- Create a folder where you gather all the documents that are in some way related to the project.
- When uploading for example graphic designs, you can discuss the changes under each file separately. The file can be replaced with a new version so all the changes are kept and you can revise them again any time in the future.
- When someone sends you a link to a file stored in the cloud, you can add it to a particular project using the file type Link. It will be way easier to search for it next time.

How to upload a new file to Freelo
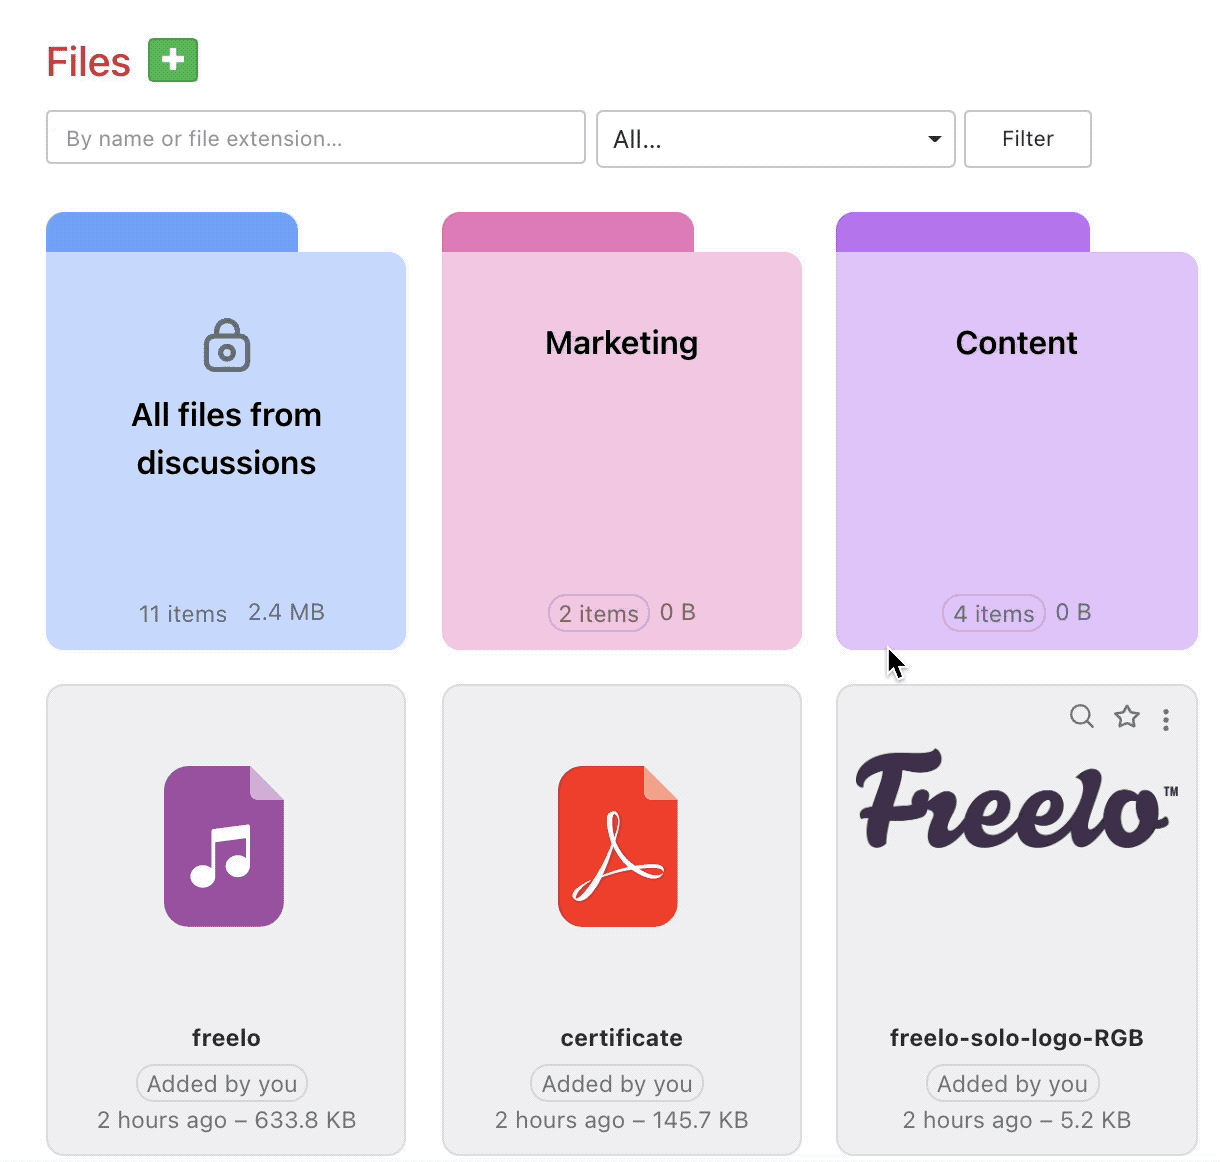
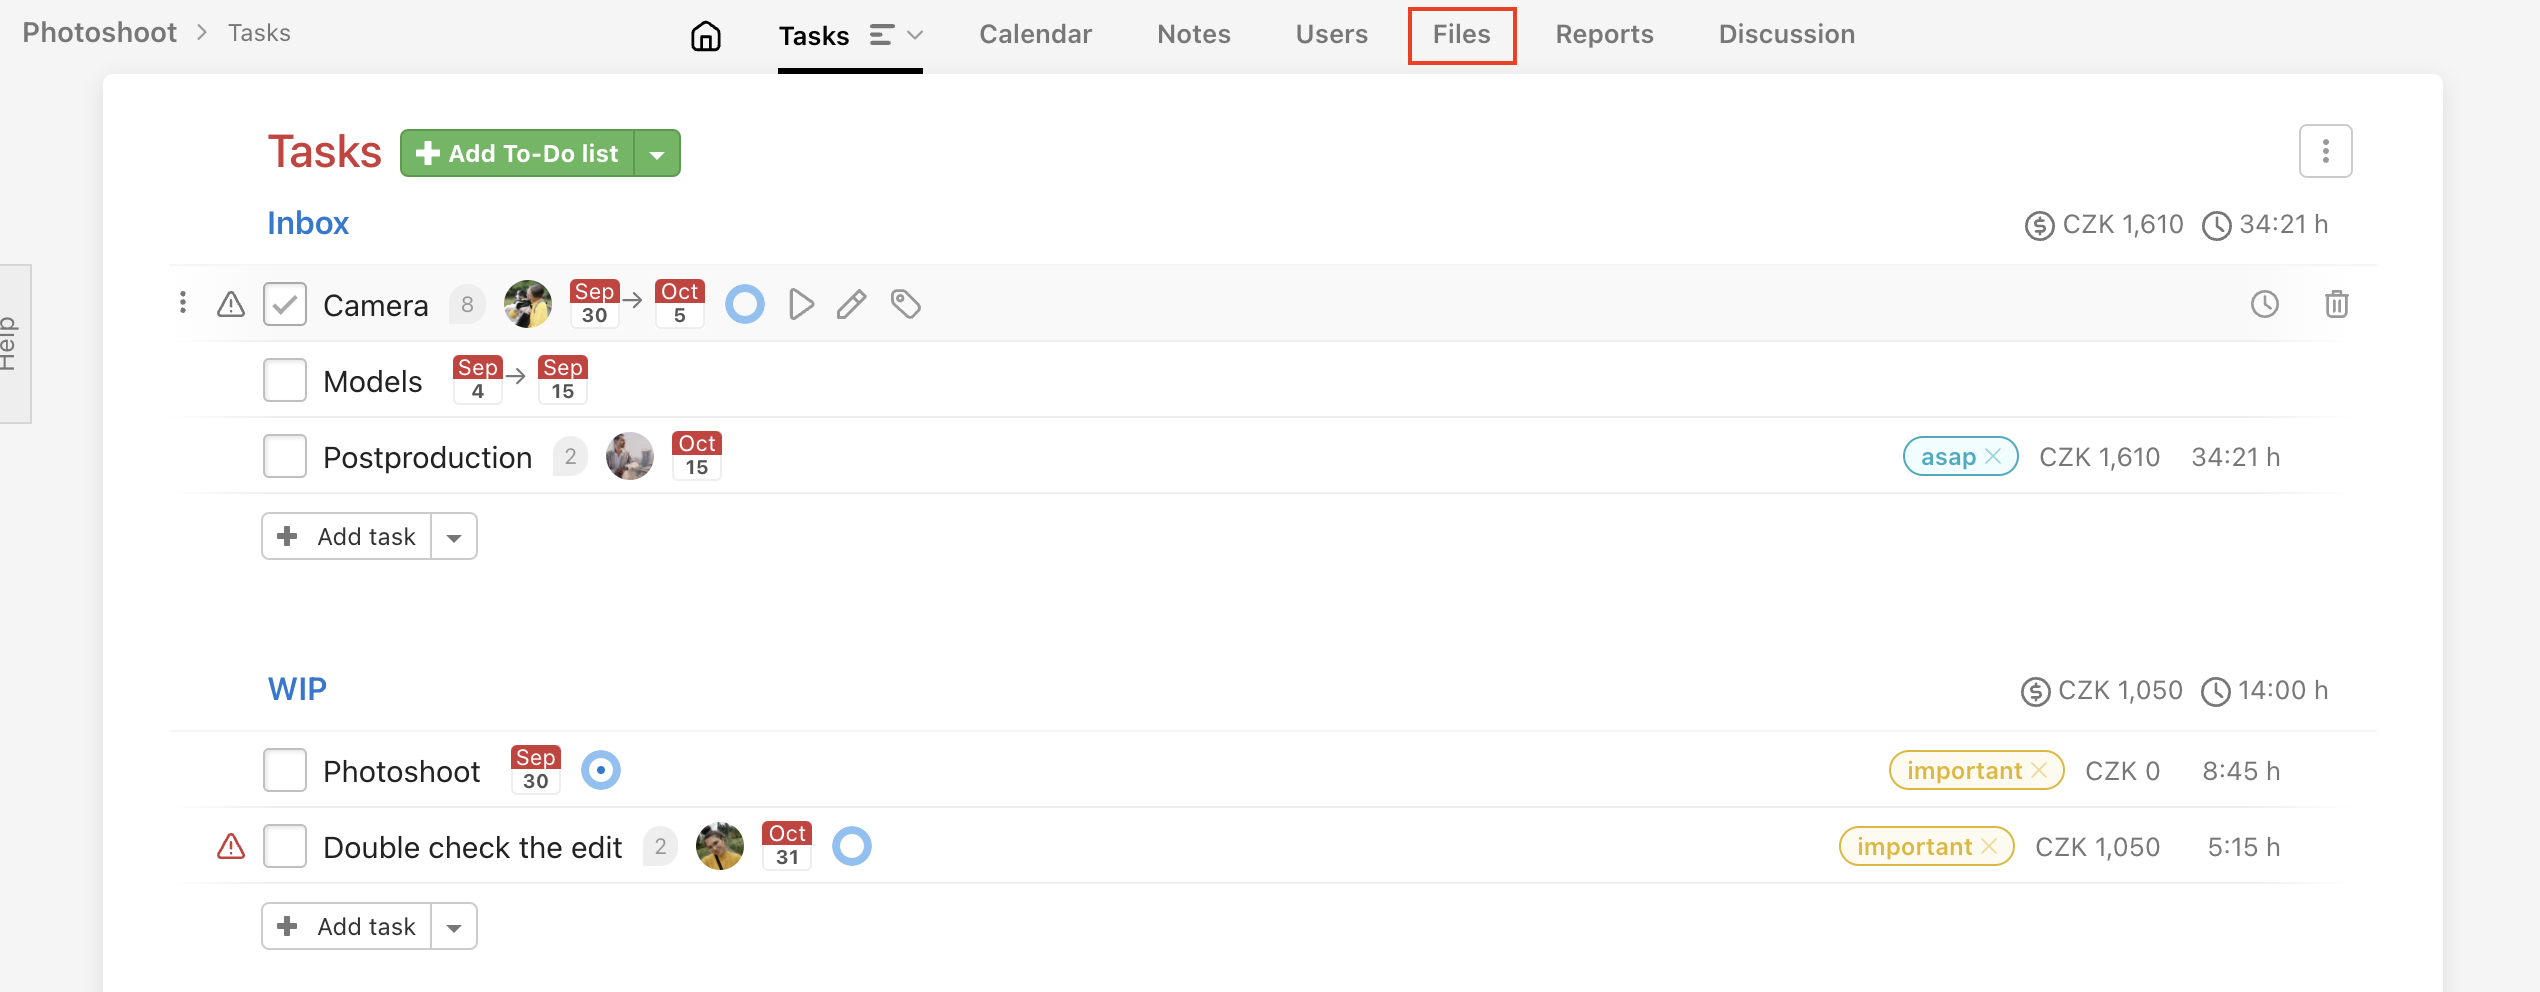
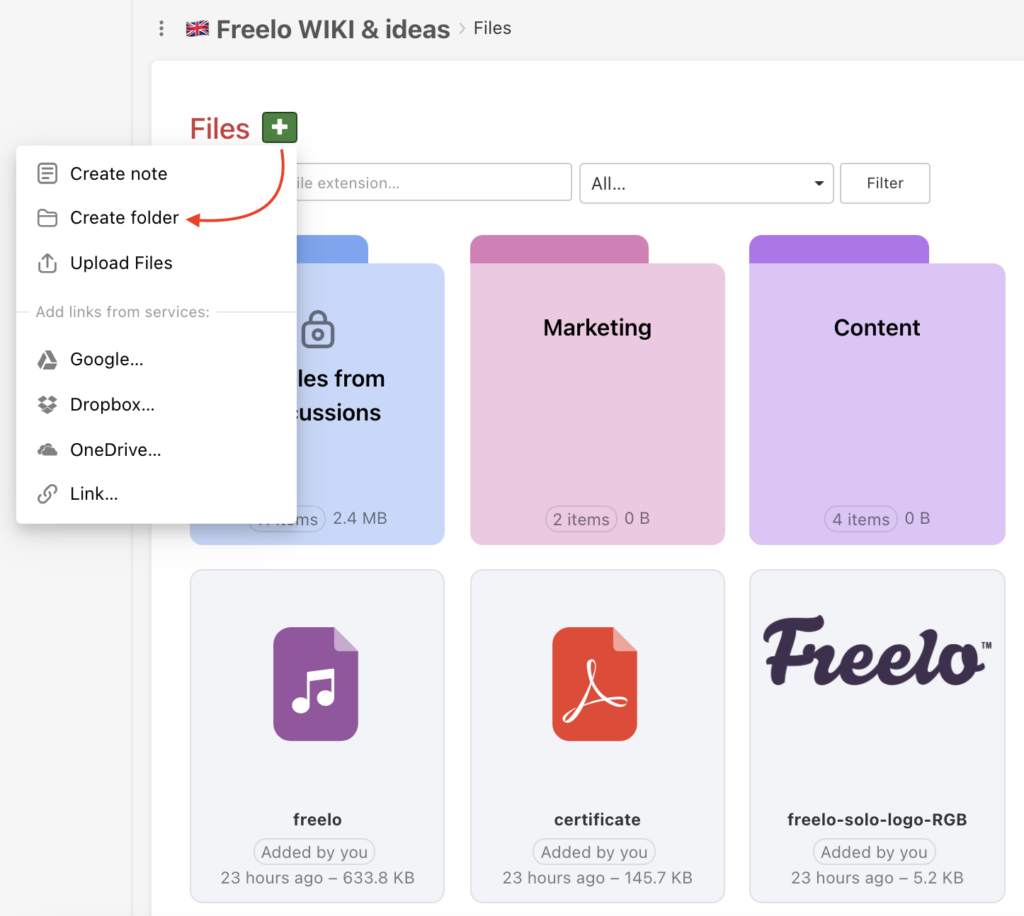
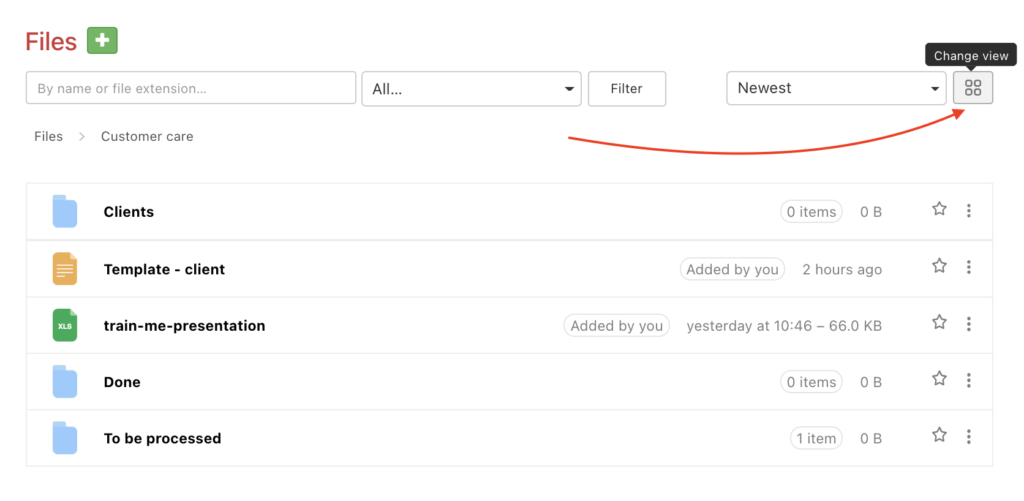
- Add an item to the section Files: In this section, you can sort files in folders – the items are not connected to specific tasks. Each project has its unique section Files. It can be found in project detail within the bar under a project name.
After clicking the green button +, you can choose which item type you wish to upload. - Drag and Drop to the editor window or in Files: Drag any file (or more files) using the mouse cursor and drop them into the comment window. It will be uploaded with your comment (and later to be found in the section Files).
- CTRL (CMD) + V: Copy the picture to the clipboard, then paste it directly into the text editor while writing a comment (also works in section Files). You can also paste content from the clipboard through the context menu of the mouse (right button).
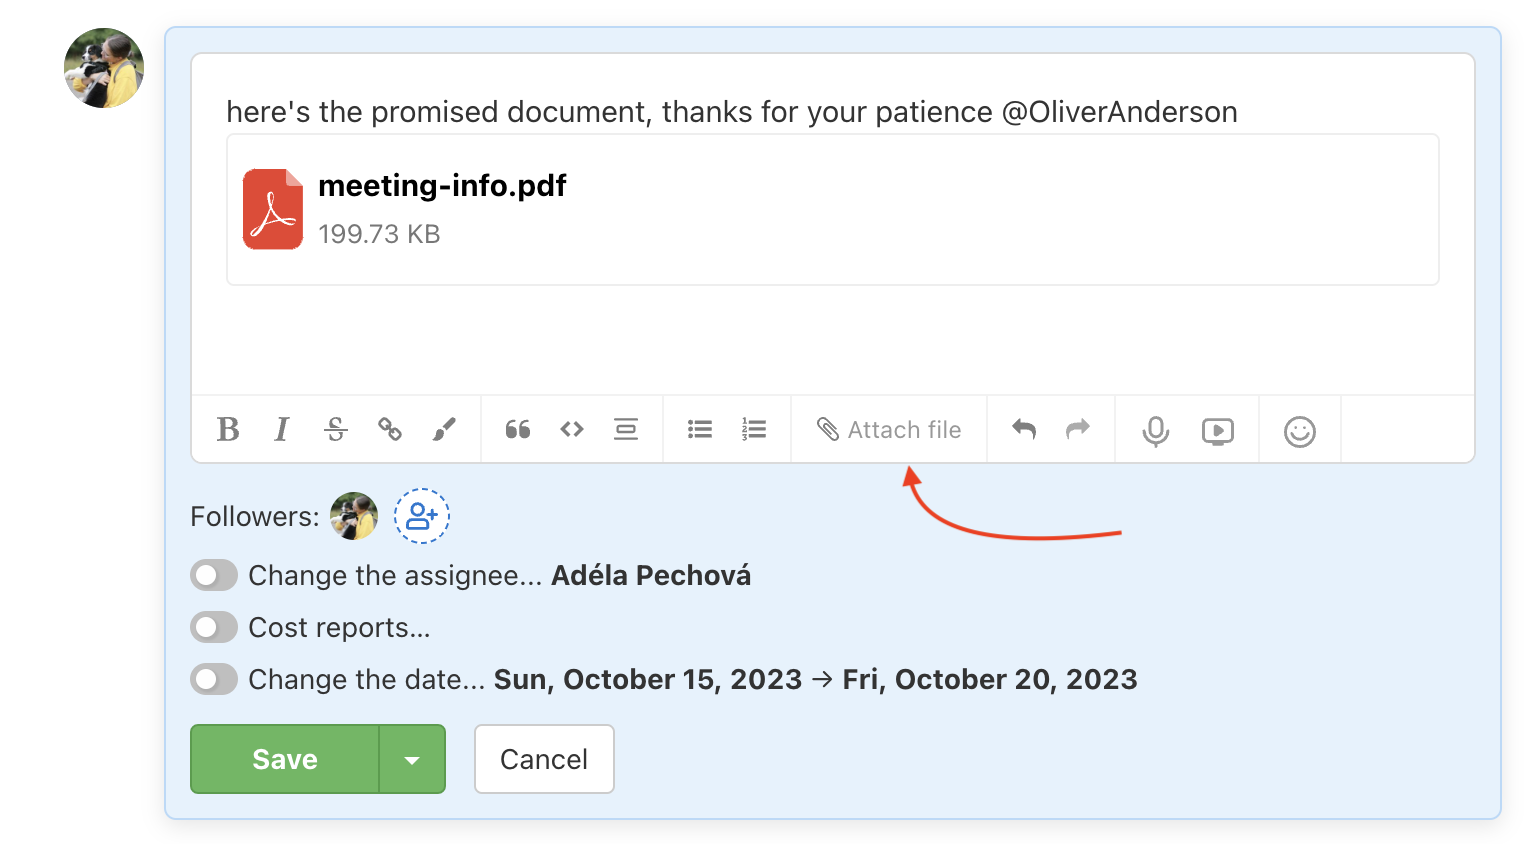
- Via the Attach file button: The button is below the text editor. Click and select one or more files you want to add to the comment.
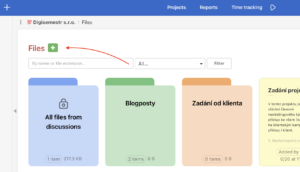
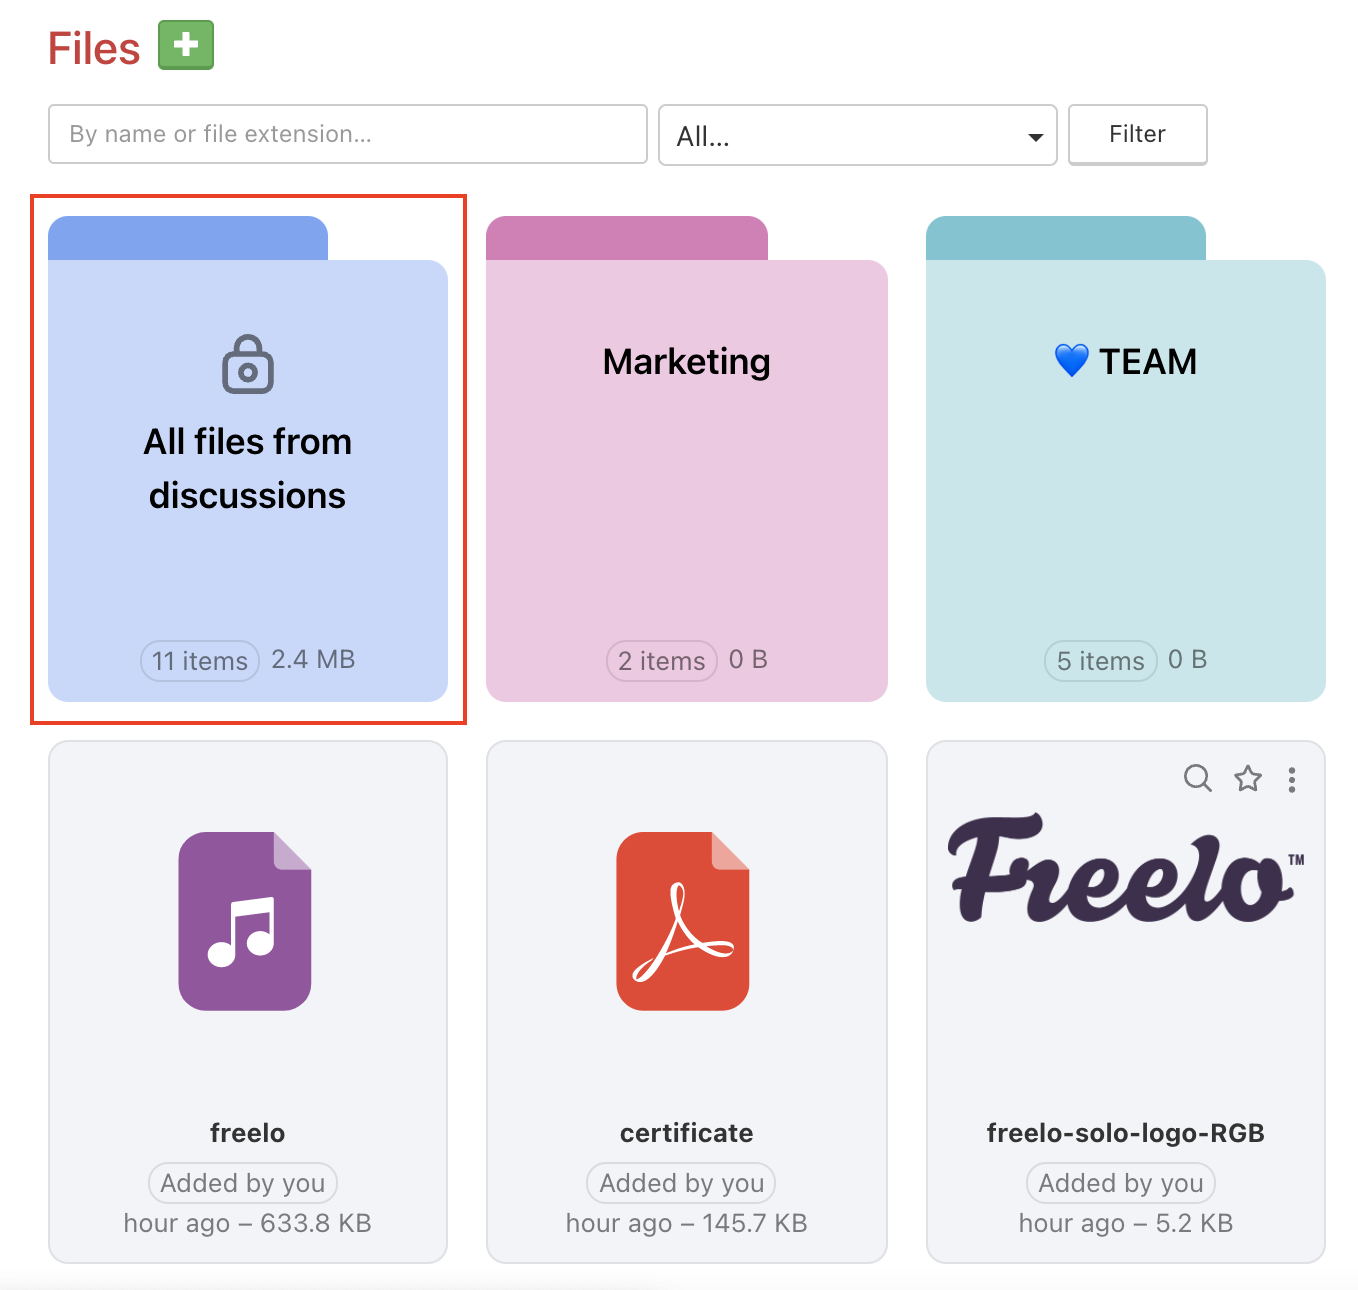
All uploaded files from discussions are in the blue folder All files from discussions. This folder is the first in section Files and cannot be removed, renamed or edited. It helps you search and filter across the files in comments.
Uploading in Files
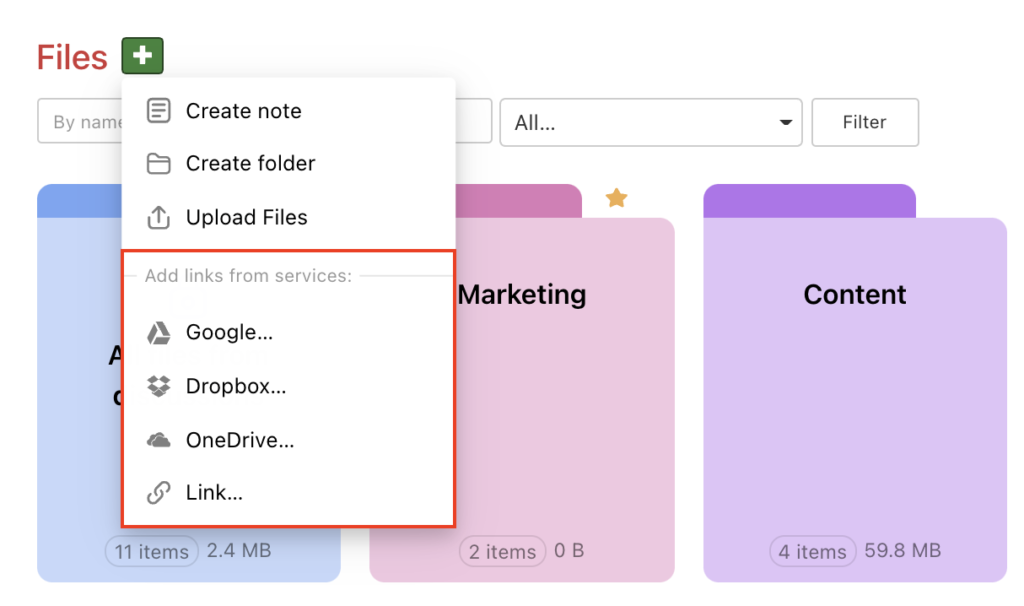
You can upload a new item in the section Files via green button + and then select which item type you want to create/upload. Or just drag the items and drop them into a file.
Add item types:
- New note
- Create a folder
- Upload a file (we support all types)
- Link for third-party service (Google Drive, Dropbox, OneDrive or any other URL)
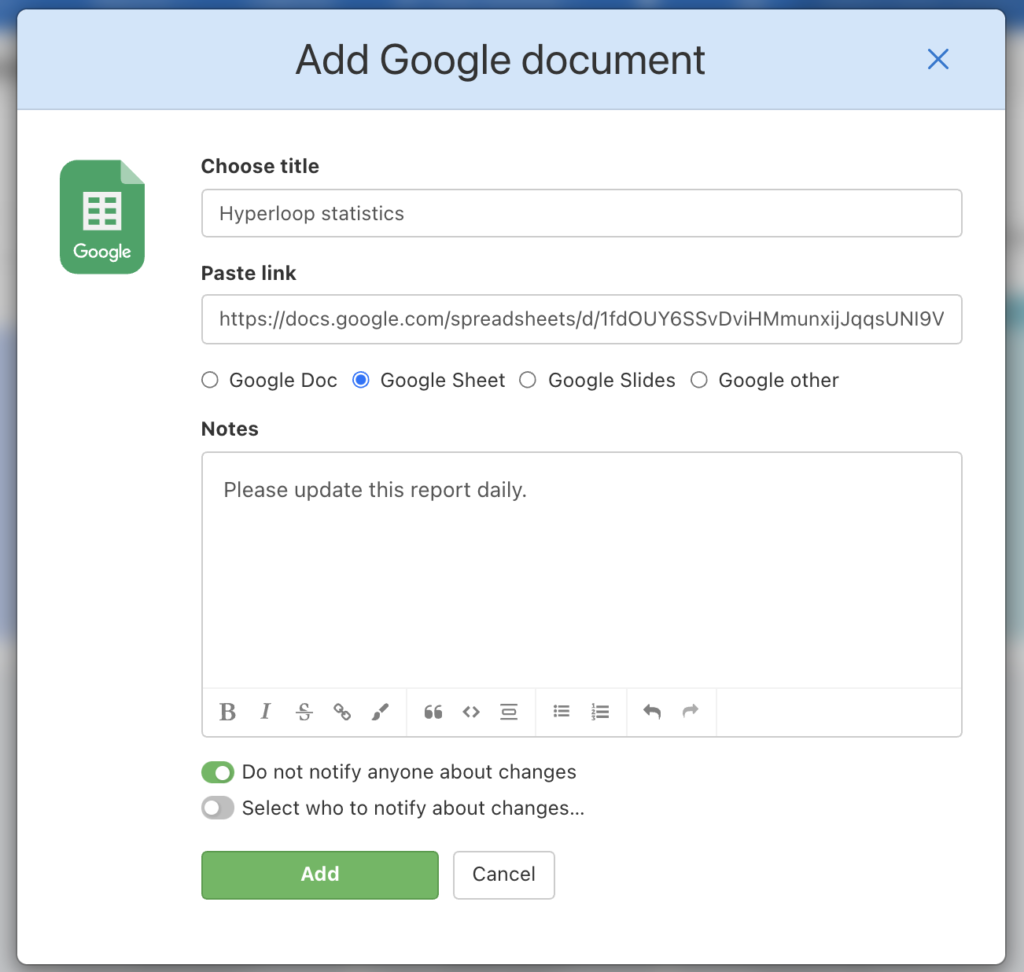
In the uploading form enter the item name, otherwise, that is the same as the file name. You can add some notes and select, if you want to notify other users. Save via green button Add.
Section Files
Every project has section Files in the menu, where you can sort attachments in folders, set them color or order, filter, plunge and work with services such as Google Drive, Dropbox or OneDrive. Items can have multiple versions that you can browse in history.
Handle your documents and notes as in the computer storage. Thanks to that all the project is documentation at one place, without creating tasks.
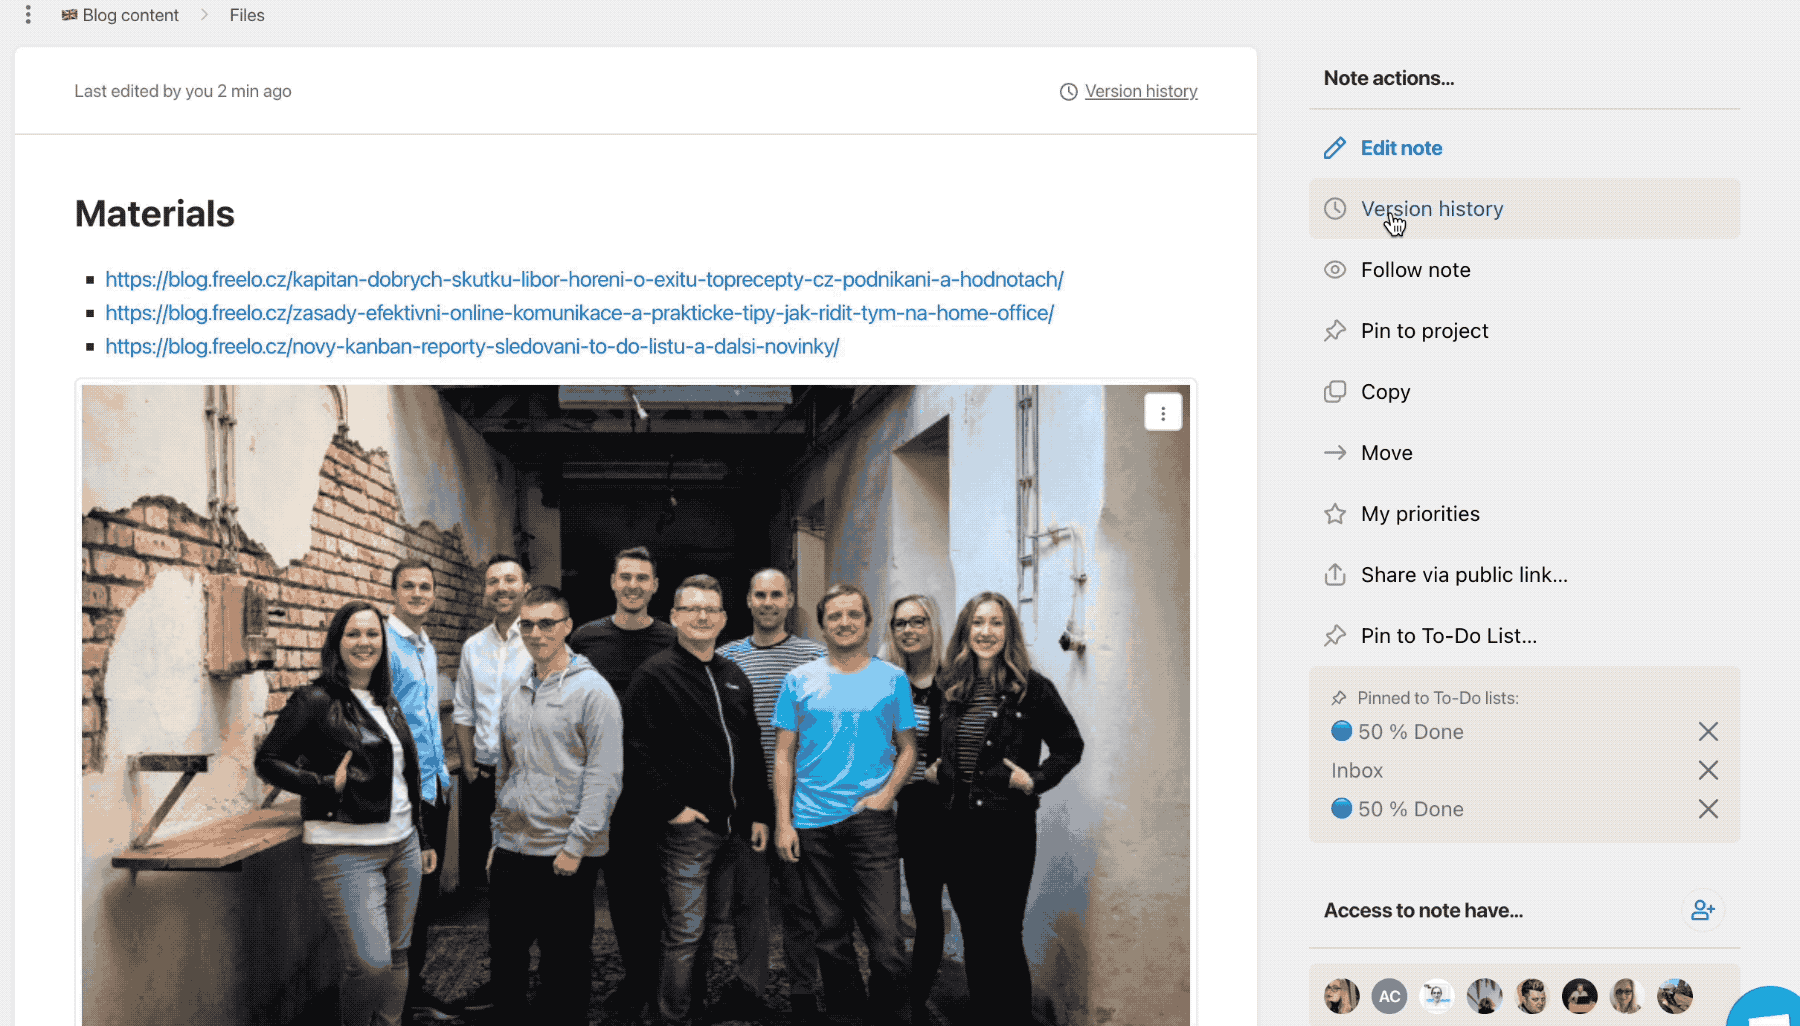
Features within files
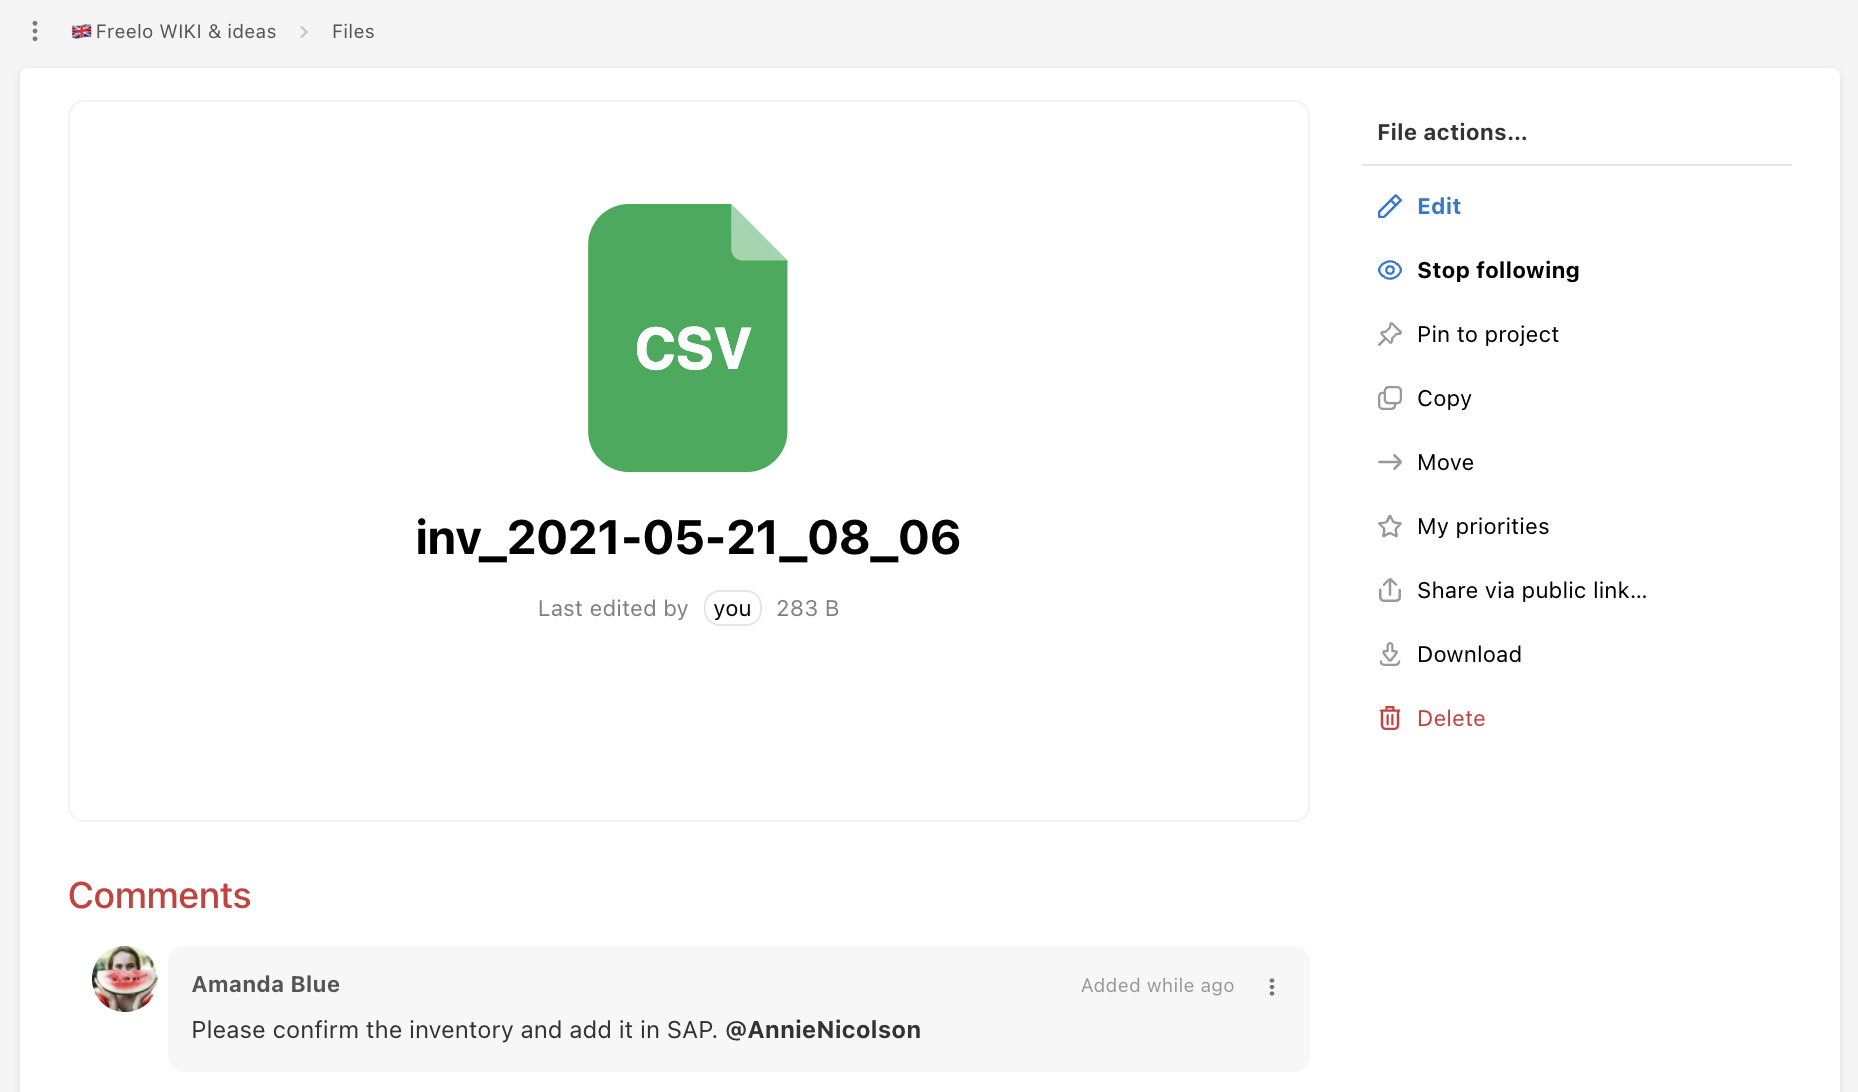
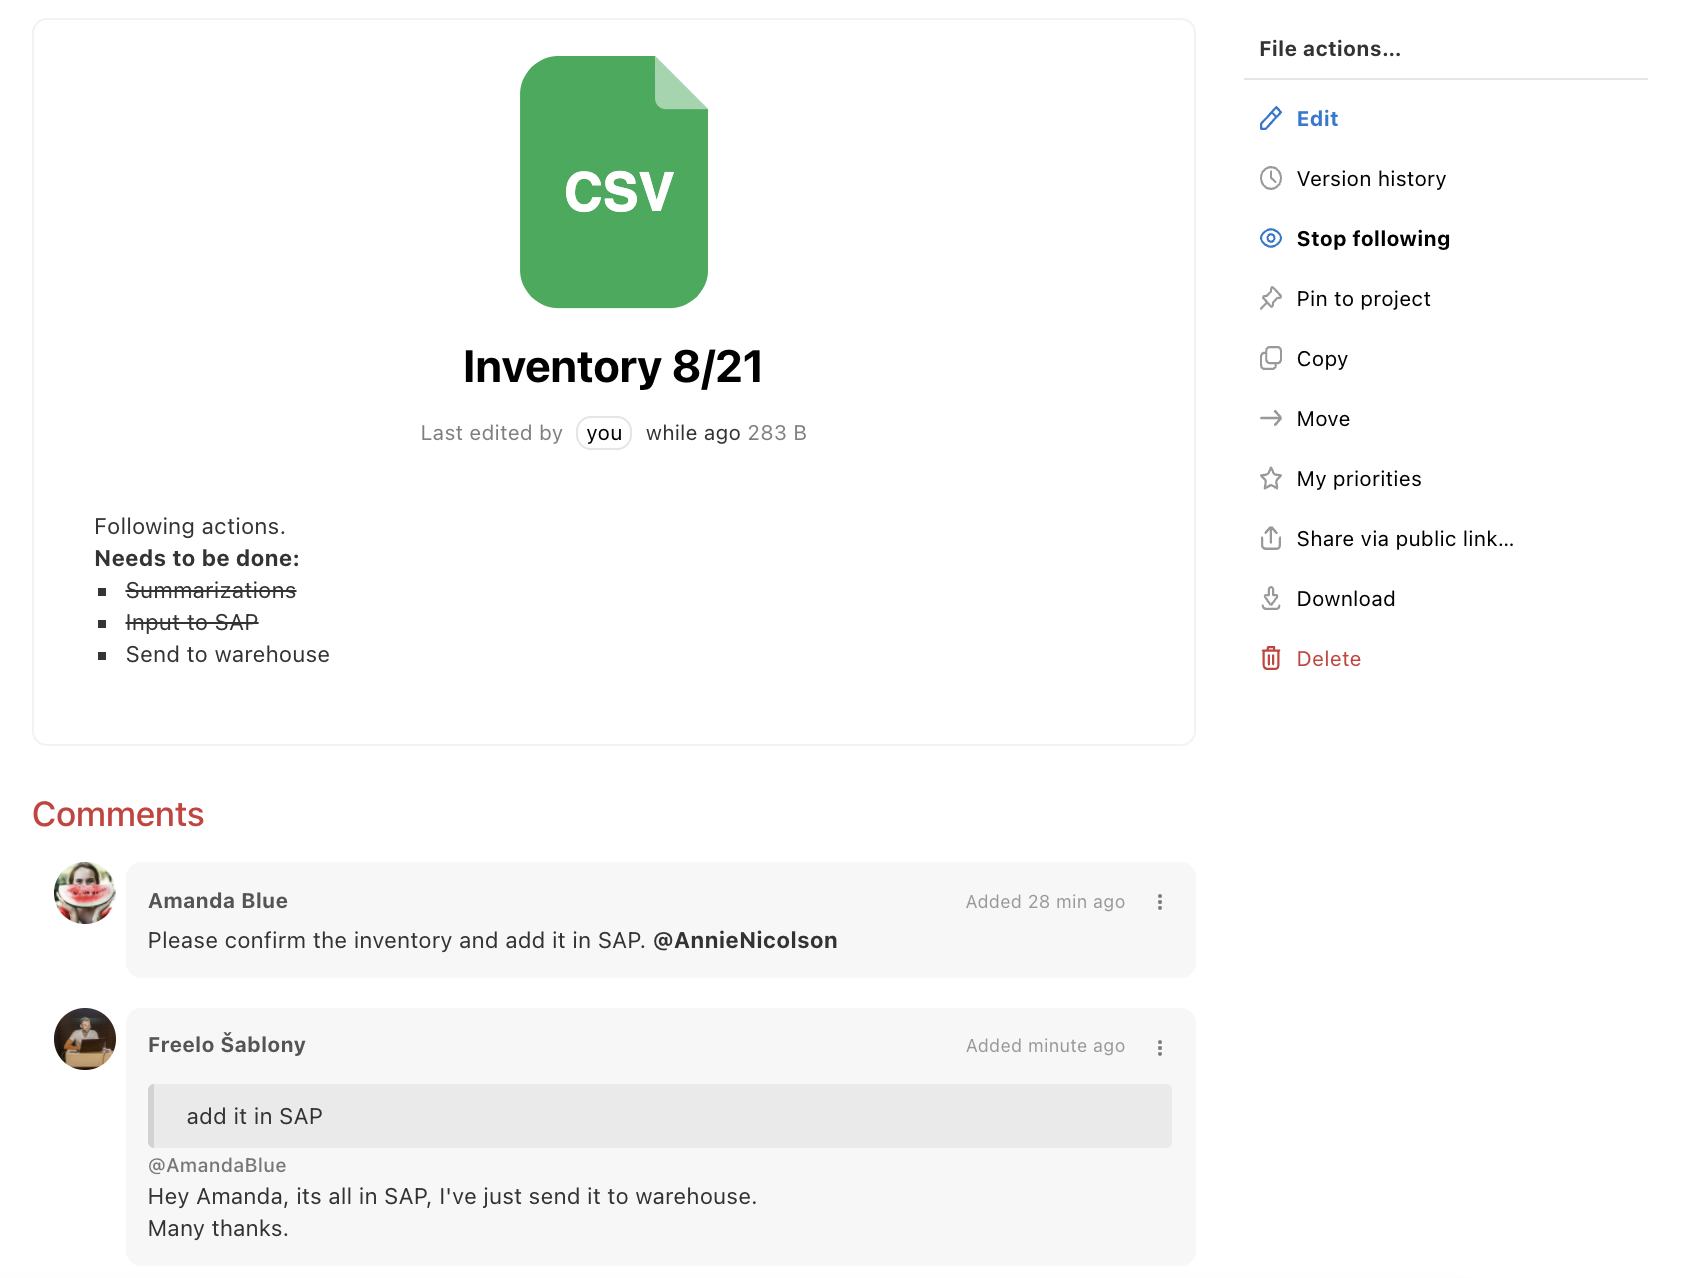
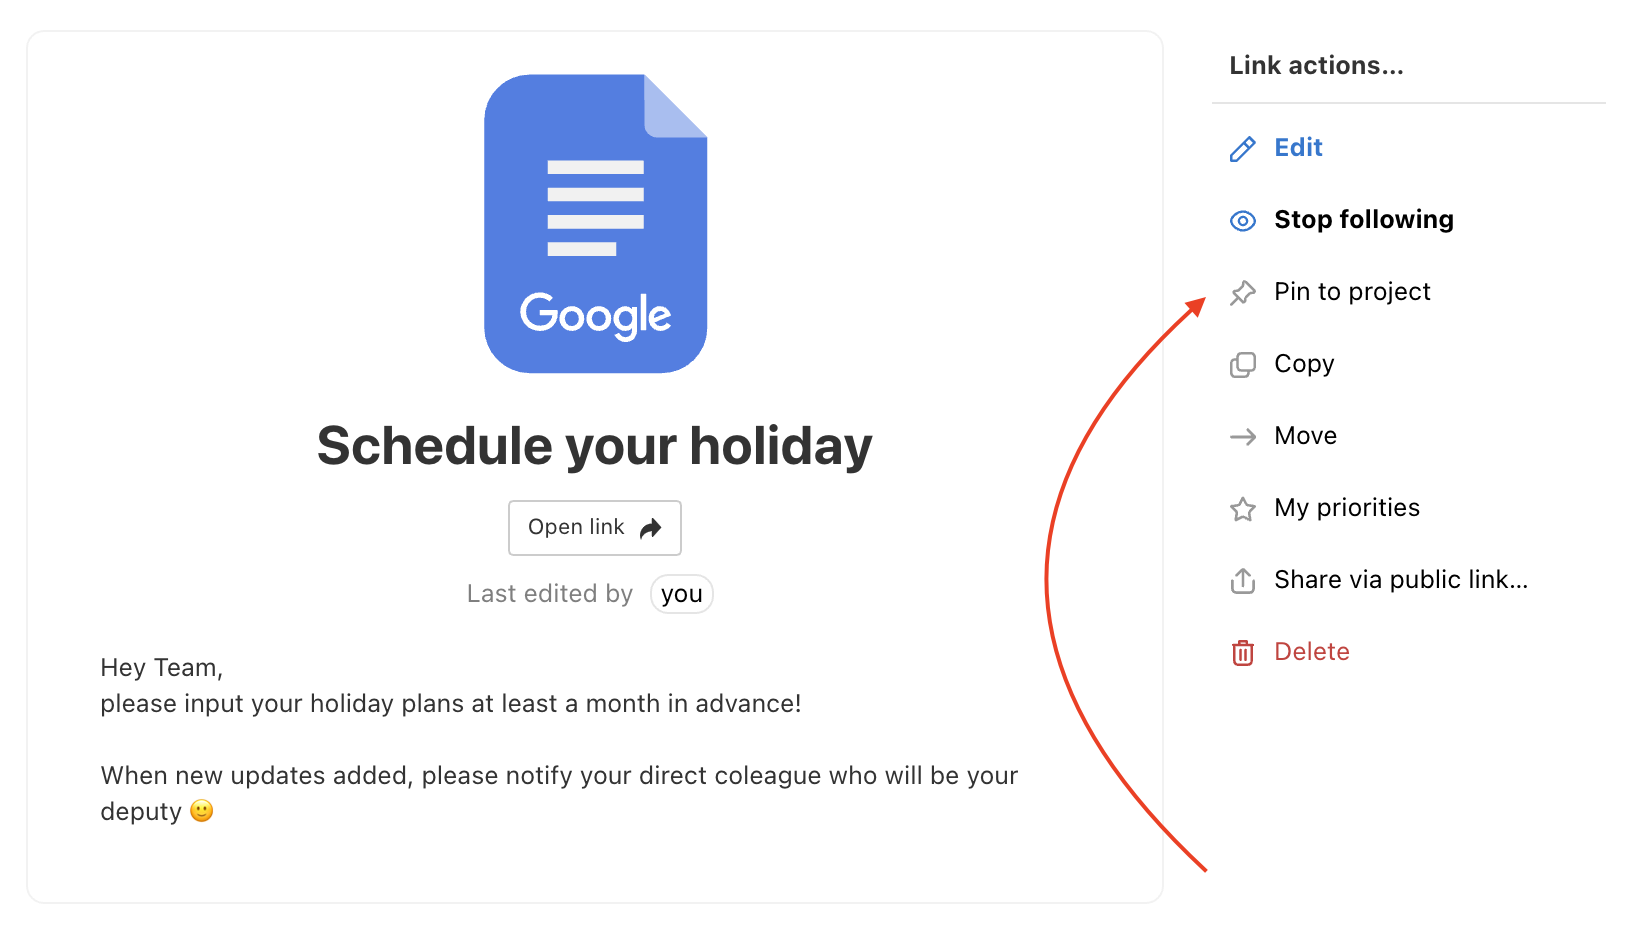
In the detail of each item/file is a menu that offers more actions. On the right is File actions…, Note actions… or Link actions… et.
What can you do with items:
- Comment, discuss, mention colleagues
- Edit – author and other team members
- Browse history of changes
- Follow the item and receive notifications in case of updates
- Pin to a project so no one can miss it
- Copy (create a template and use it over and over)
- Move to another project or folder
- Set your own priority
- Share via public link – useful when someone doesn’t use Freelo
- Download file
- Delete file
Versions and browse history
Via Version history you can browse the history of the uploaded file versions. With every new update the author can decide, whether wants to notify other users about the changes.
Click Version history in the right menu.
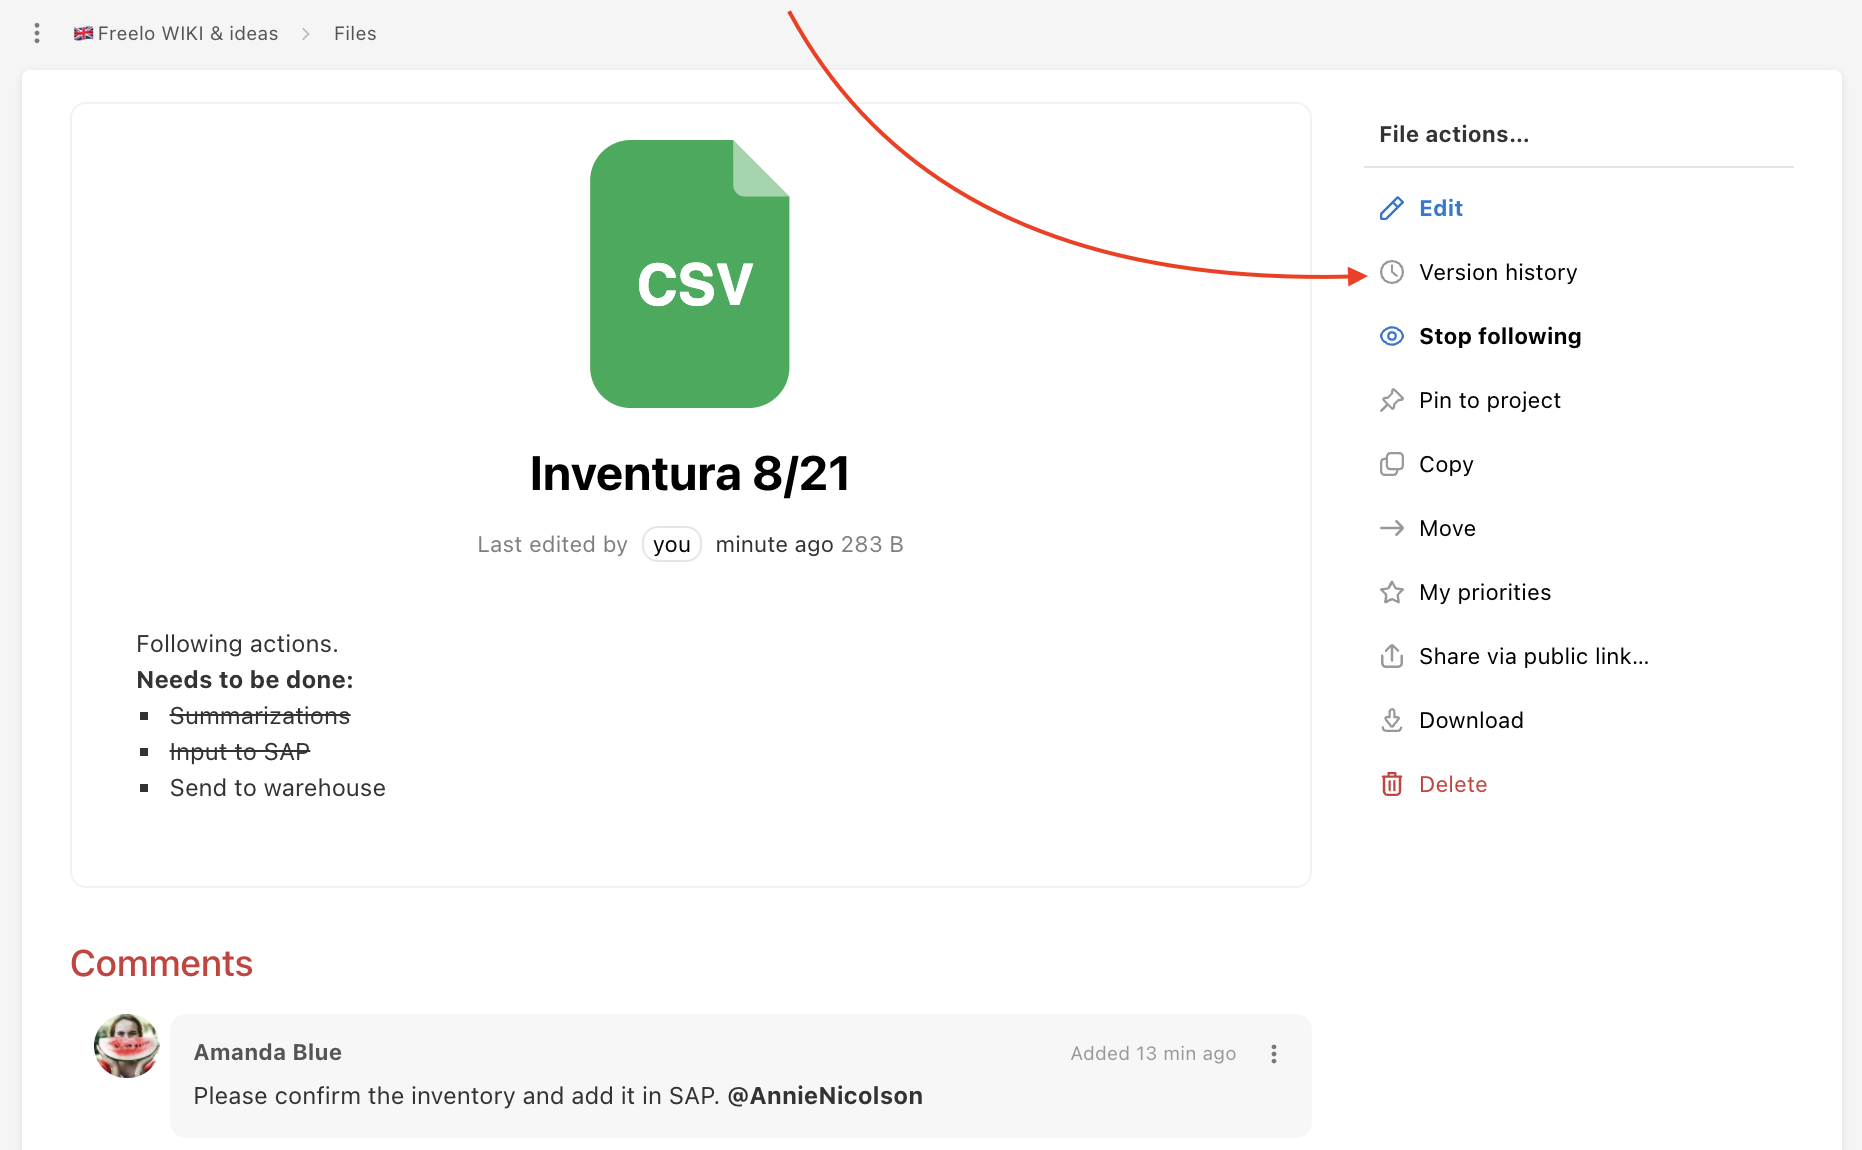
A window appears with all the changes.
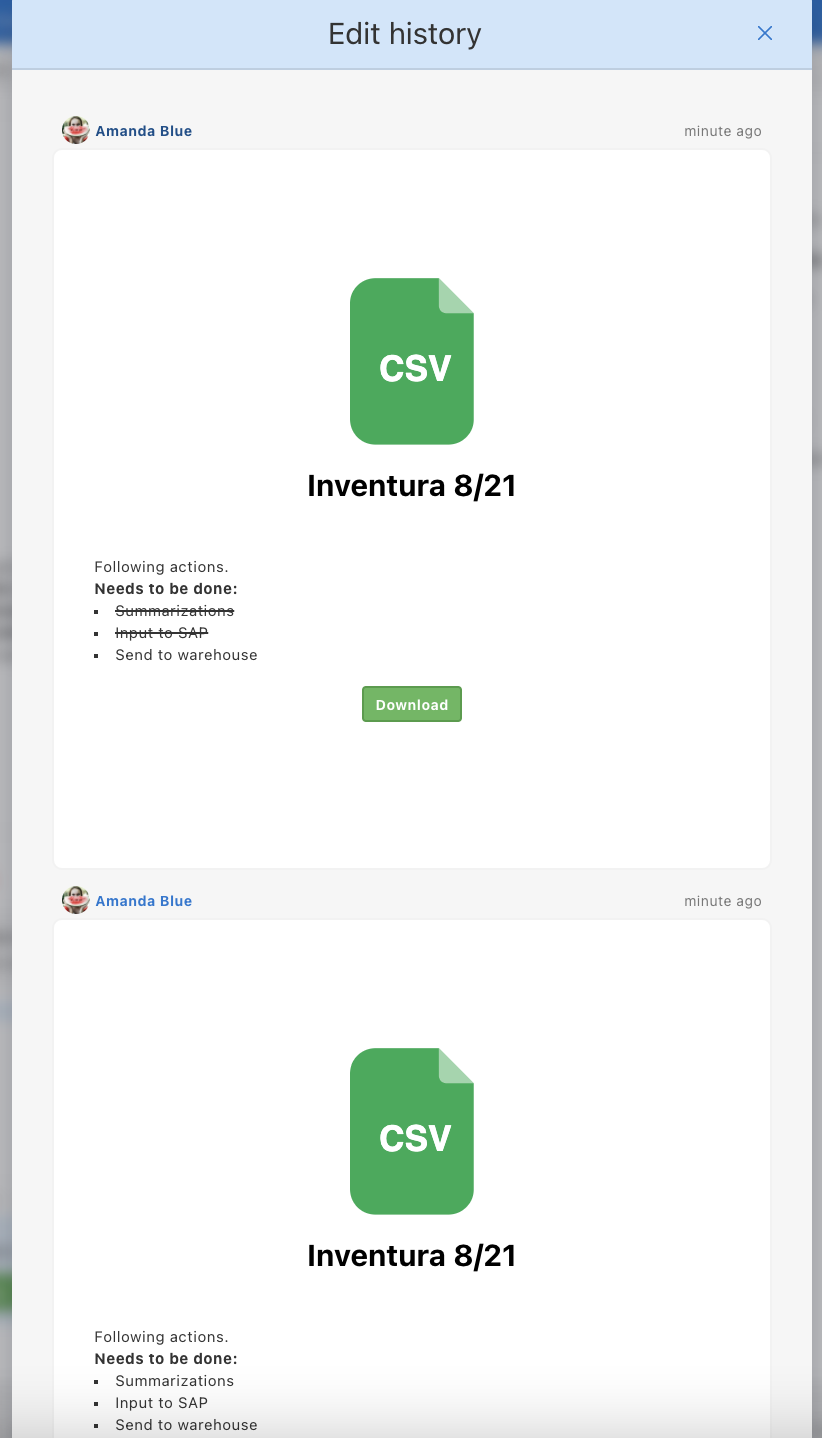
In the history of every note you can also find all the files, which has been attached to it. Even if the files has been deleted, you can download it from the history.
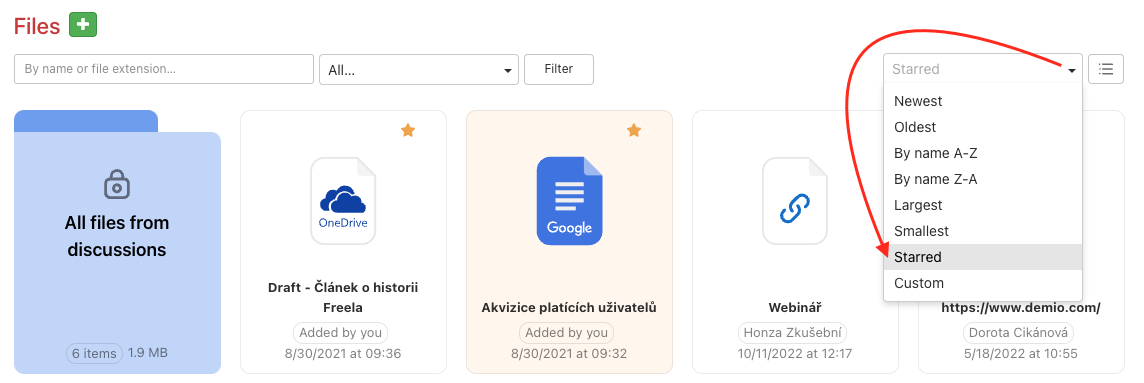
Starred
You can also files with a star, just like notes. After that, you can filter them in the section Files in the right menu and then pick Starred. Afterwards, all starred files will be displayed, sorted according to the set priority.
Discussion in files and notes
Under every file and note you have a space for team discussion, you can format the text as usual, use mentions, send notifications and replies to comments.
How to notify other users
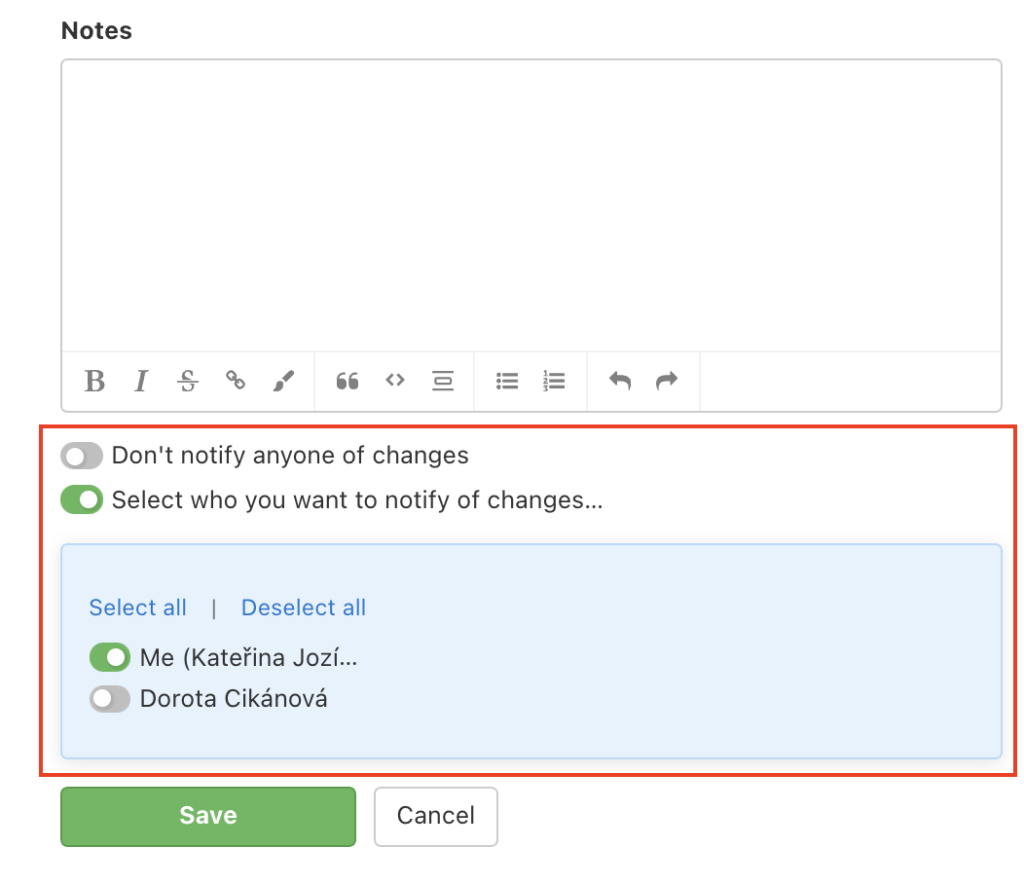
You can choose whether you want to notify other users when editing or adding new items. Click Don’t notify anyone of changes so no one receives a notification about updates. Or click Select who you want to notify of changes where you select users, who will be notified > click the checkbox by their name.
Confirm the changes via Add or Save.
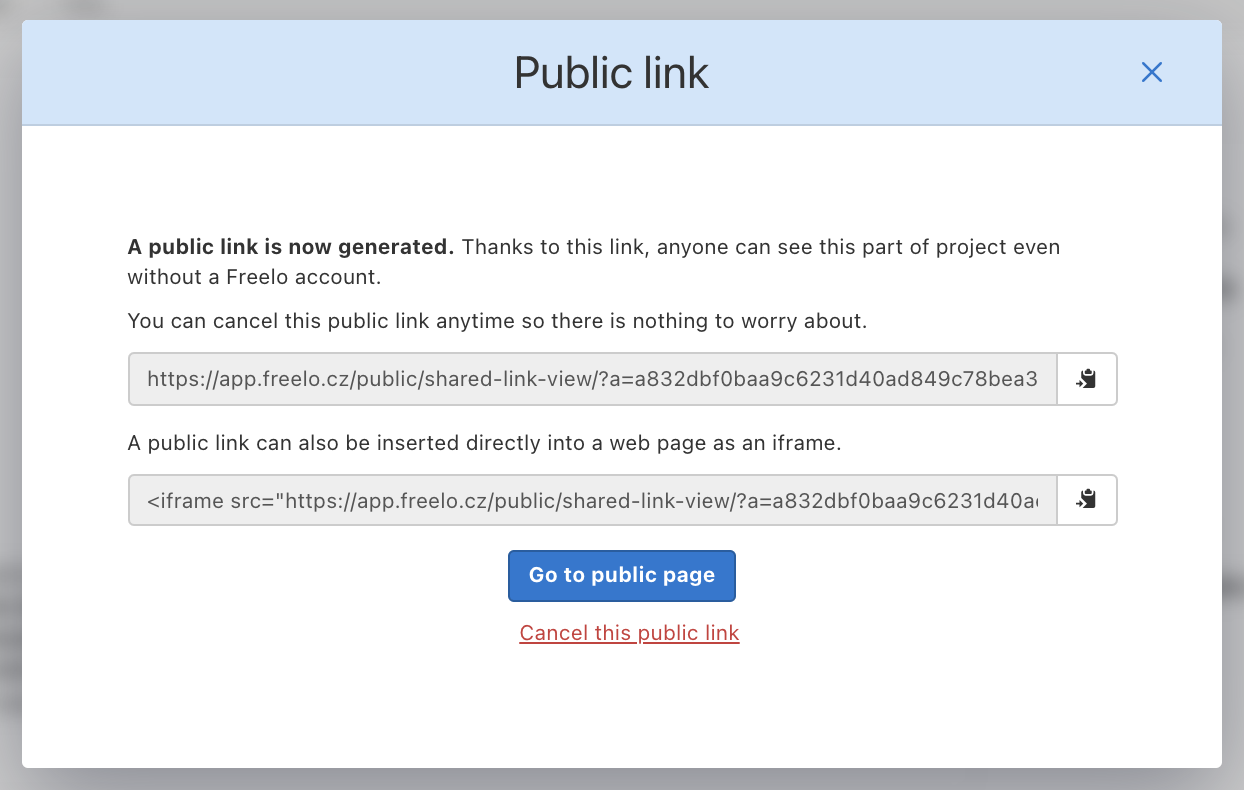
Share outside Freelo via public link
This feature is useful when you have colleagues (from another department) or clients who don’t use Freelo. The link is always updated so you can share discussions with notes to a particular file. There is no need to download an item.
In the right menu click Share via public link… > Generate public link > Go to public page. Copy the link and share it with anyone you need outside Freelo.

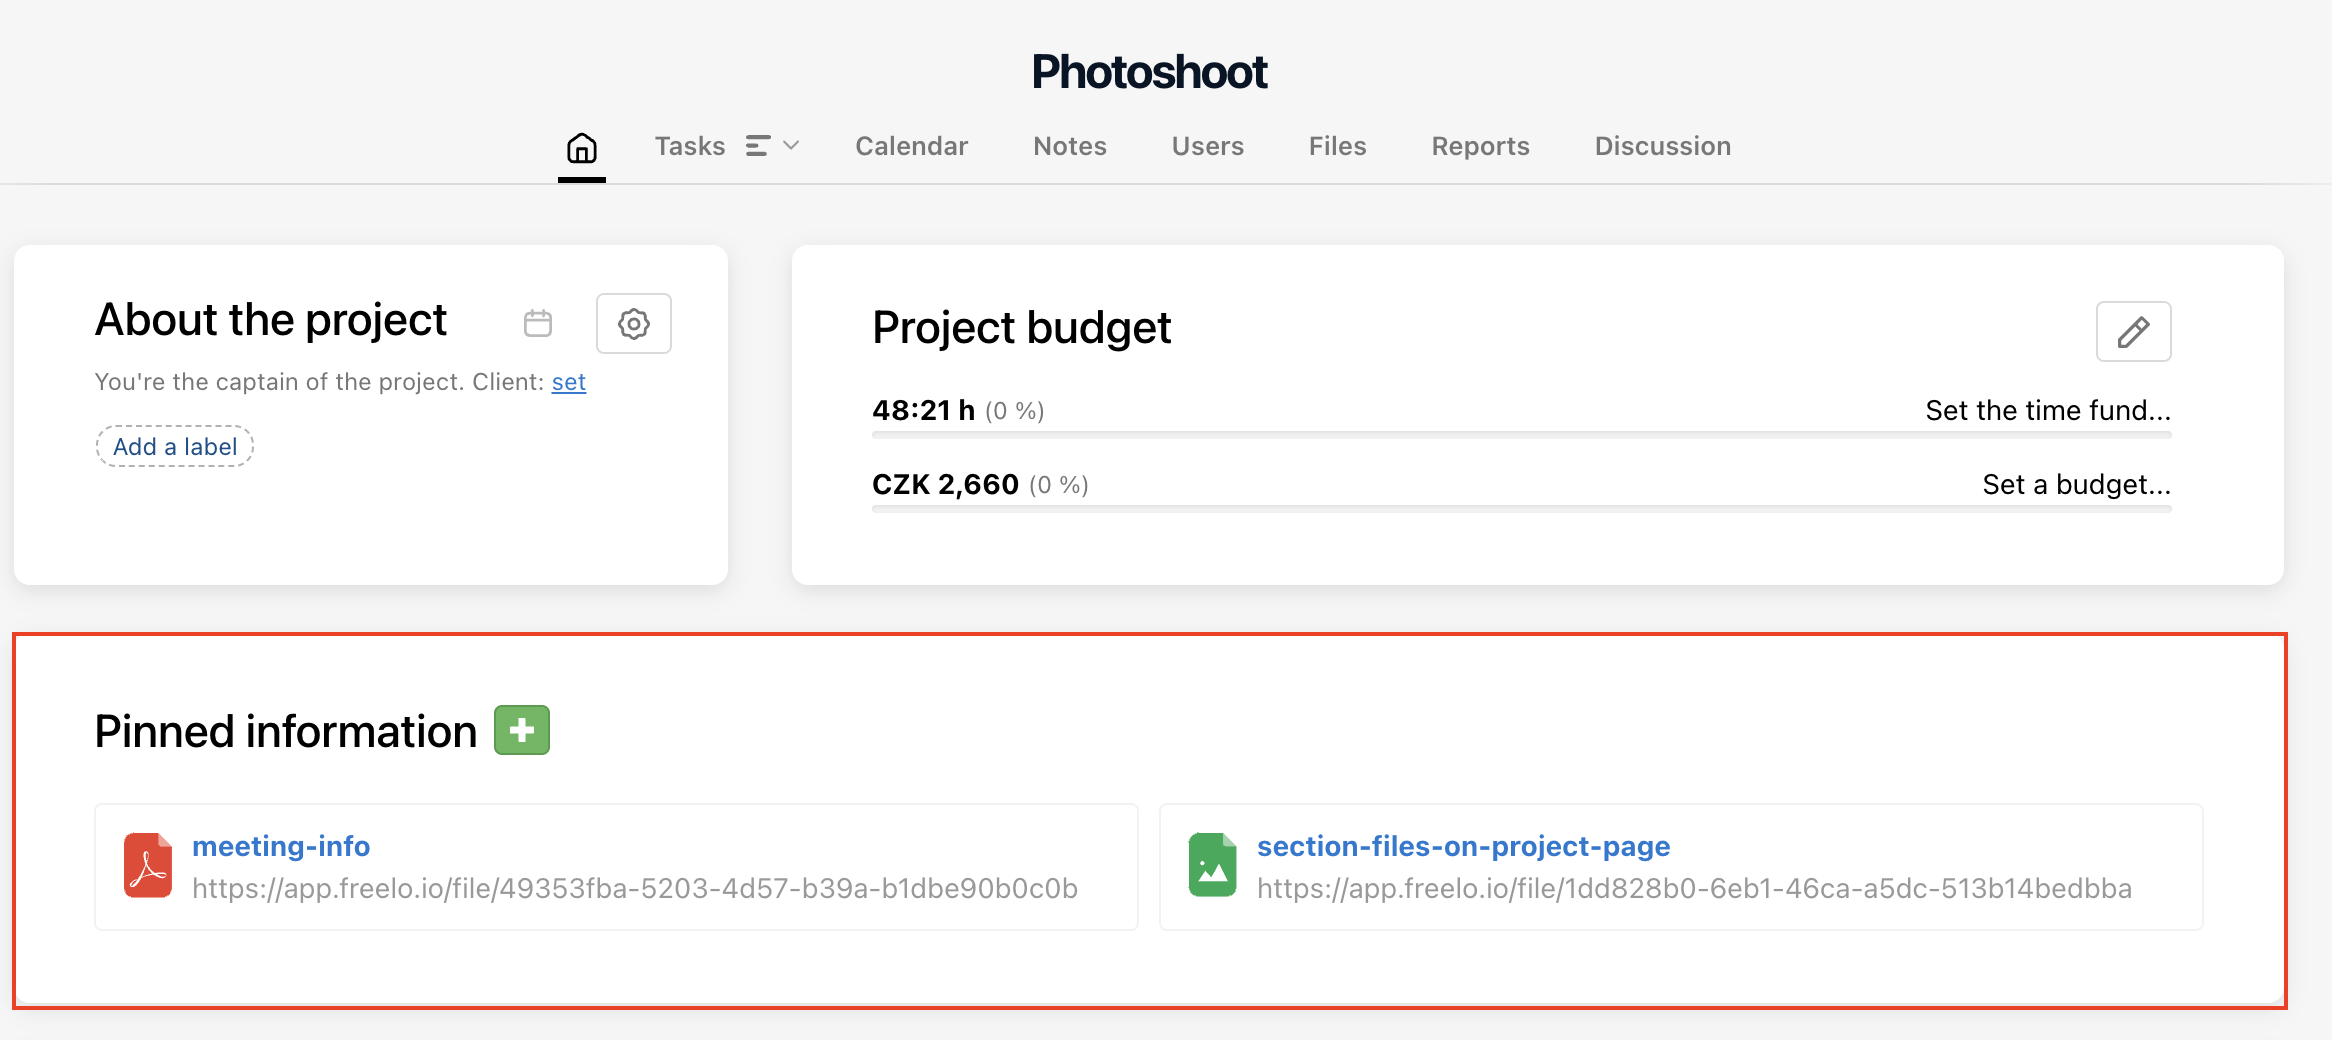
How to pin file to a project
Pinned items to a project are well visible for all users in a project. It is useful for important files, project assignments or client details. We would recommend setting up project sections in Project settings as well.
Go to file detail and in right the menu click Pin to project… You can pin the item to a project, where it is located only.
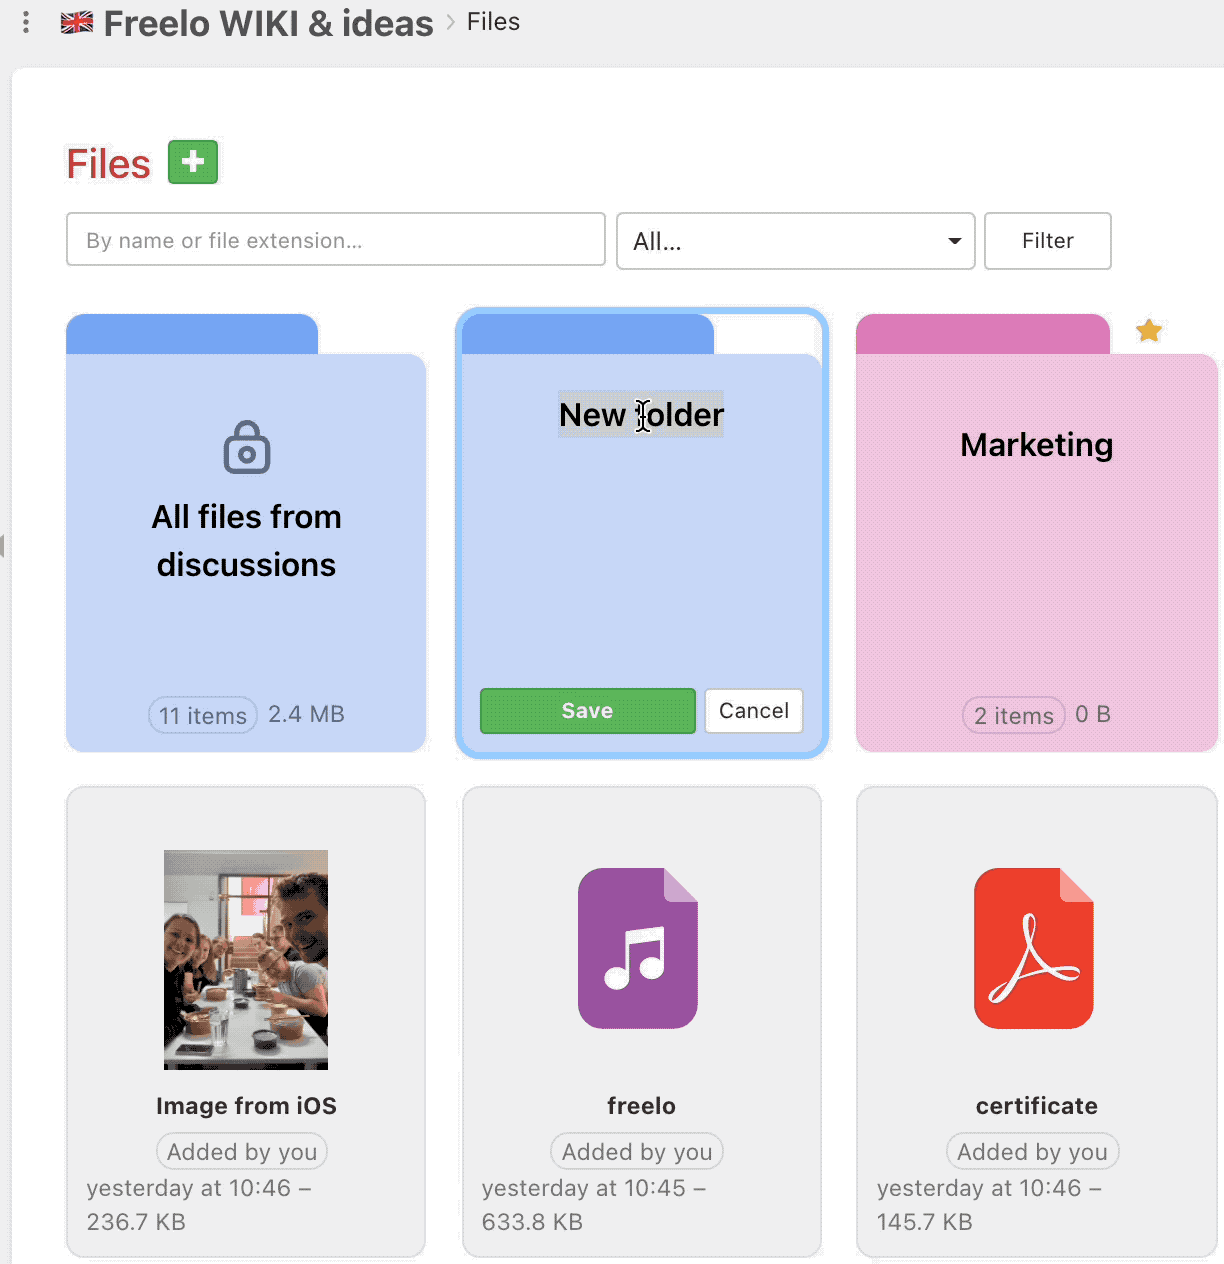
File Folders
Thanks to sorting files into folders you have everything nicely organized. Add a new folder via green button + and then click Create folder. A blue folder appears where you have to input a name.
You can also change folder color via three-dot menu > Change color > select color and confirm the setting via Save.
How to work with items
Within Files you can have many levels of folders and subfolders. It works just as the common computer storage.
How to move item
Move items into the folder via drag&drop (pull with mouse) or move it across the project/folders. In case you want to move the item to another project or a subfolder, click three-dot menu > Move.
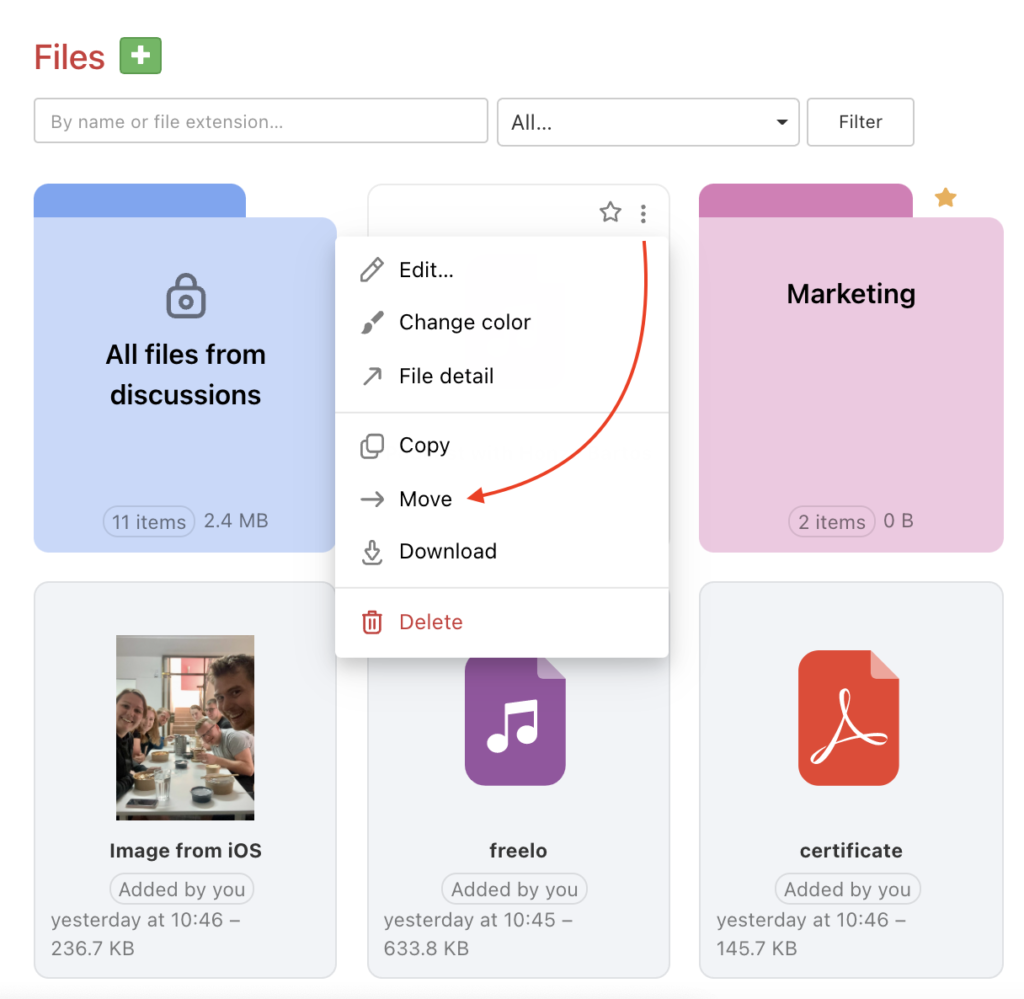
In the following form select a project > Where do you want to move the item… and folders/subfolders > Select folder. Confirm via Move.

How to copy item
It is useful when you have a template where fields are prepared to be filled. For example, create a note where you enter the client’s details.
Click the three-dot menu > Copy.
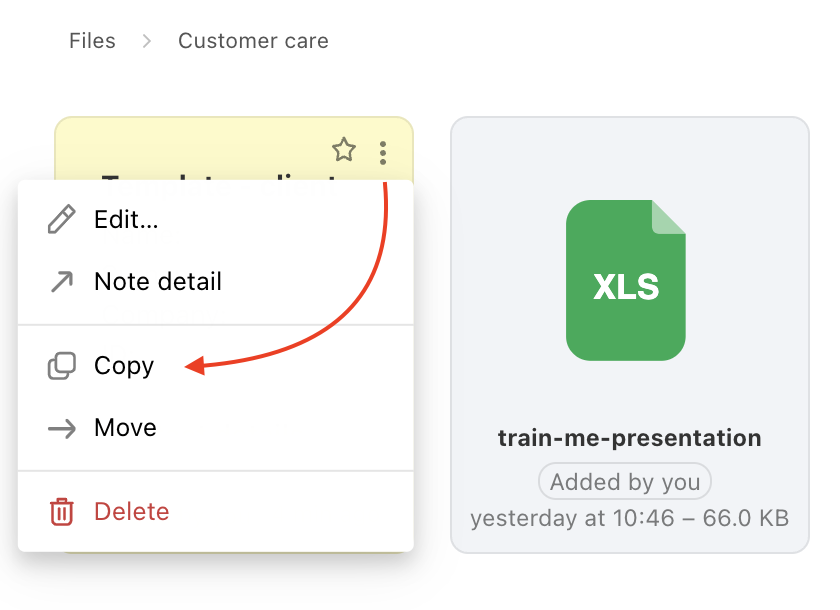
Then select a project, folder and subfolders, where you want to place the item.

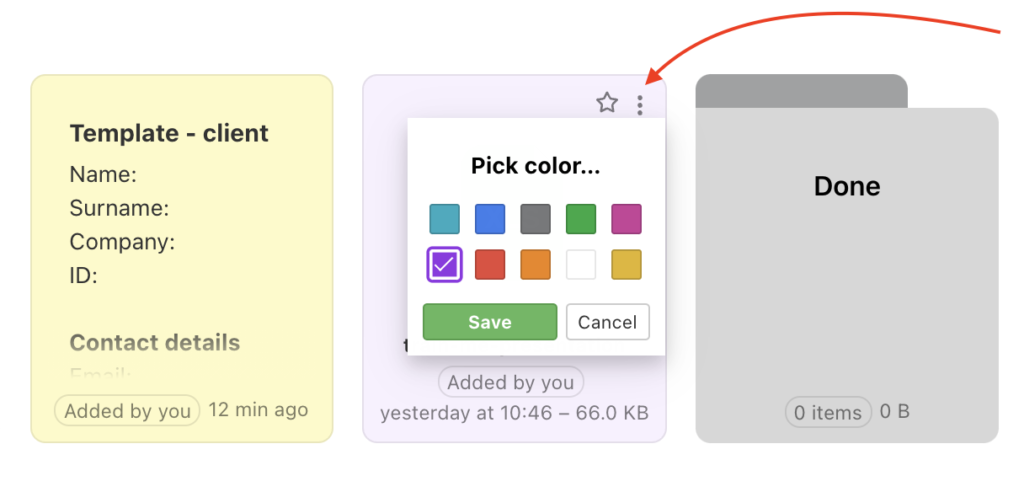
Colored components
You can set a color for folders and files. Click the three-dot menu and select Change color. Confirm via Save.
Navigation and location
How to move from folder to folder? Use breadcrumb navigation, where the exact item location. It is right under the filters.
In the picture you can see the current subfolder Blogposts, that is organized in three subfolders by post status: Published, WIP, Ideas and is part of a folder Content.
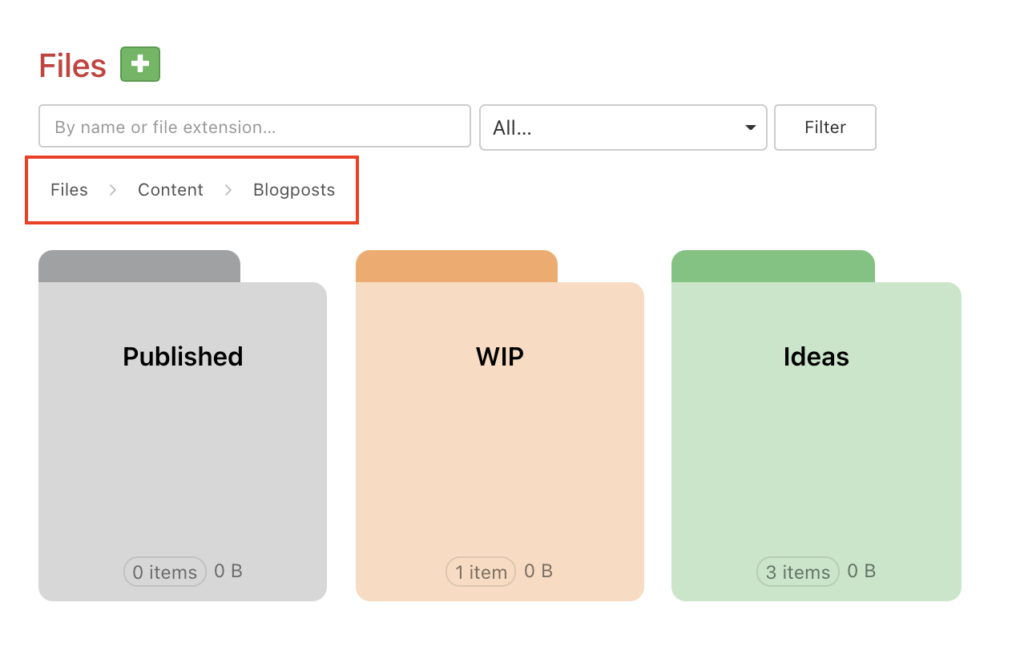
When you click the sub/folder name in the navigation, you will be redirected there.
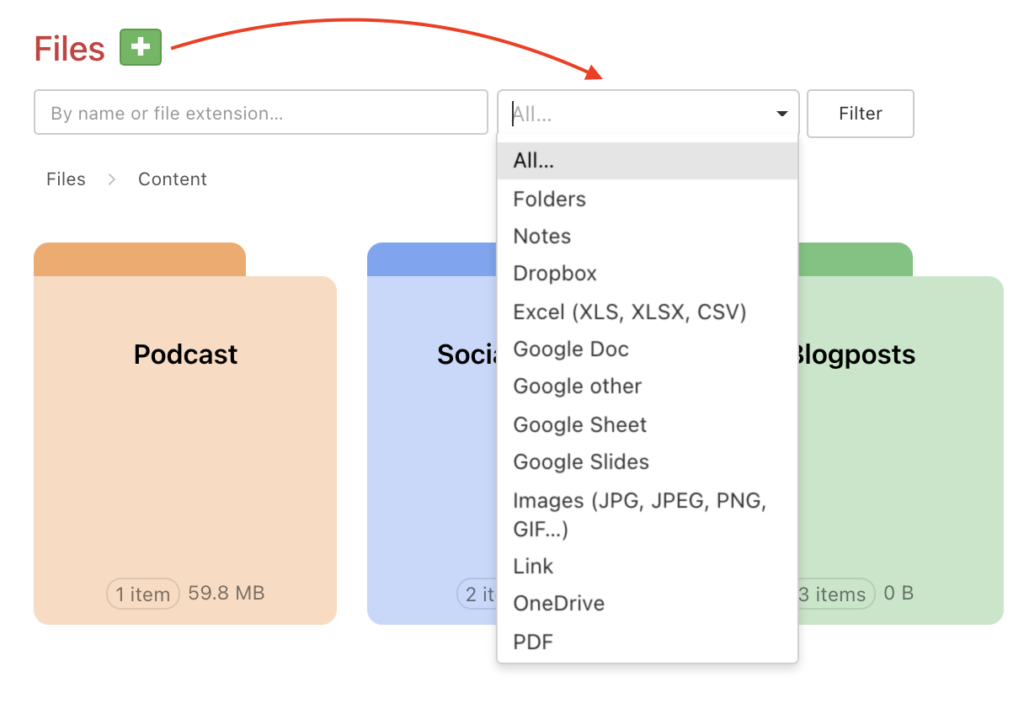
Search by item title or type
Across the files and subfiles, you can search and filter according to item name or type (note, Google doc, picture, PDF etc.).
Item order and view
There are several ways how to order your files and folders:
- From newest or oldest
- By name from A-Z or Z-A
- By size from biggest or smallest
- By priority
- Custom order as you want
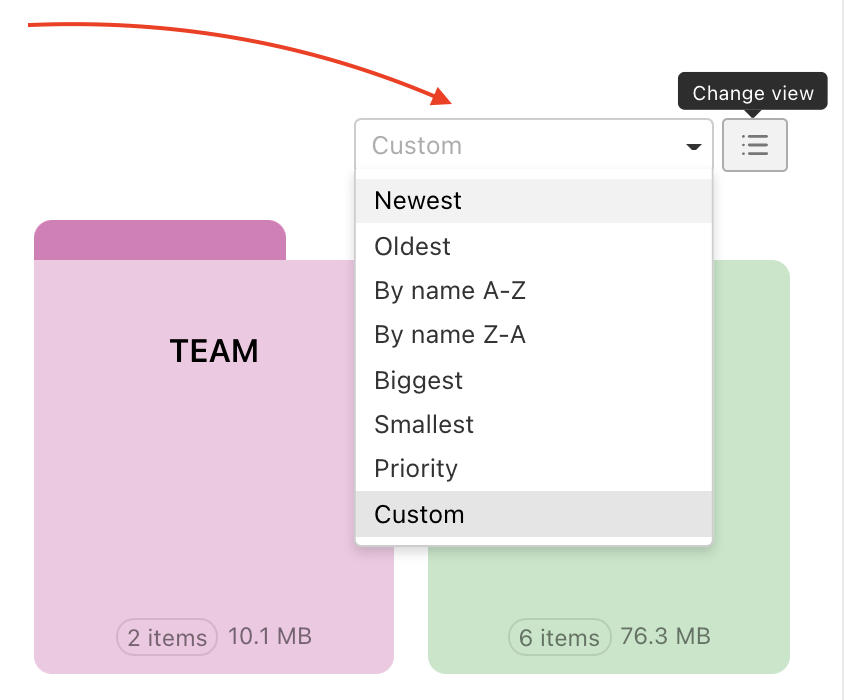
You can switch from the view next to each other (default setting) to rows. Change the listing in the top right corner via Change view.
How to link files from cloud
Links for files in external storage can be still added to comments in tasks. In the section Files you can add a link regardless of the task. You can choose from following connected services:
- Google Drive
- Dropbox
- OneDrive
- Other link – any URL address
Click the green + and select one from the section Add links from services.
In the form you have to input the Title and paste the link. If it is a Google document, you need to select the document type. It is up to you whether you add a note – what does the file contain or some instructions, how to work with it. Form the text as in common comments in Freelo.
At this point you can also choose other users that you would like to notify about the changes.
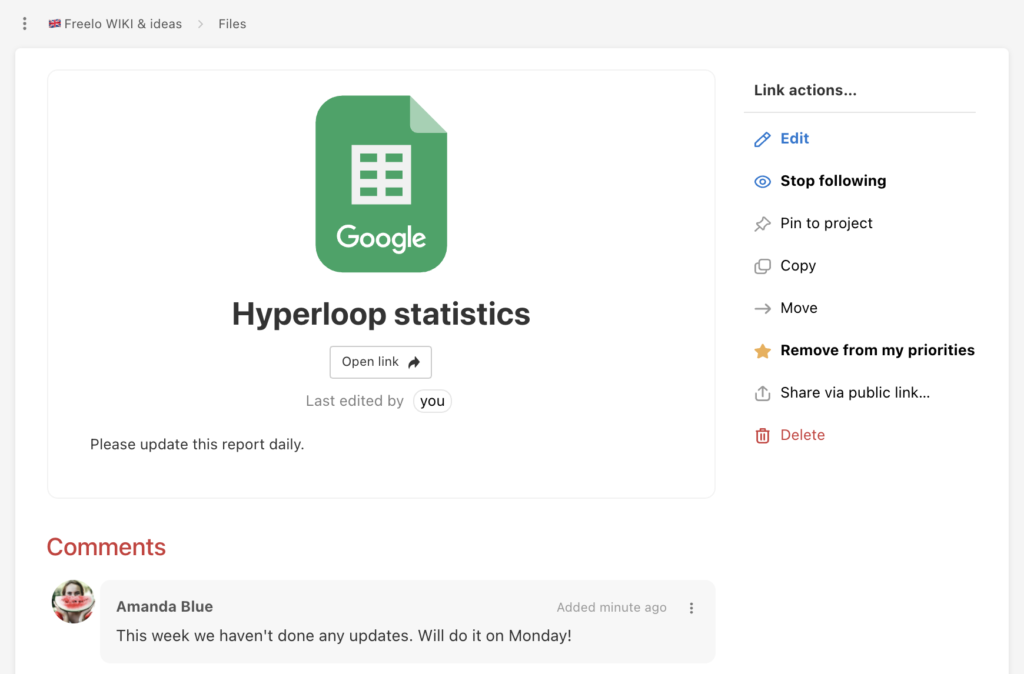
Added link has an icon of the particular cloud service. When you click the icon, it redirects you to the link detail in Freelo. There you can discuss the file with your colleagues, add it to your priority or create a public link.
In link detail click Open link and go to the document on Google Drive, OneDrive etc.
Frequently asked questions
What happens to my text and files when I close my browser window without saving it?
We thought about this situation. This can happen in the following cases:
- In task discussion: added text and uploaded files in a comment in a discussion will wait for you if you refresh the page. Same goes for editing comments – the edit is being automatically saved so you won’t lose any text or files.
- On the detail of the project when adding a new task: itemized task will stay there as in previous case.
- In the new task window, which is called with the plus icon in the blue bar: If you have text in this window, we warn you when you close the window by saying that you should not close the window. It is up to you if you listen to us 🙂 If you press Esc for the first time, nothing happens. When you press the Esc twice, then we close the window and the text will be irreversibly gone.
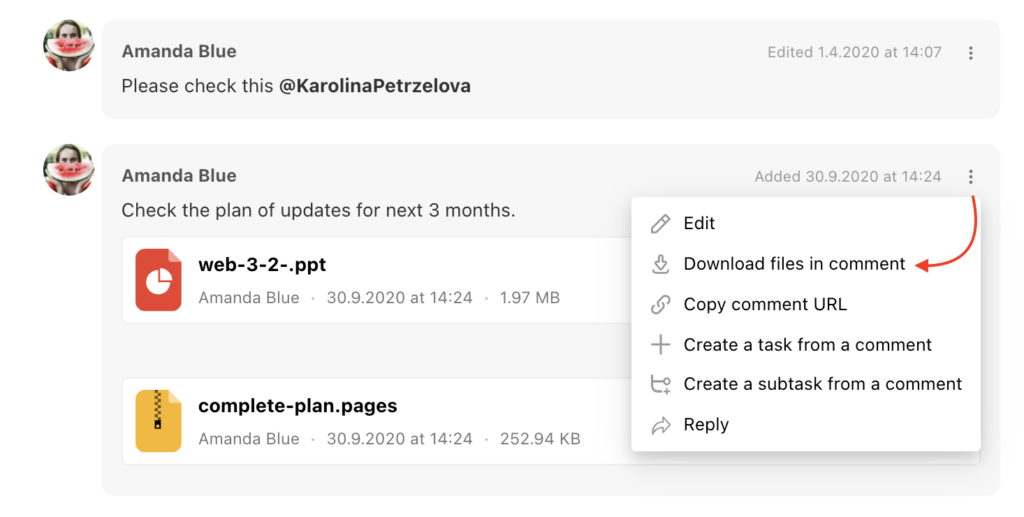
How can I download all the files in one comment in bulk?
All comments that have more than one attached file have the option Download files in comment. Click and start downloading a .zip file with all the files that are in the comment.
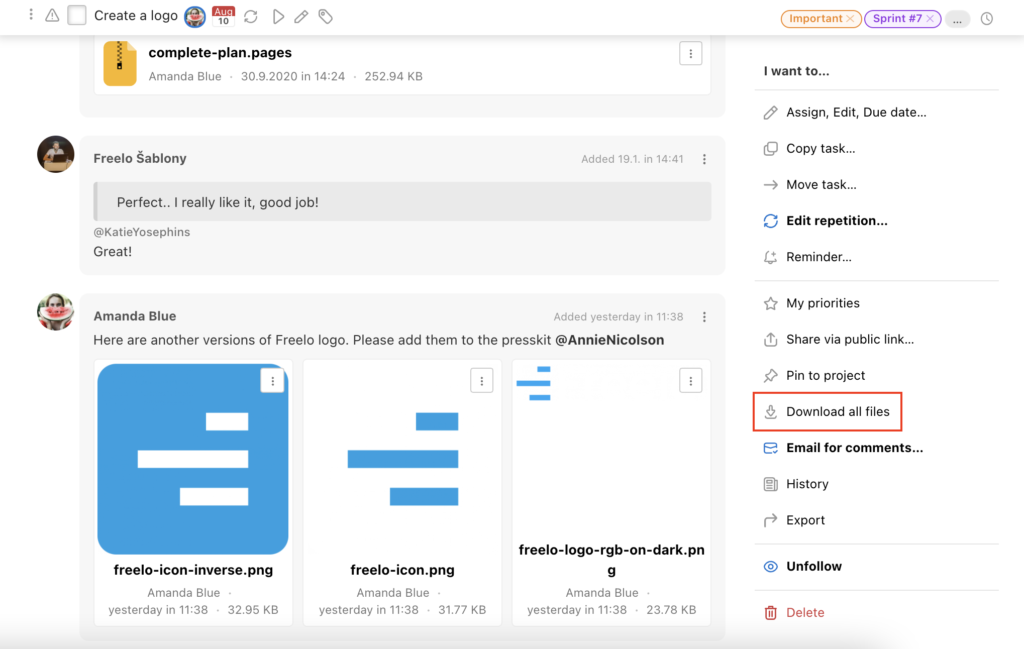
How can I download all files in the task?
If the discussion contains any more files, in the right menu is the option to Download all files. Click and start downloading a .zip file. This includes all the files from the discussion in this task.