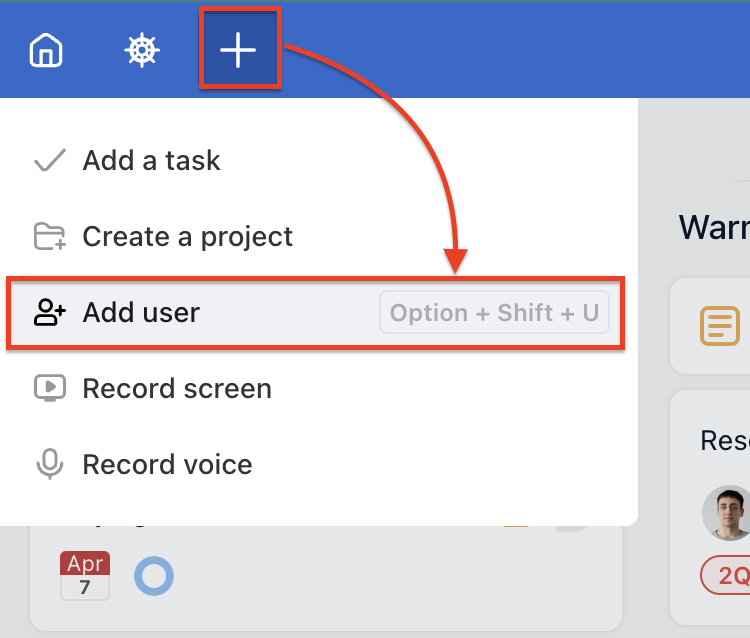
Inviting colleagues or clients to Freelo is easy. Click on the plus icon in the upper blue bar on the left > Add User.
Who can invite new users? Only the project captain (owner) or Admin of the project. In case you have a Free plan, you can invite 3 users to your projects.
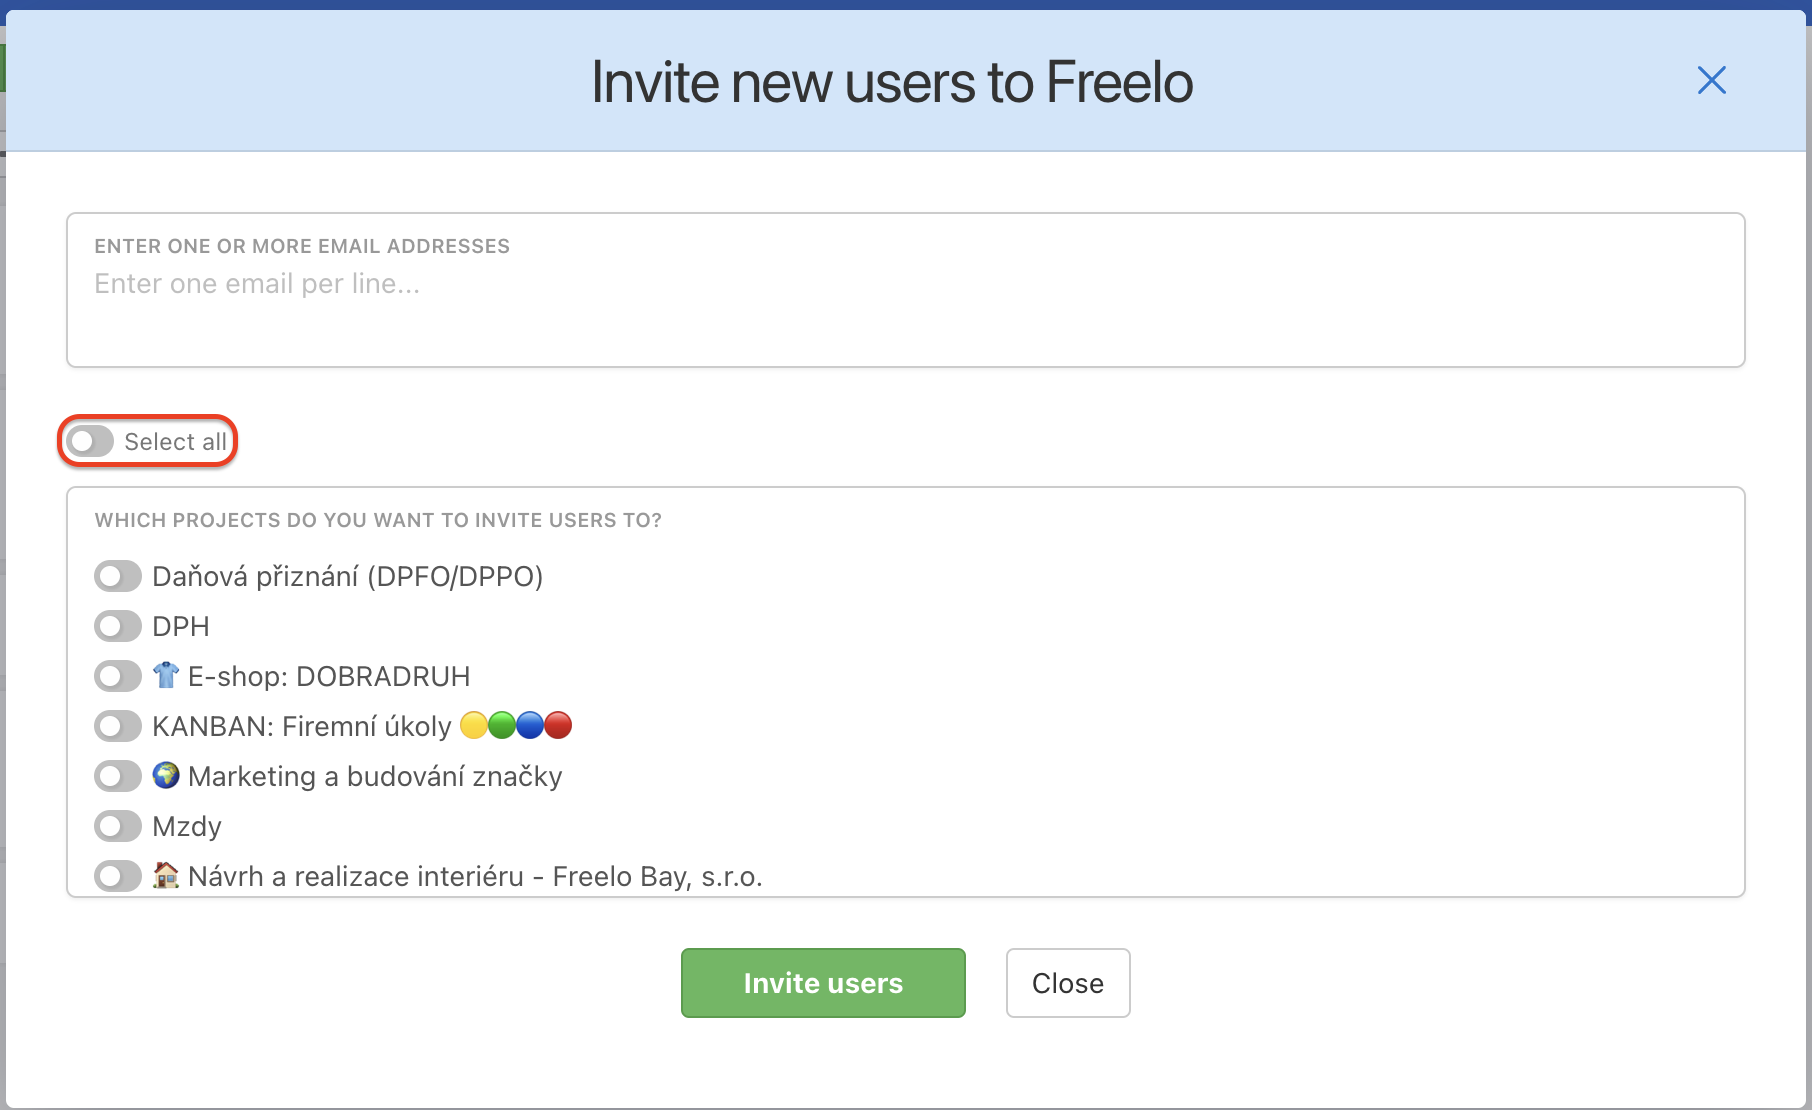
Then type the user’s email (or more at once) and there is an option to invite them to particular projects directly or choose all projects by clicking Select All. Add one email per line and confirm by Invite users.
Invite a user to the project
You can invite a user to a particular project directly. Go to project detail and find the section Users. Click on the green plus icon. Select users from the menu. You can invite the user to some of the To-Do lists.
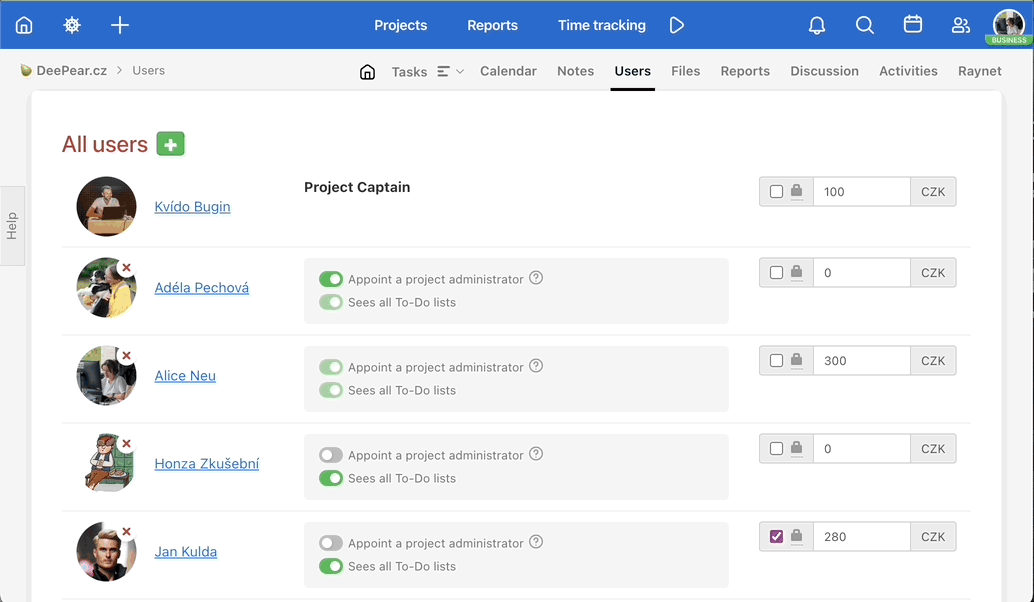
If you want the user to see only a few To-Do lists, check out the option Invited users will see all To-Do lists and select only those you want the user to have access to.
Otherwise, you can leave the checkbox checked and your colleague or client will see all the To-Do lists in the project.
Confirm your invitation by clicking the Save button.
Invite new users via email address
You can invite multiple users to the project at once. Go to project detail and find the section Users. Click on the green plus icon and select Add new users. Type one email per line. Confirm and invite the users via Save.

Once users are already invited to Freelo and you share some projects, you can select them from the drop-down menu.
Inviting entire teams to the project
You can invite all users who are a part of one team simply with just one click. You can define your teams in the Business panel in the Managing team section.
In the Users section of the project, just click on the green + button. After that, you need to click on the team/s you want to invite to the project.
Invite a user to multiple projects at once
In case you need to invite someone to more than one project, do so this way and save time.
Go to the section Users in the top blue section. There is a list of users who you share any projects with. On the right, click on the green button Invite users and a pop-up window will appear.
Type the user’s email addresses and select the projects you want to share with them. Confirm by Invite users.
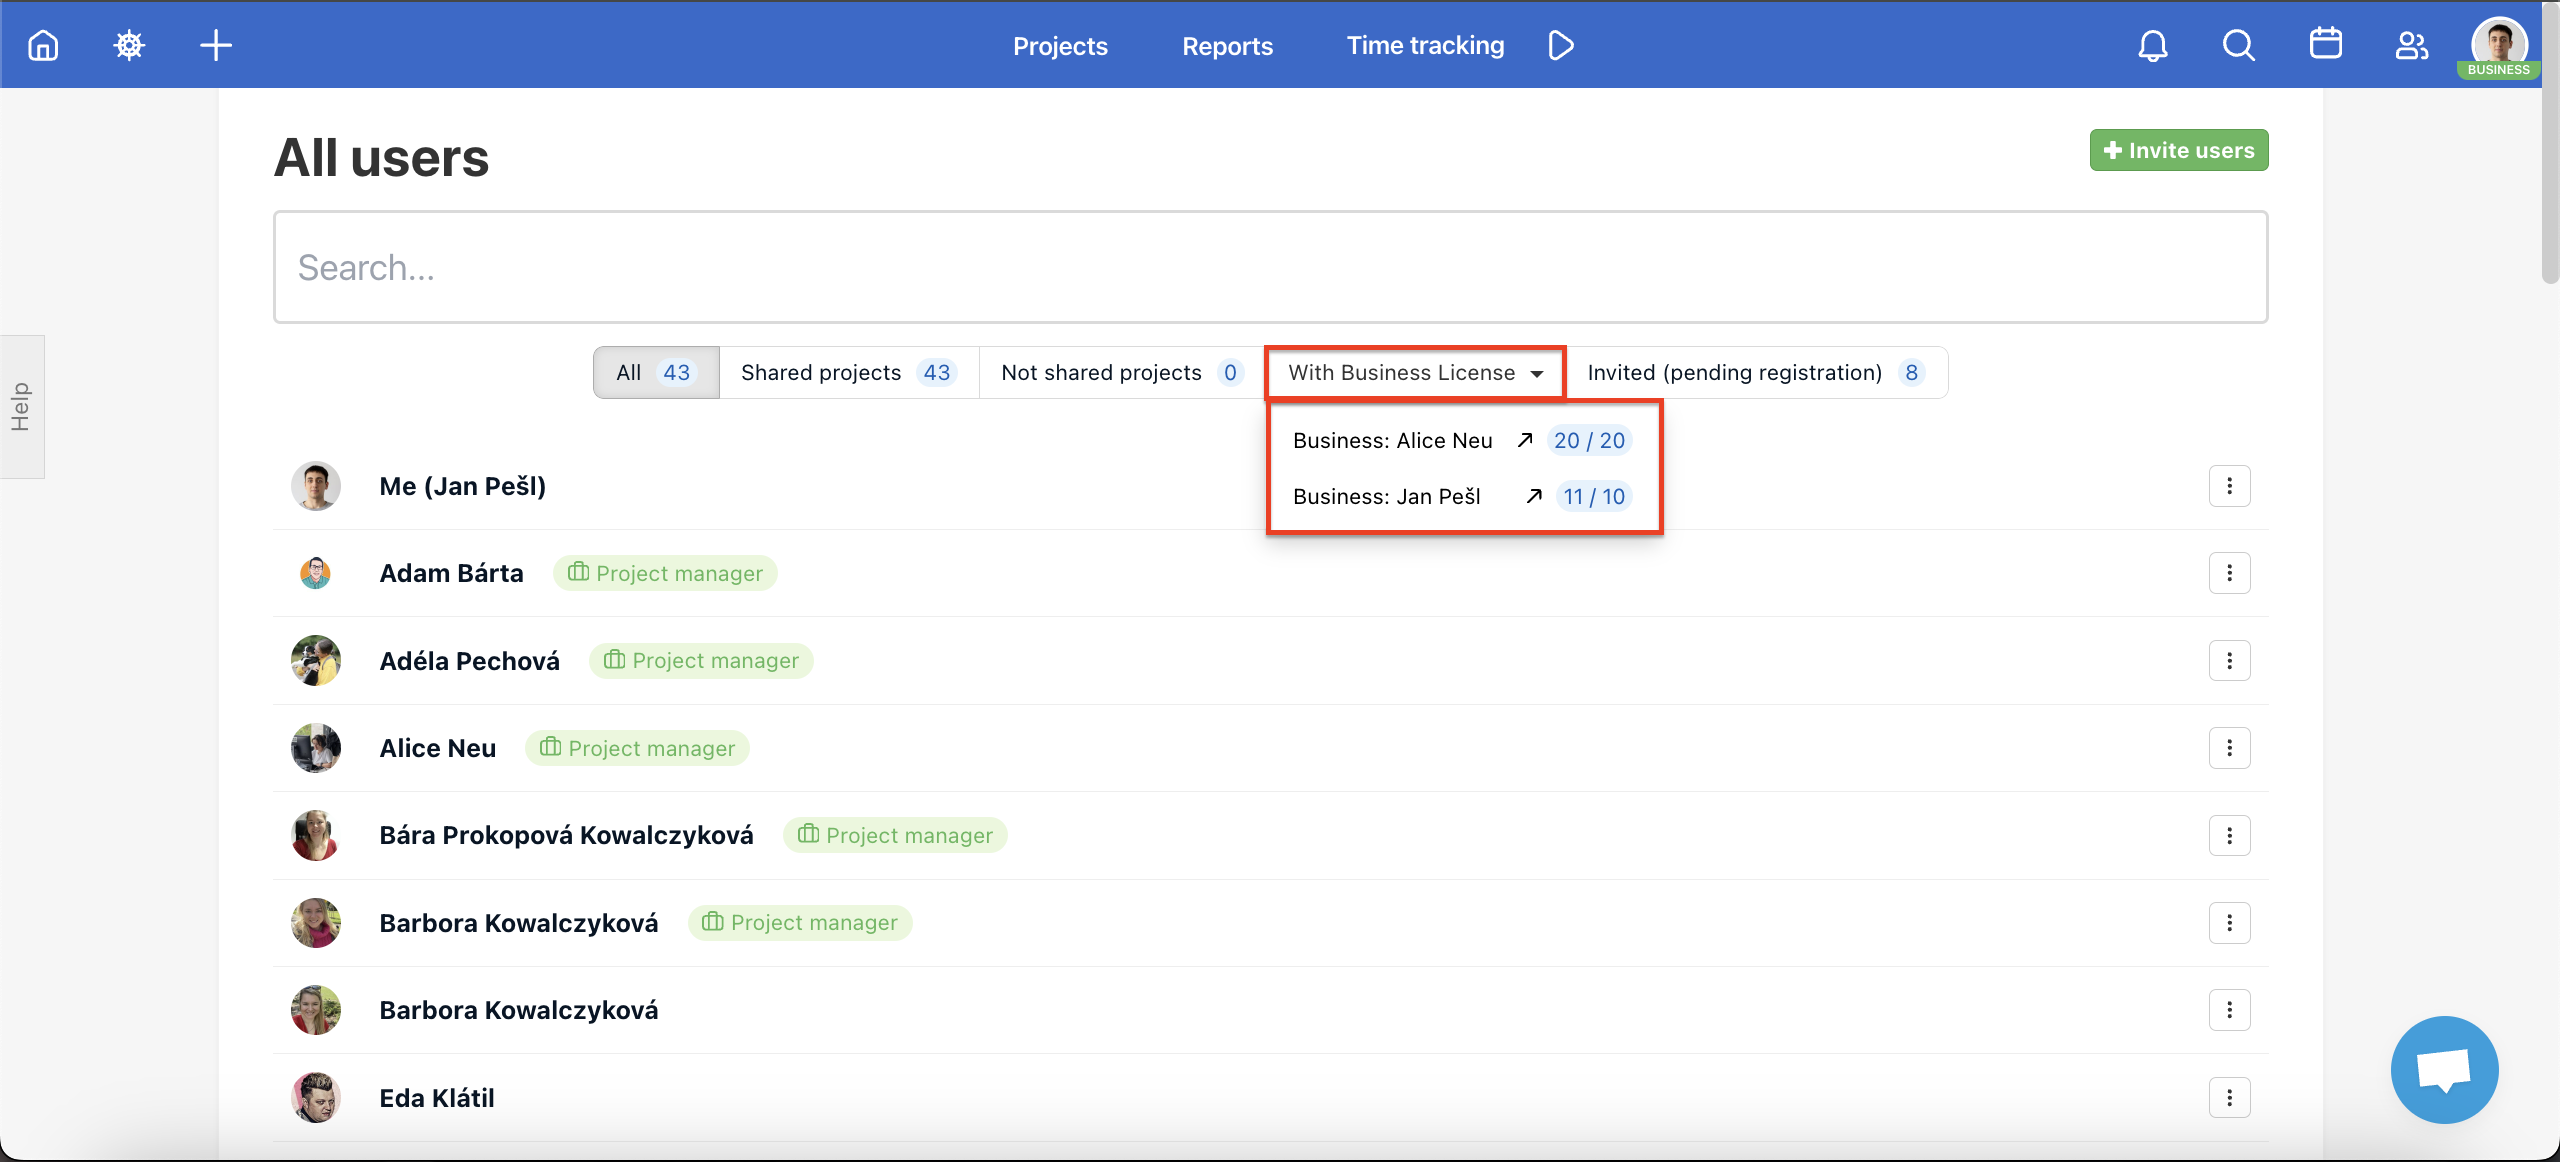
The Invite user option is also located in the All users section in the upper right corner.
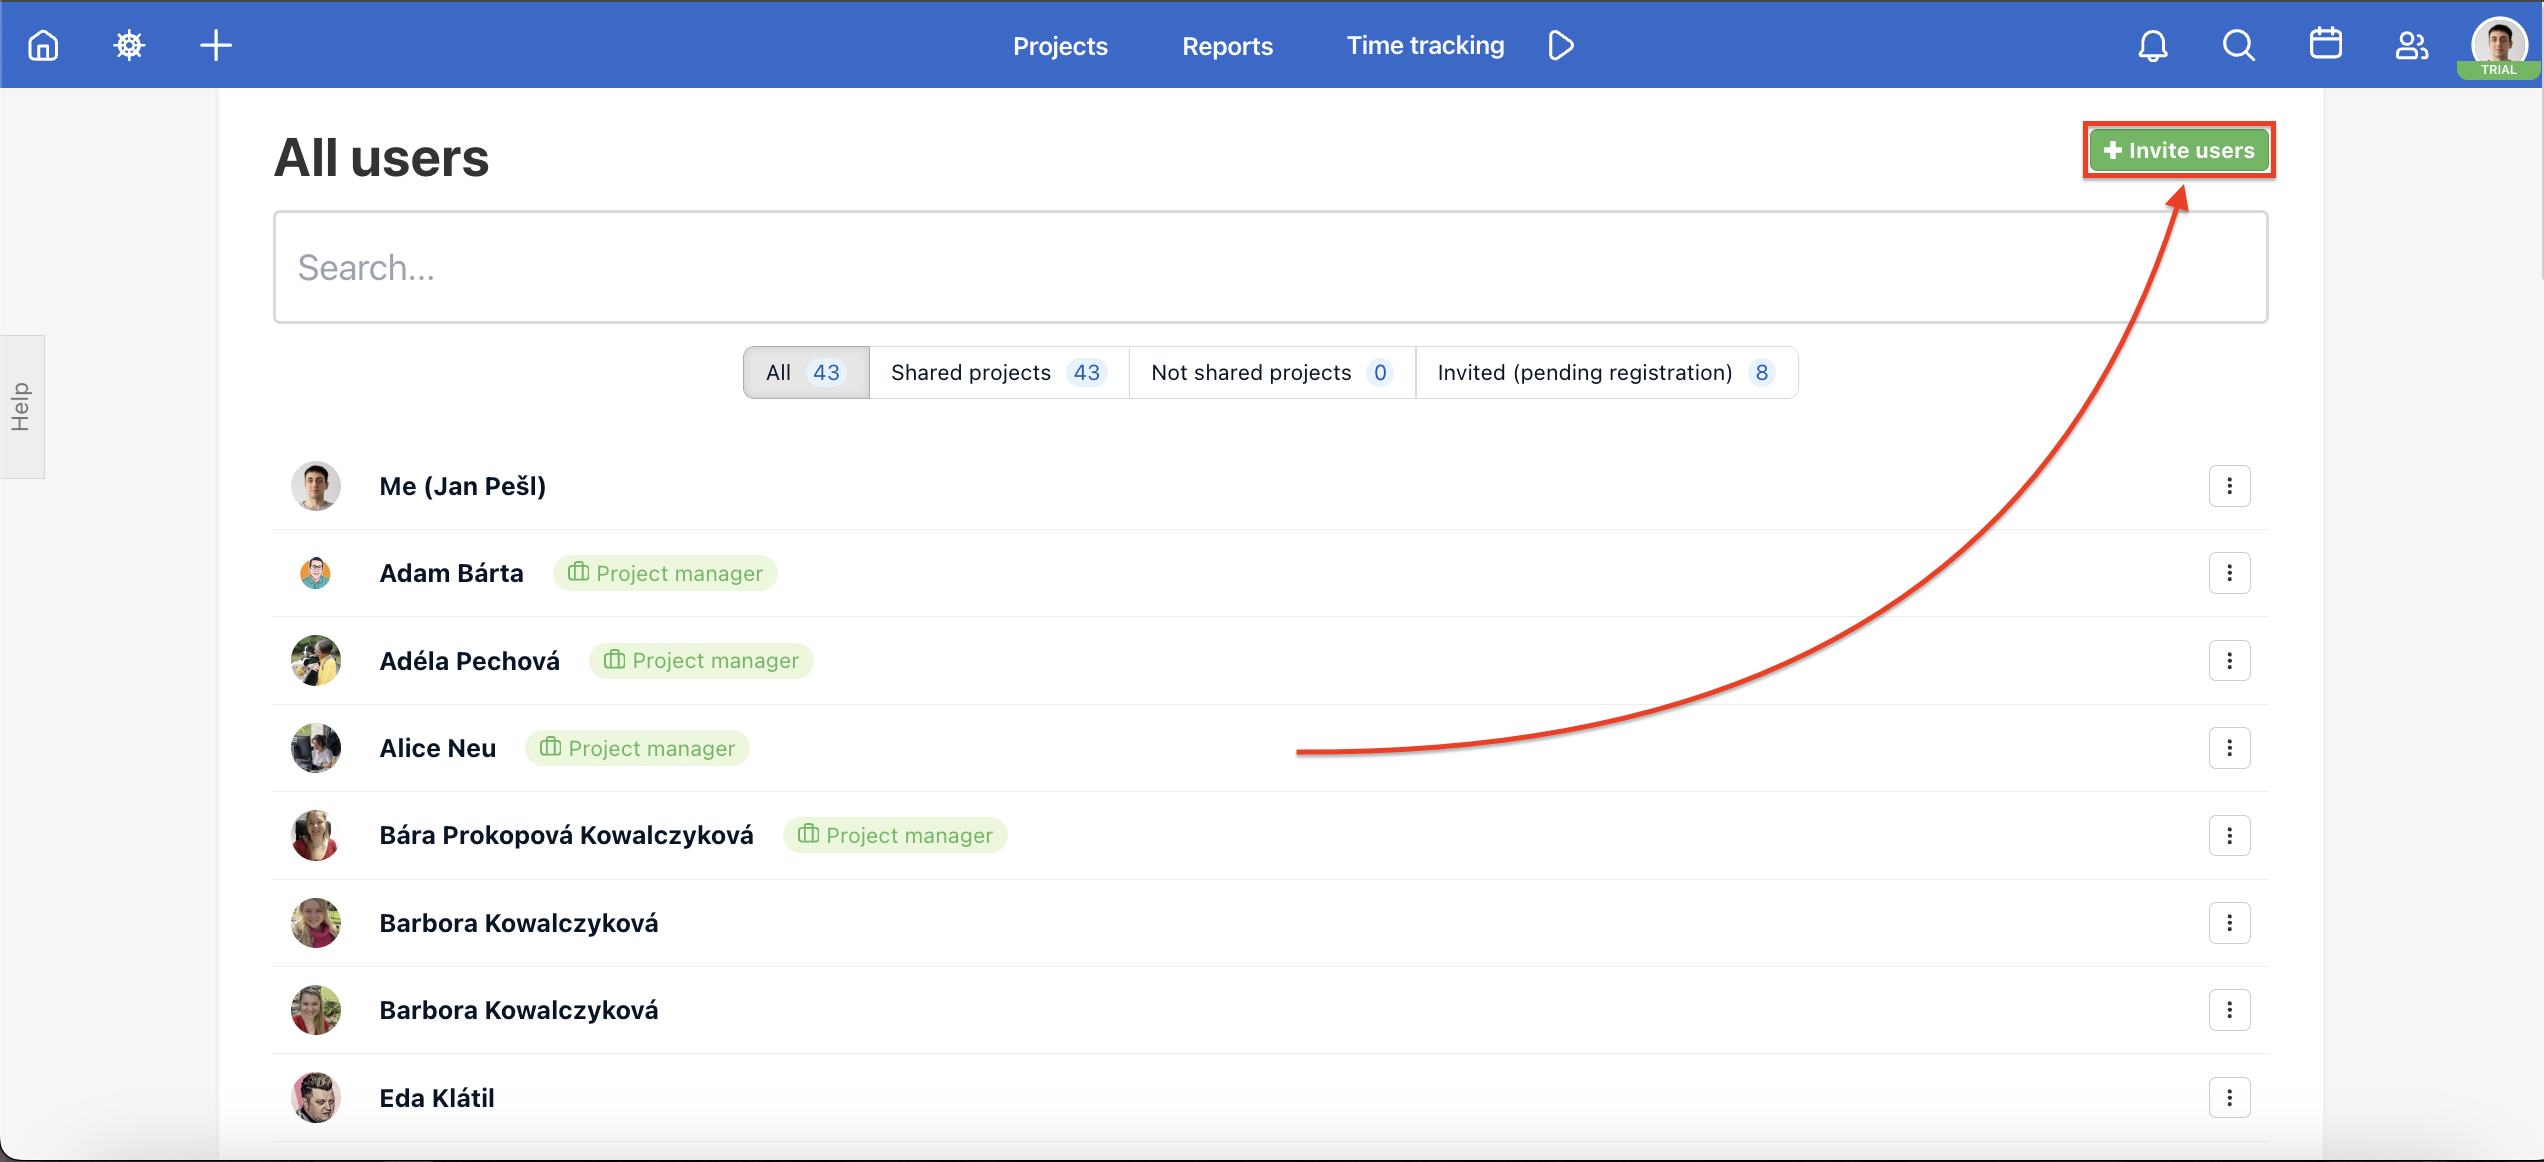
Another way to invite one user to multiple projects is via the three-dot menu. Go to the section All users via the top blue section. Find a section of Users with whom you share projects. Click on the three-dot menu on the right and choose Projects where…
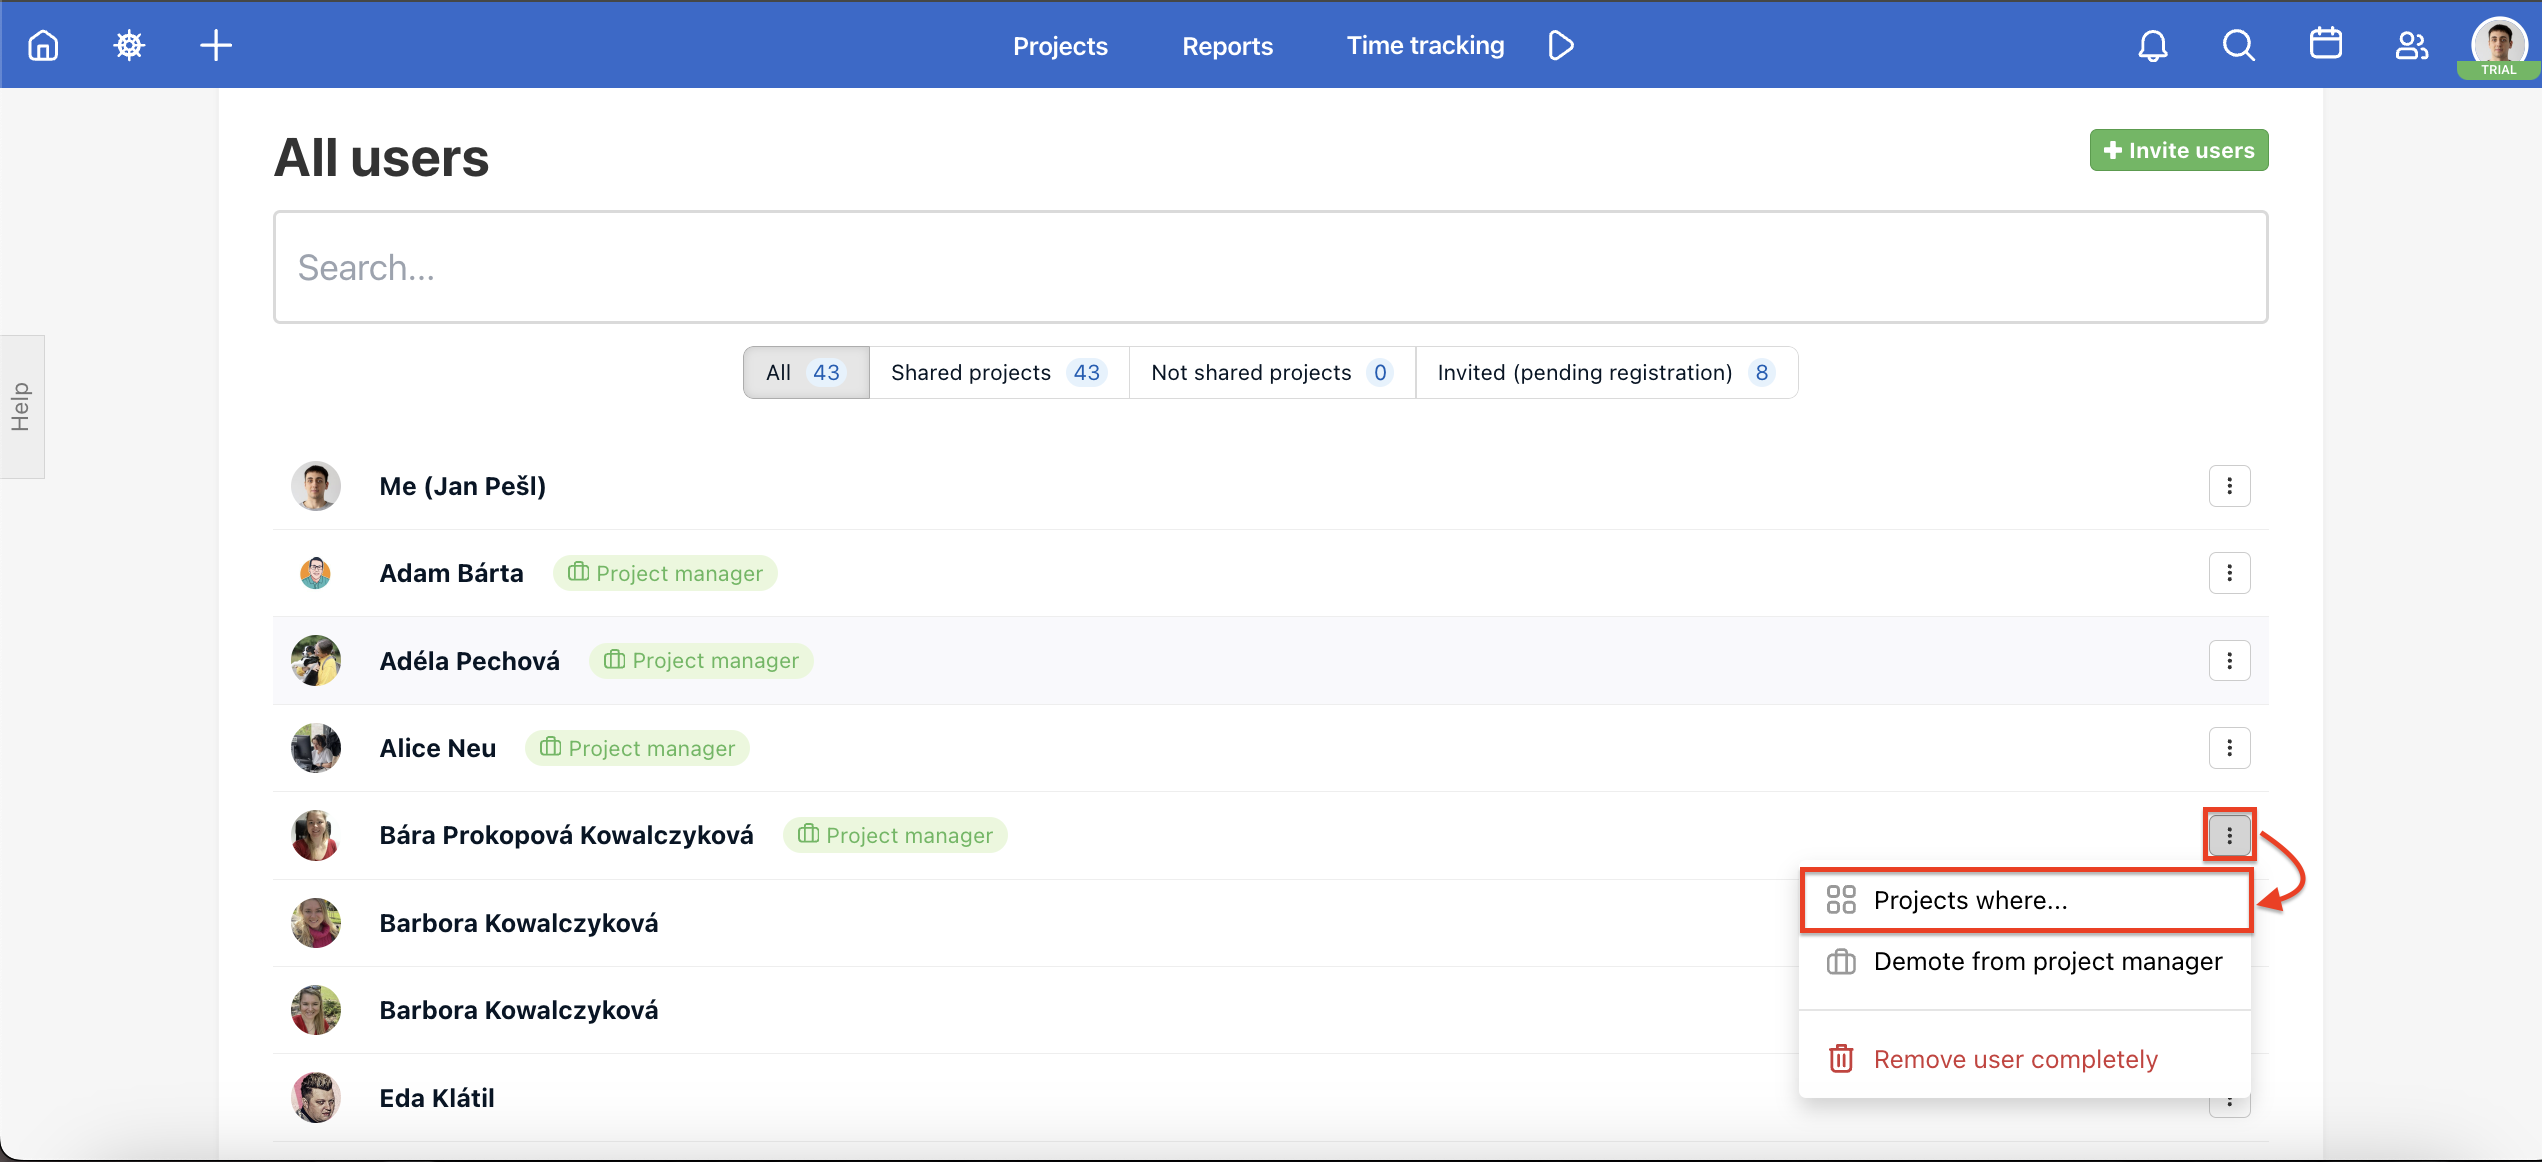
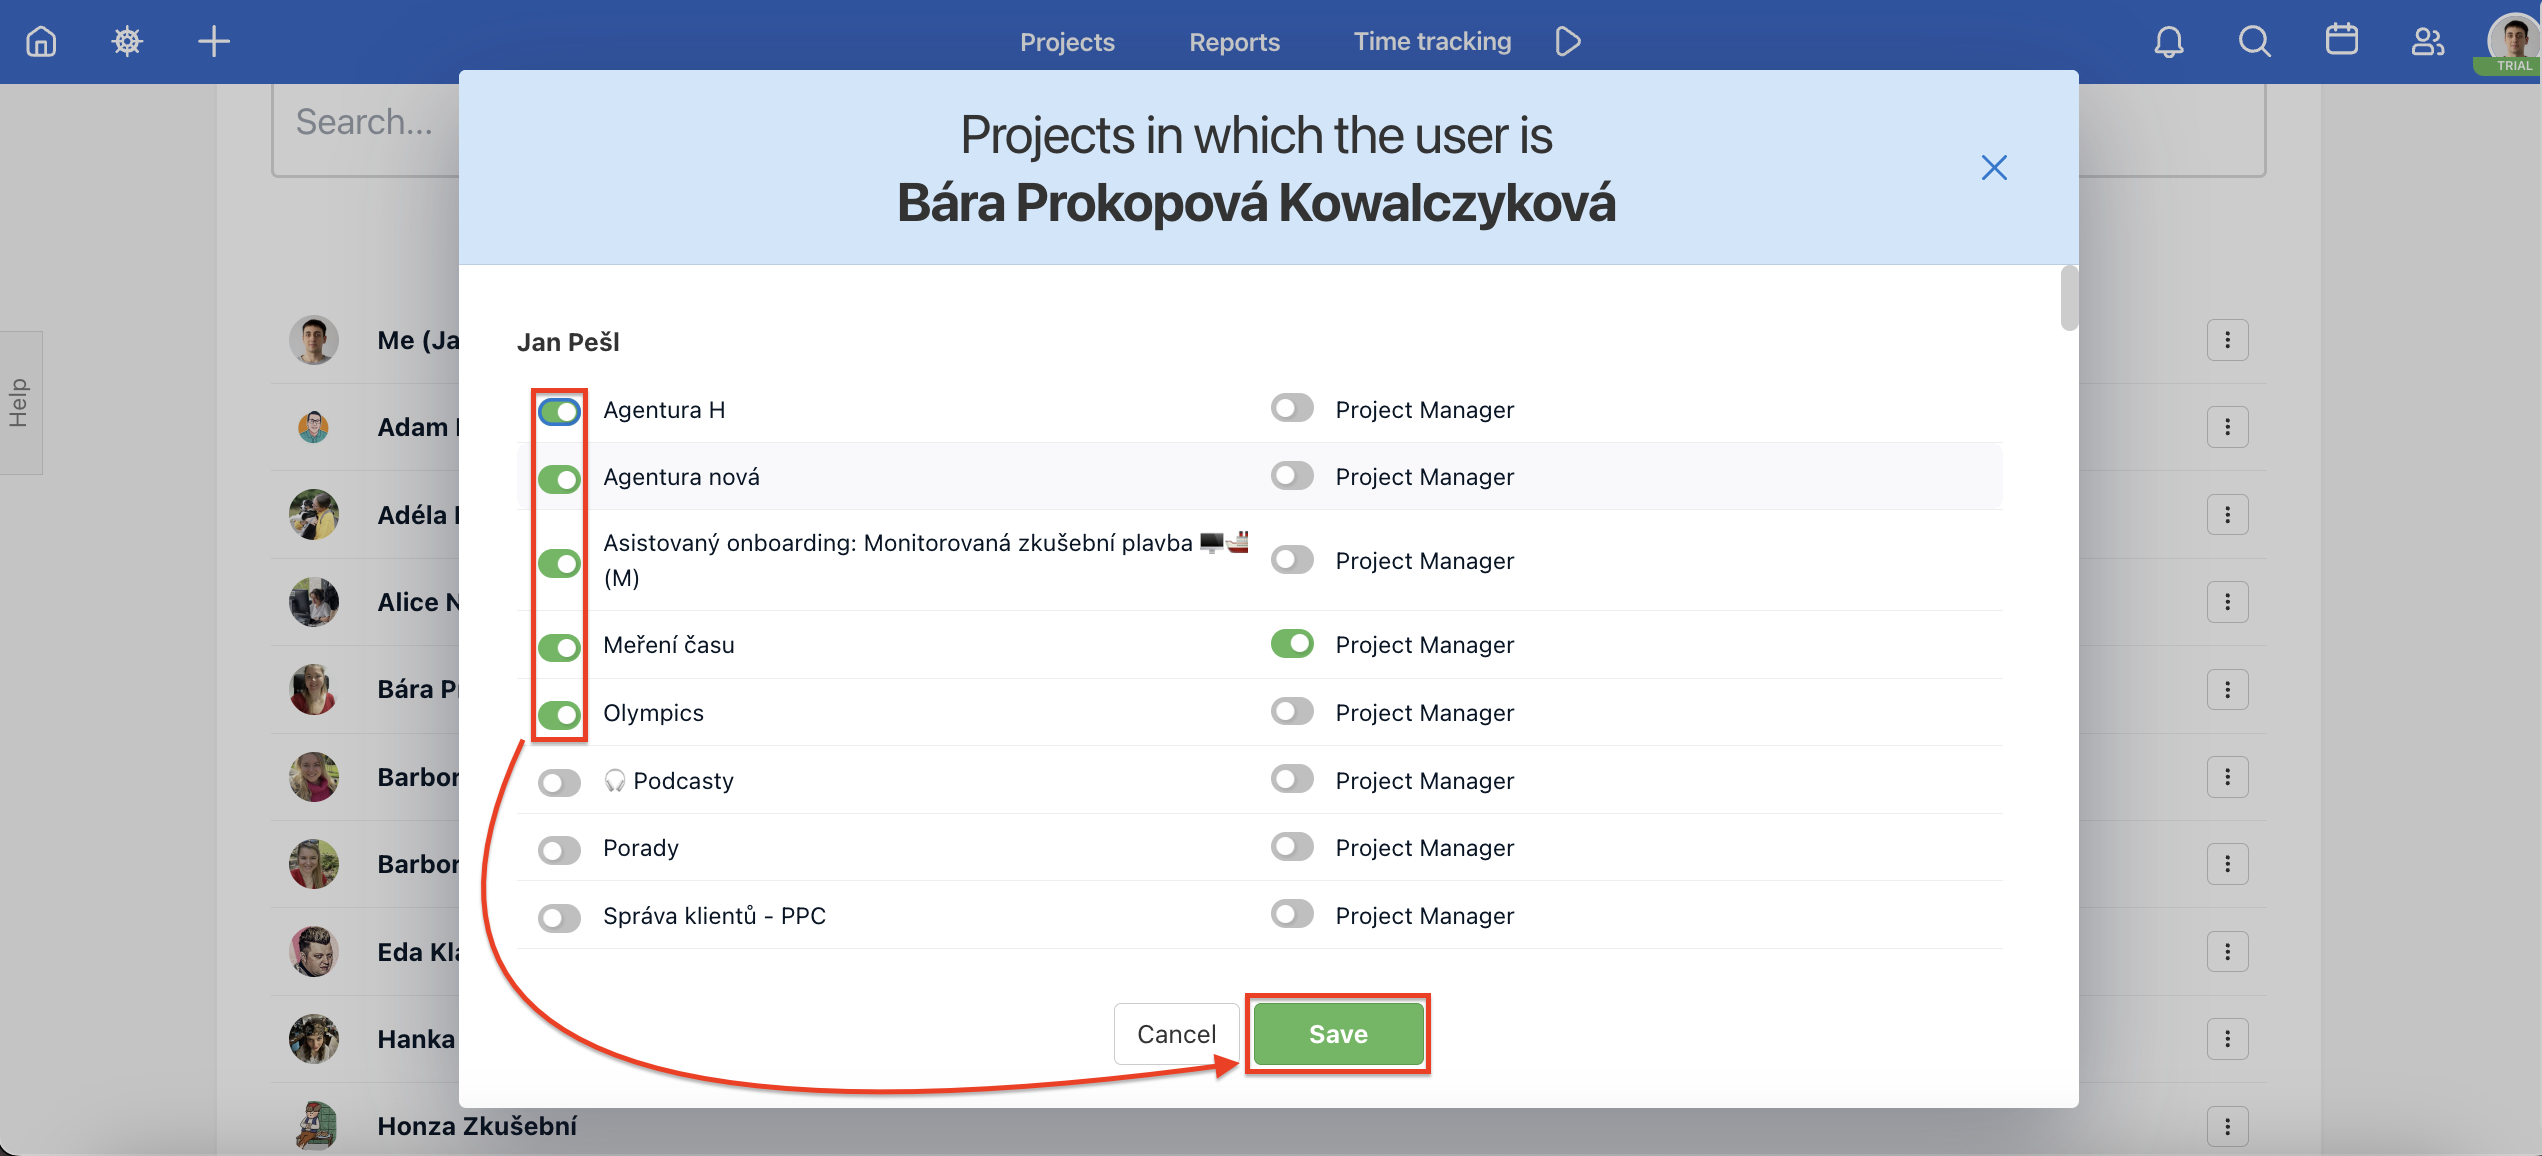
Using the checkboxes on the left you can select which projects you want to invite the user in. You can also set the user as an Admin of the projects. Confirm via green button Save.
Non-delivery of the Email invitation
Just remove the user and invite him/her again to the project. A new email invitation will be sent. We recommend you check the SPAM folder in your email.
In the section Users > All users in the upper blue bar find a user without a confirmed invitation (his/her avatar is with an exclamation mark). Click on the email address and then you can copy a link and send it to the user directly.
Password change
You can change only your own password. Go to your profile Settings via the avatar in the top right corner. You can enter the current password and type a new one. In case you forget your password we would recommend resetting it via the forgotten password procedure (but first please log out).
You might want to check how to change your password.