Thanks to the verified domain, you can manage the company users and, eventually, teams. Use it for editing personal information, setting up email notifications, and requesting 2FA. First, however, you have to verify the company’s domain and check how.
Assigning roles, replacing and removing users, or adding users to projects is possible even without the verified domain.
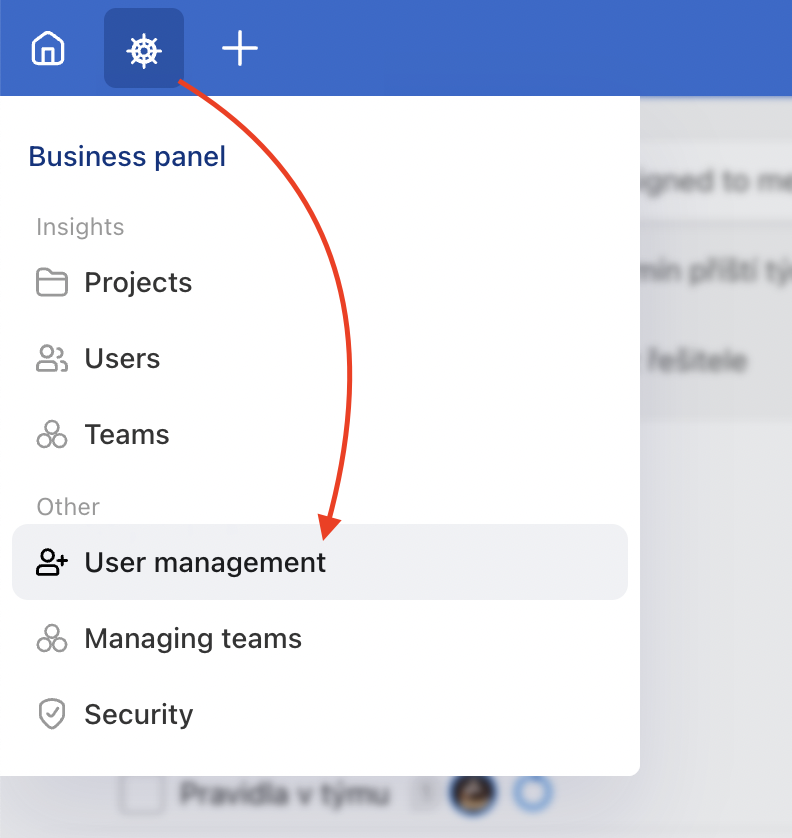
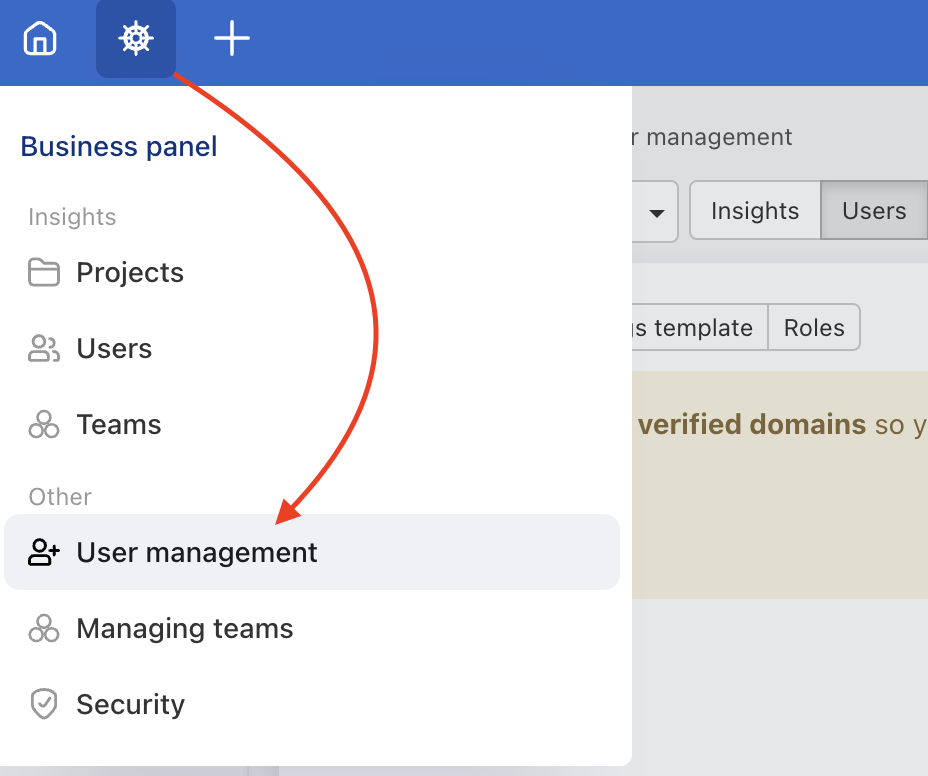
To manage users go to Business Panel > User Management.
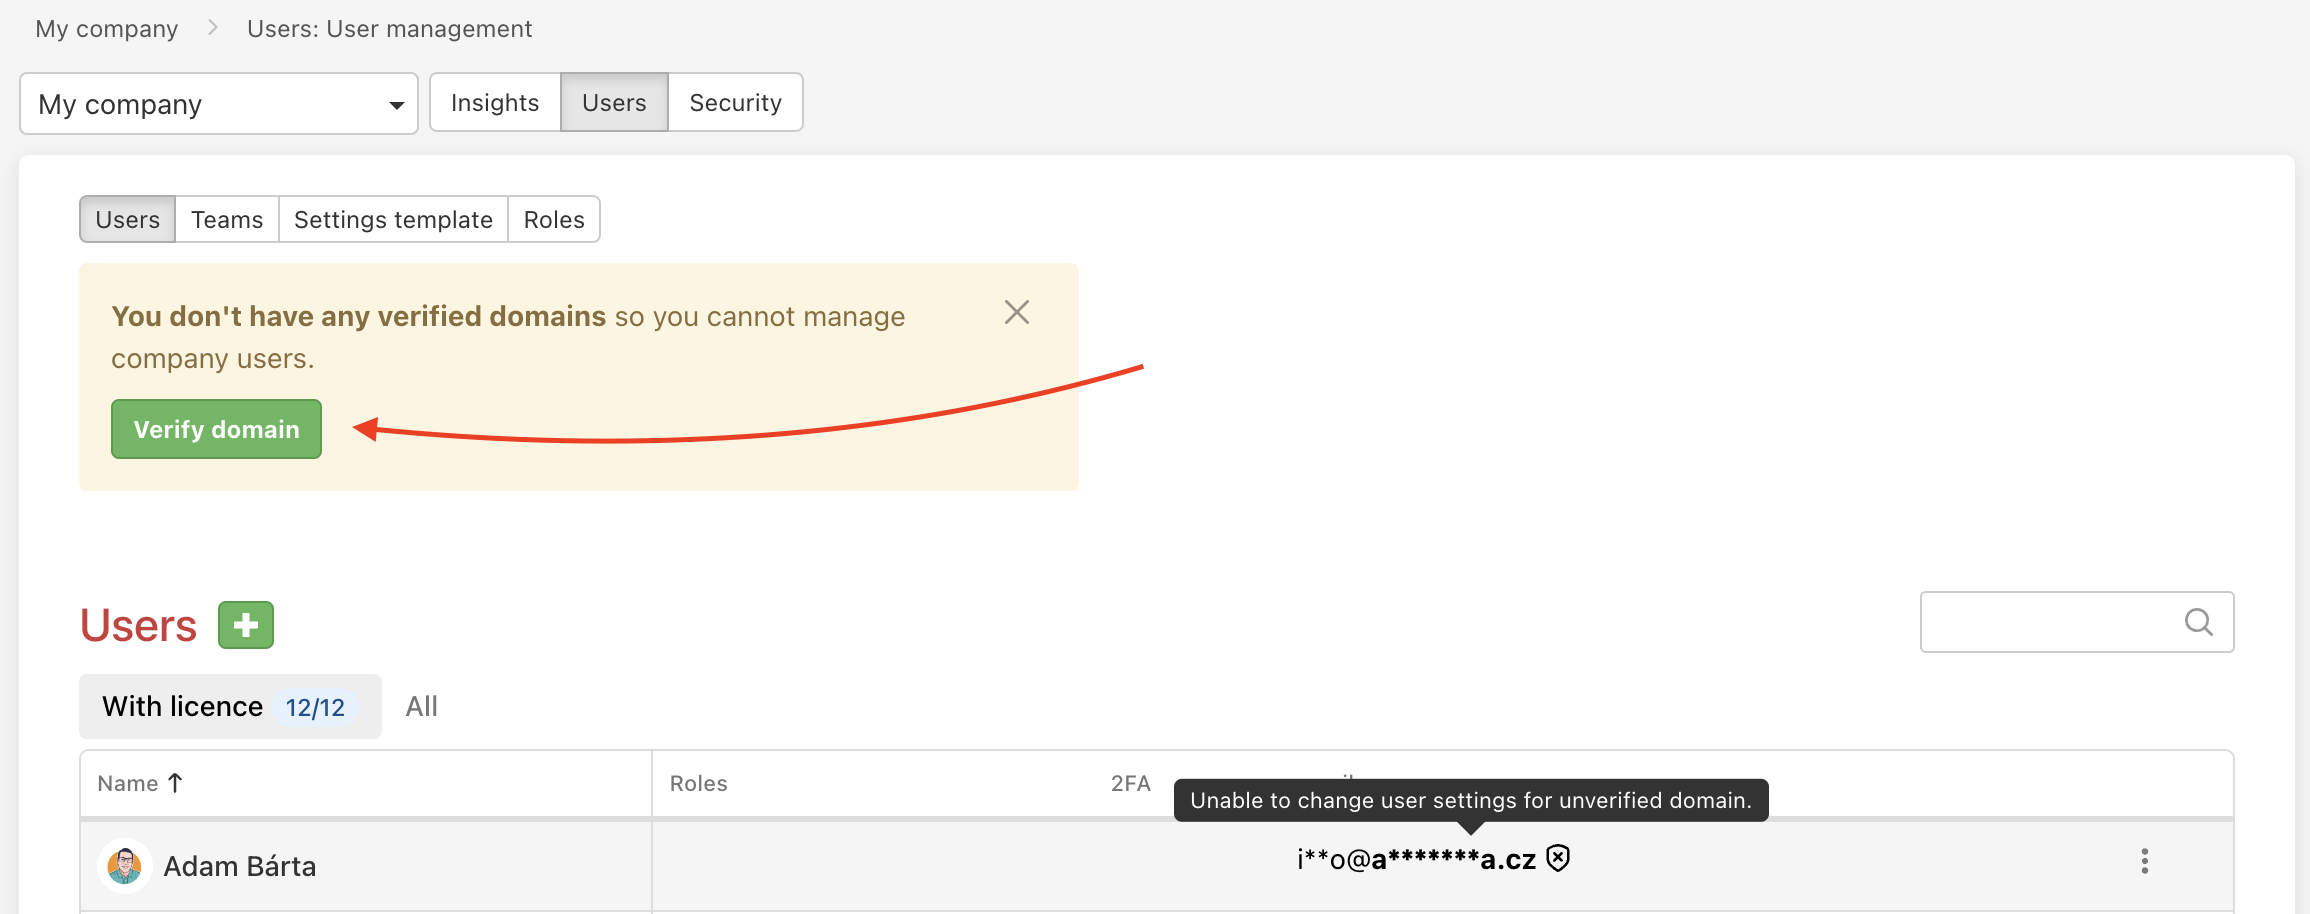
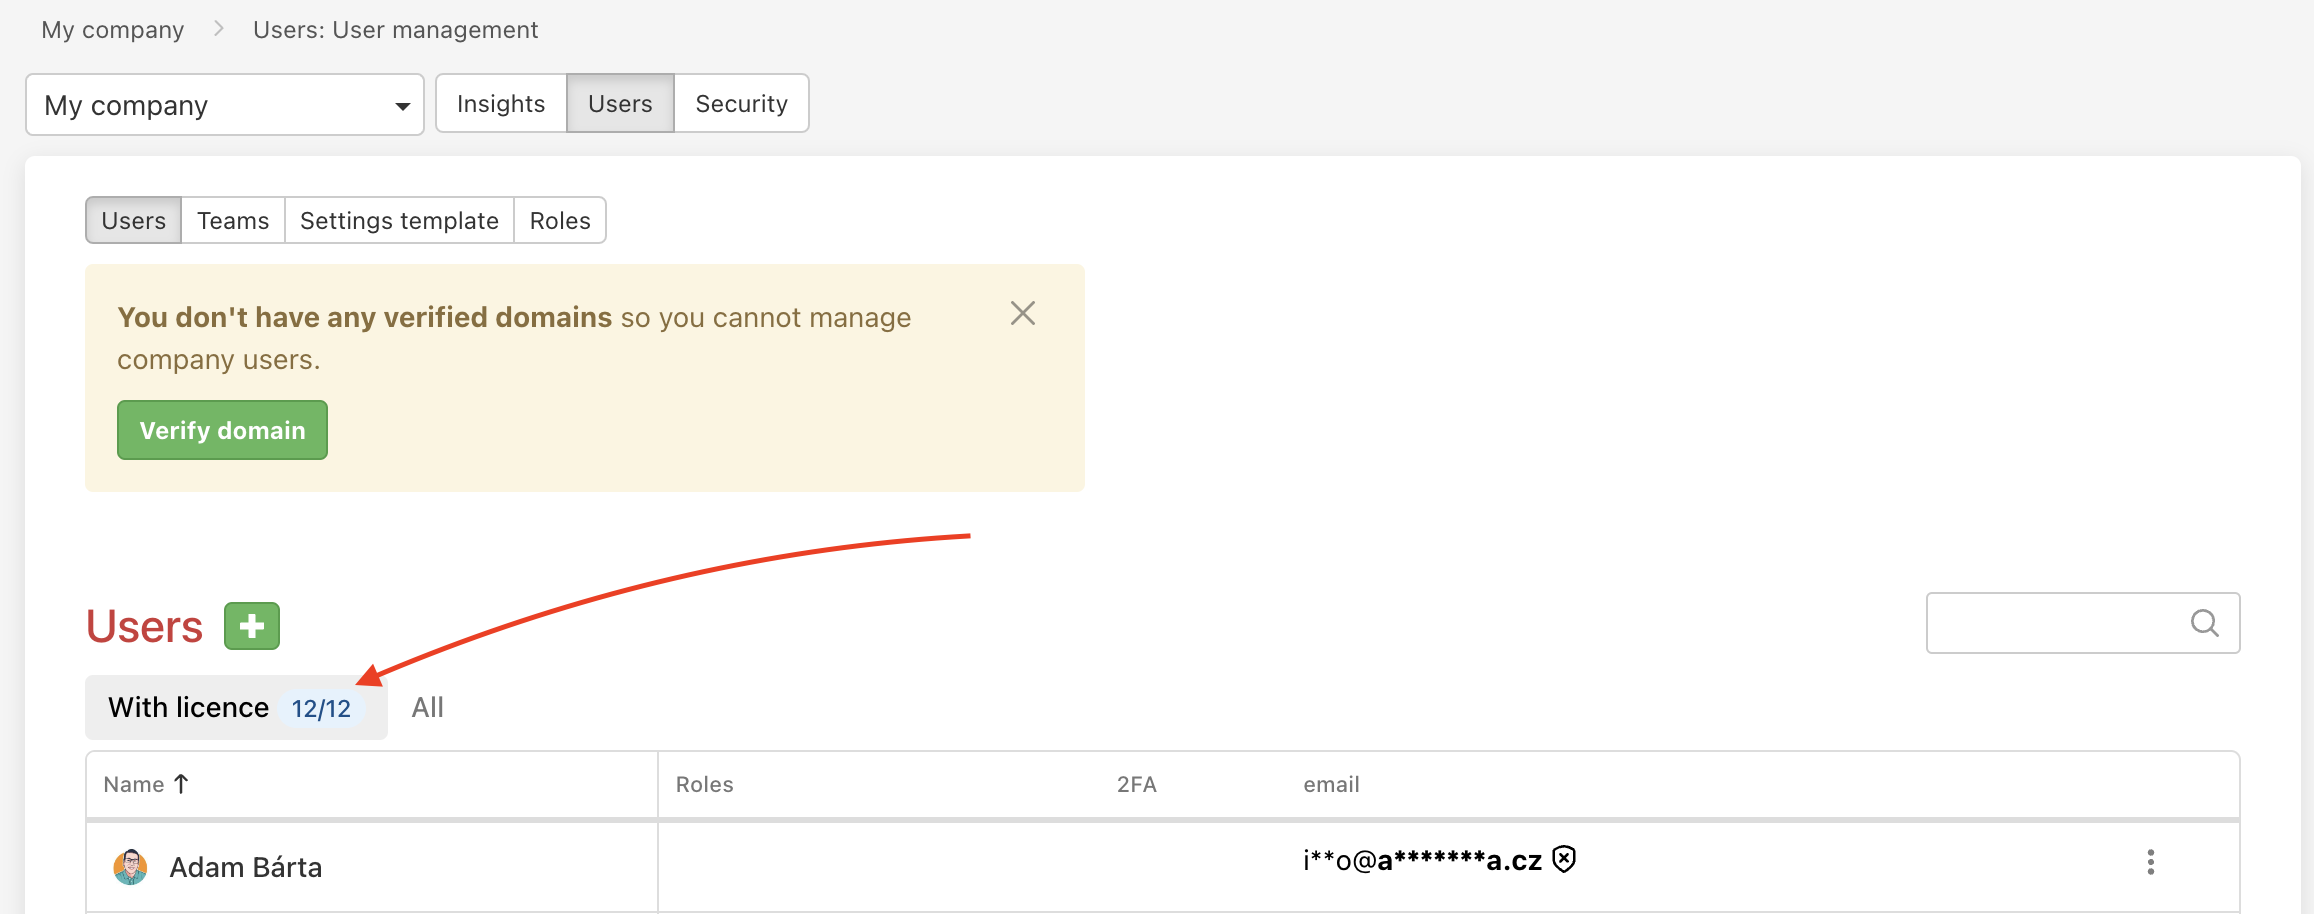
First, verify the domain. Until you do, you cannot see any user emails and will not be able to edit their profiles (profile picture, name, language, nor notification emails).
Click the green button Verify domain and follow these instructions.
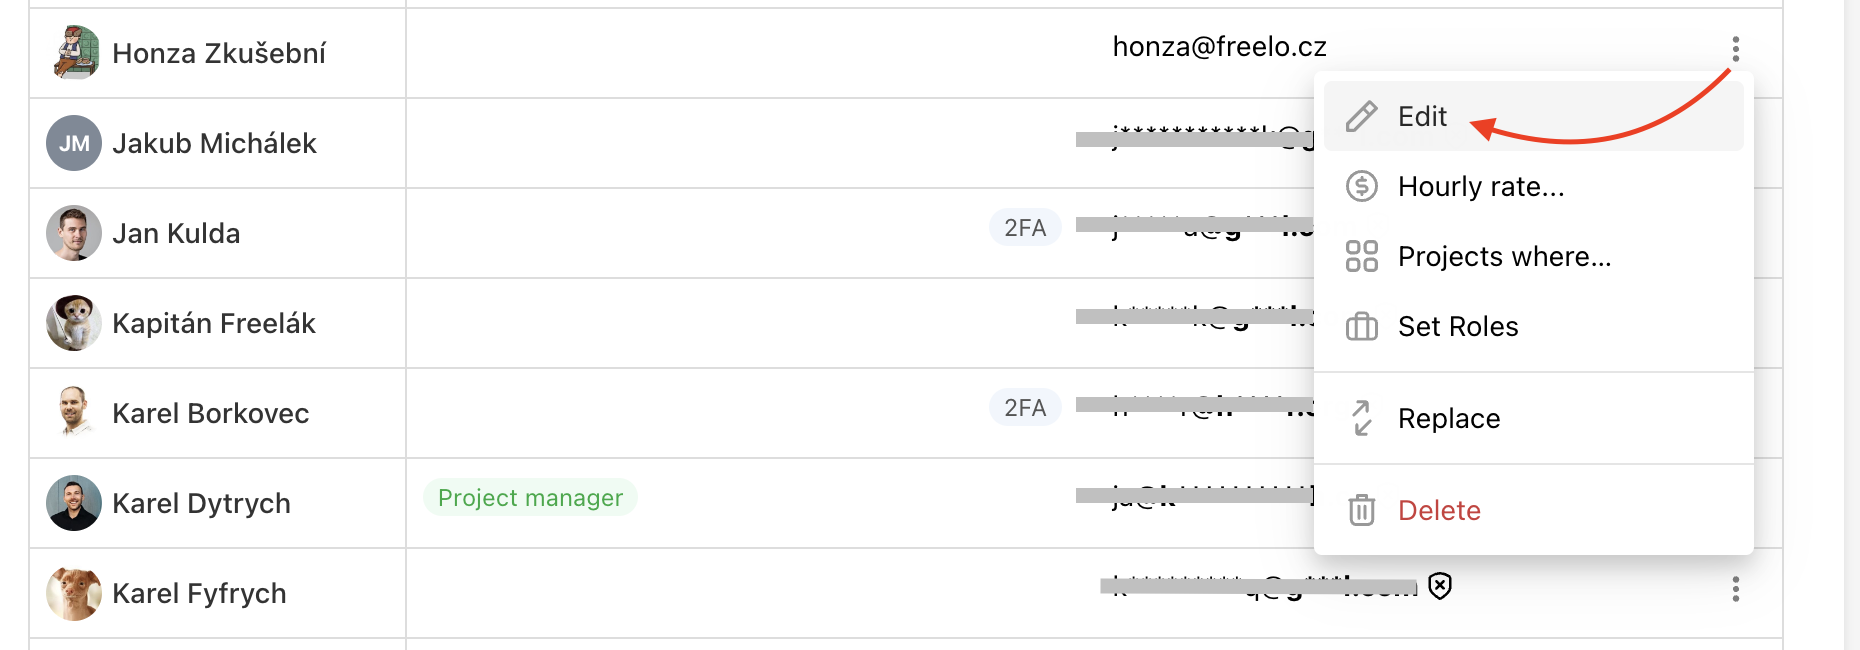
Editing and setting a user
Editing personal information and setting notification e-mails is possible only when you verify the company domain. Click on the three-dot menu to edit the information.
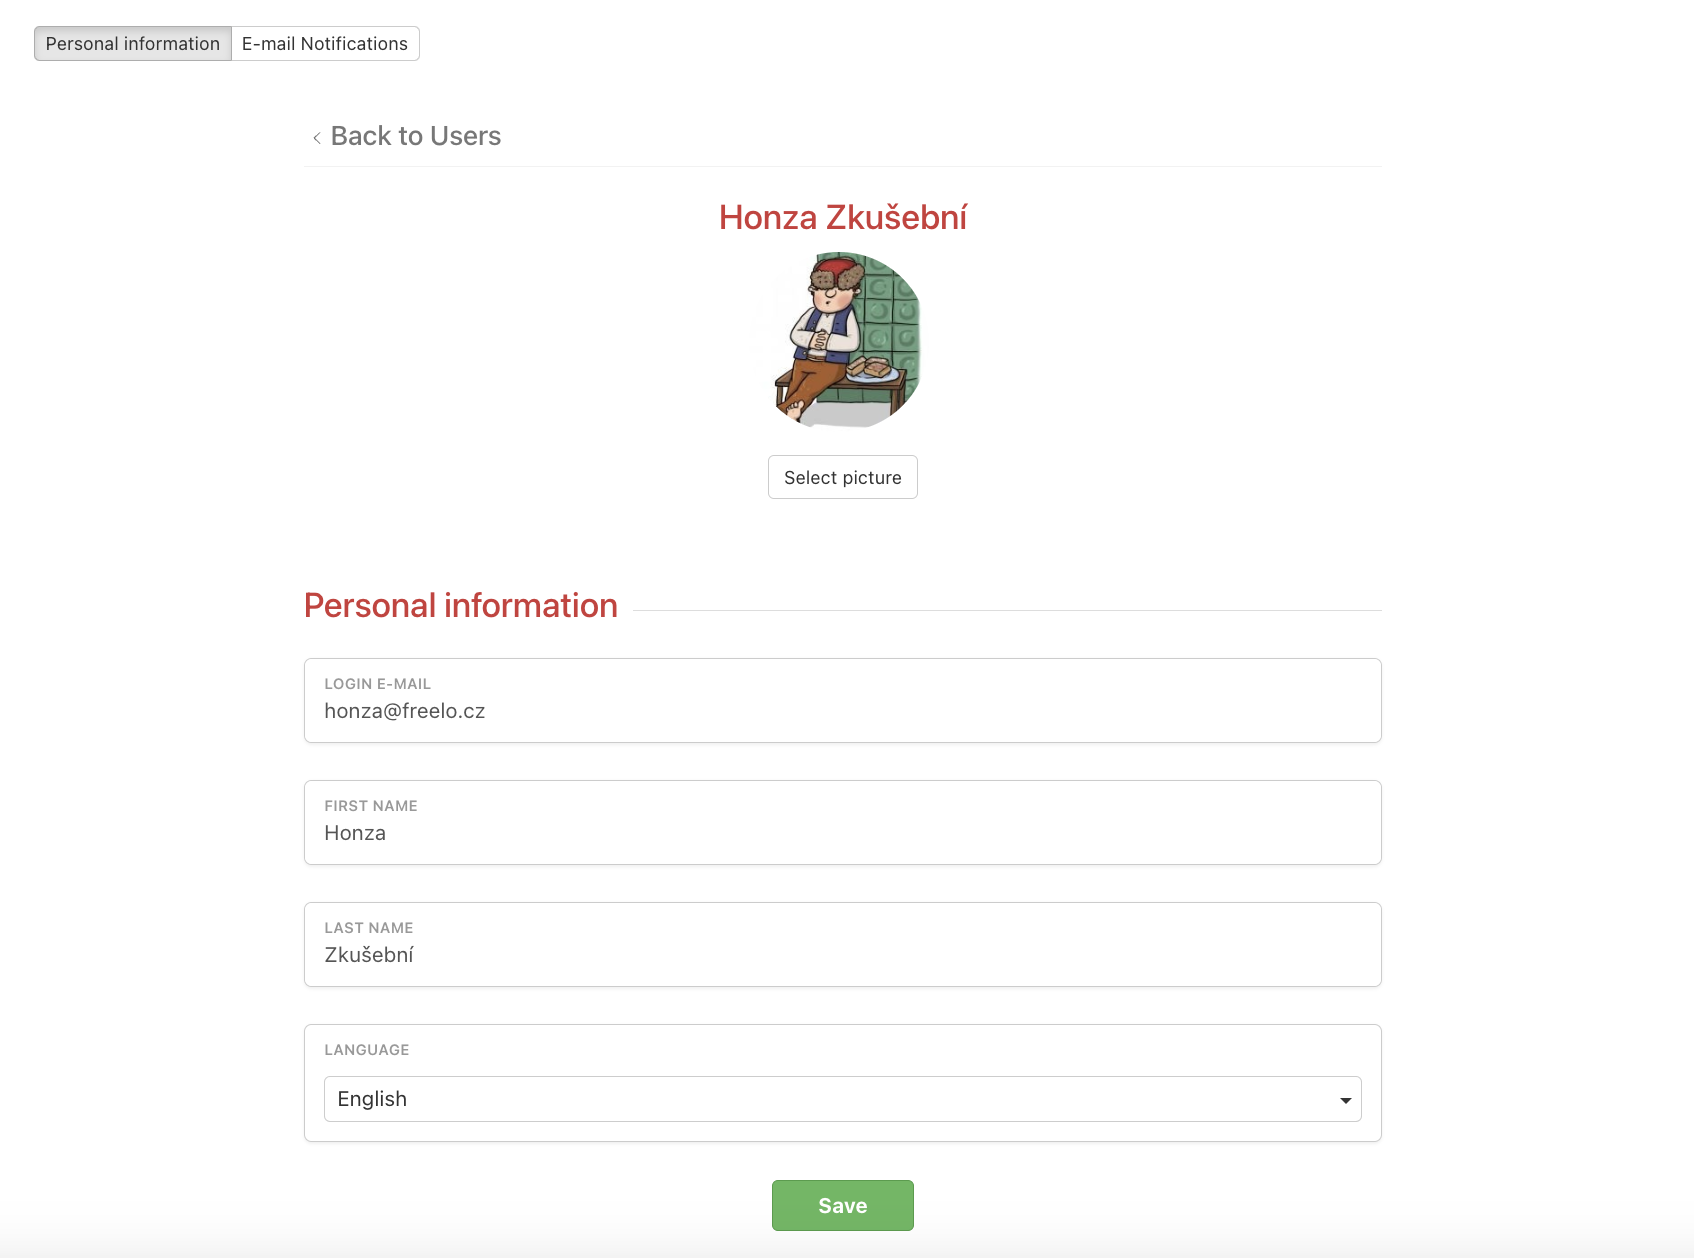
Editing Personal information
Thanks to the verified domain you can edit the user’s name and last name, avatar, and set the language.
To change the avatar (profile picture) click on Select picture and upload a square format. Confirm all changes by clicking on Save.
You cannot change the login email. If you want to change it, send us an e-mail to info@freelo.io with a login change request from your current login email.
Overview of active licenses
In case you want to check how many licenses you have available or who is invited, you can (as captain or Company Captain) easily switch between With licence and All users.
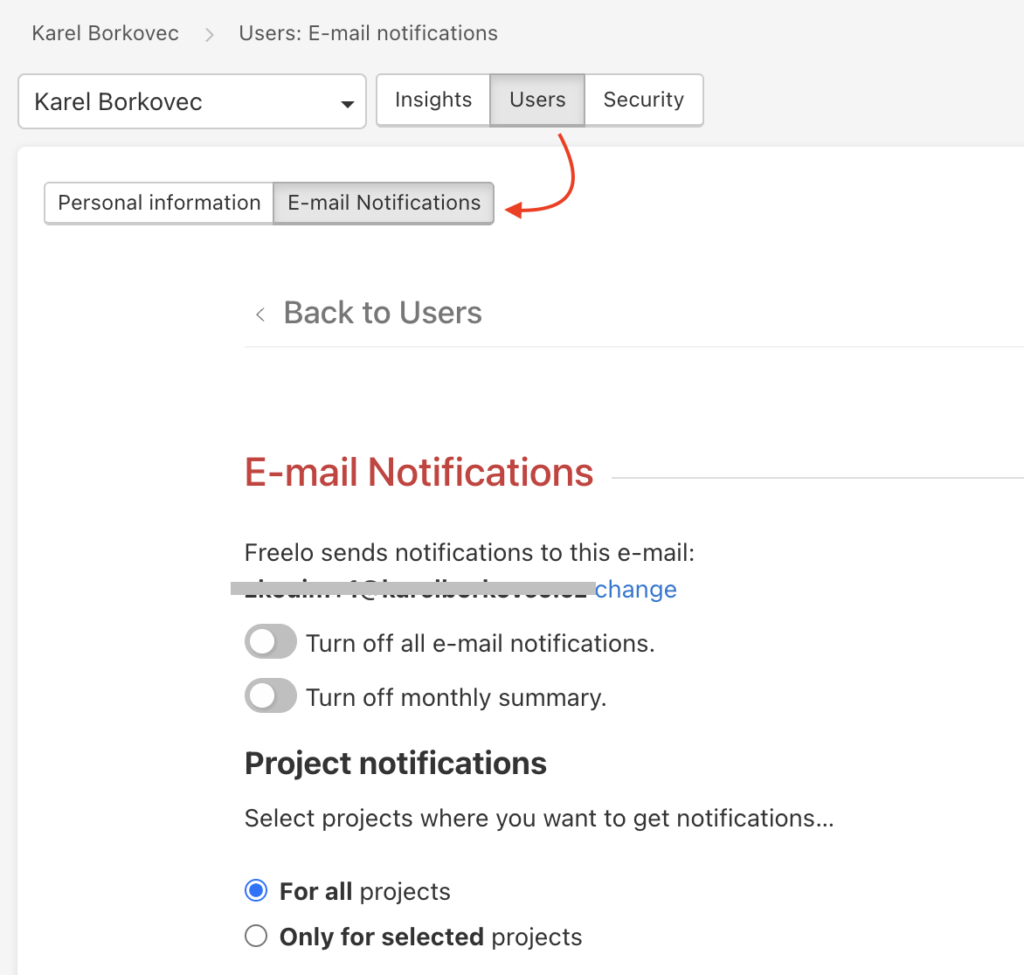
Setting Notification emails
You can select which email notifications the user receives or turn them off completely.
Bulk settings for users
Via the Settings template you can easily set up yourself and selected users with verified domains:
- e-mail notifications,
- project detail layout,
- showing Freelo support chat,
- dark mode.
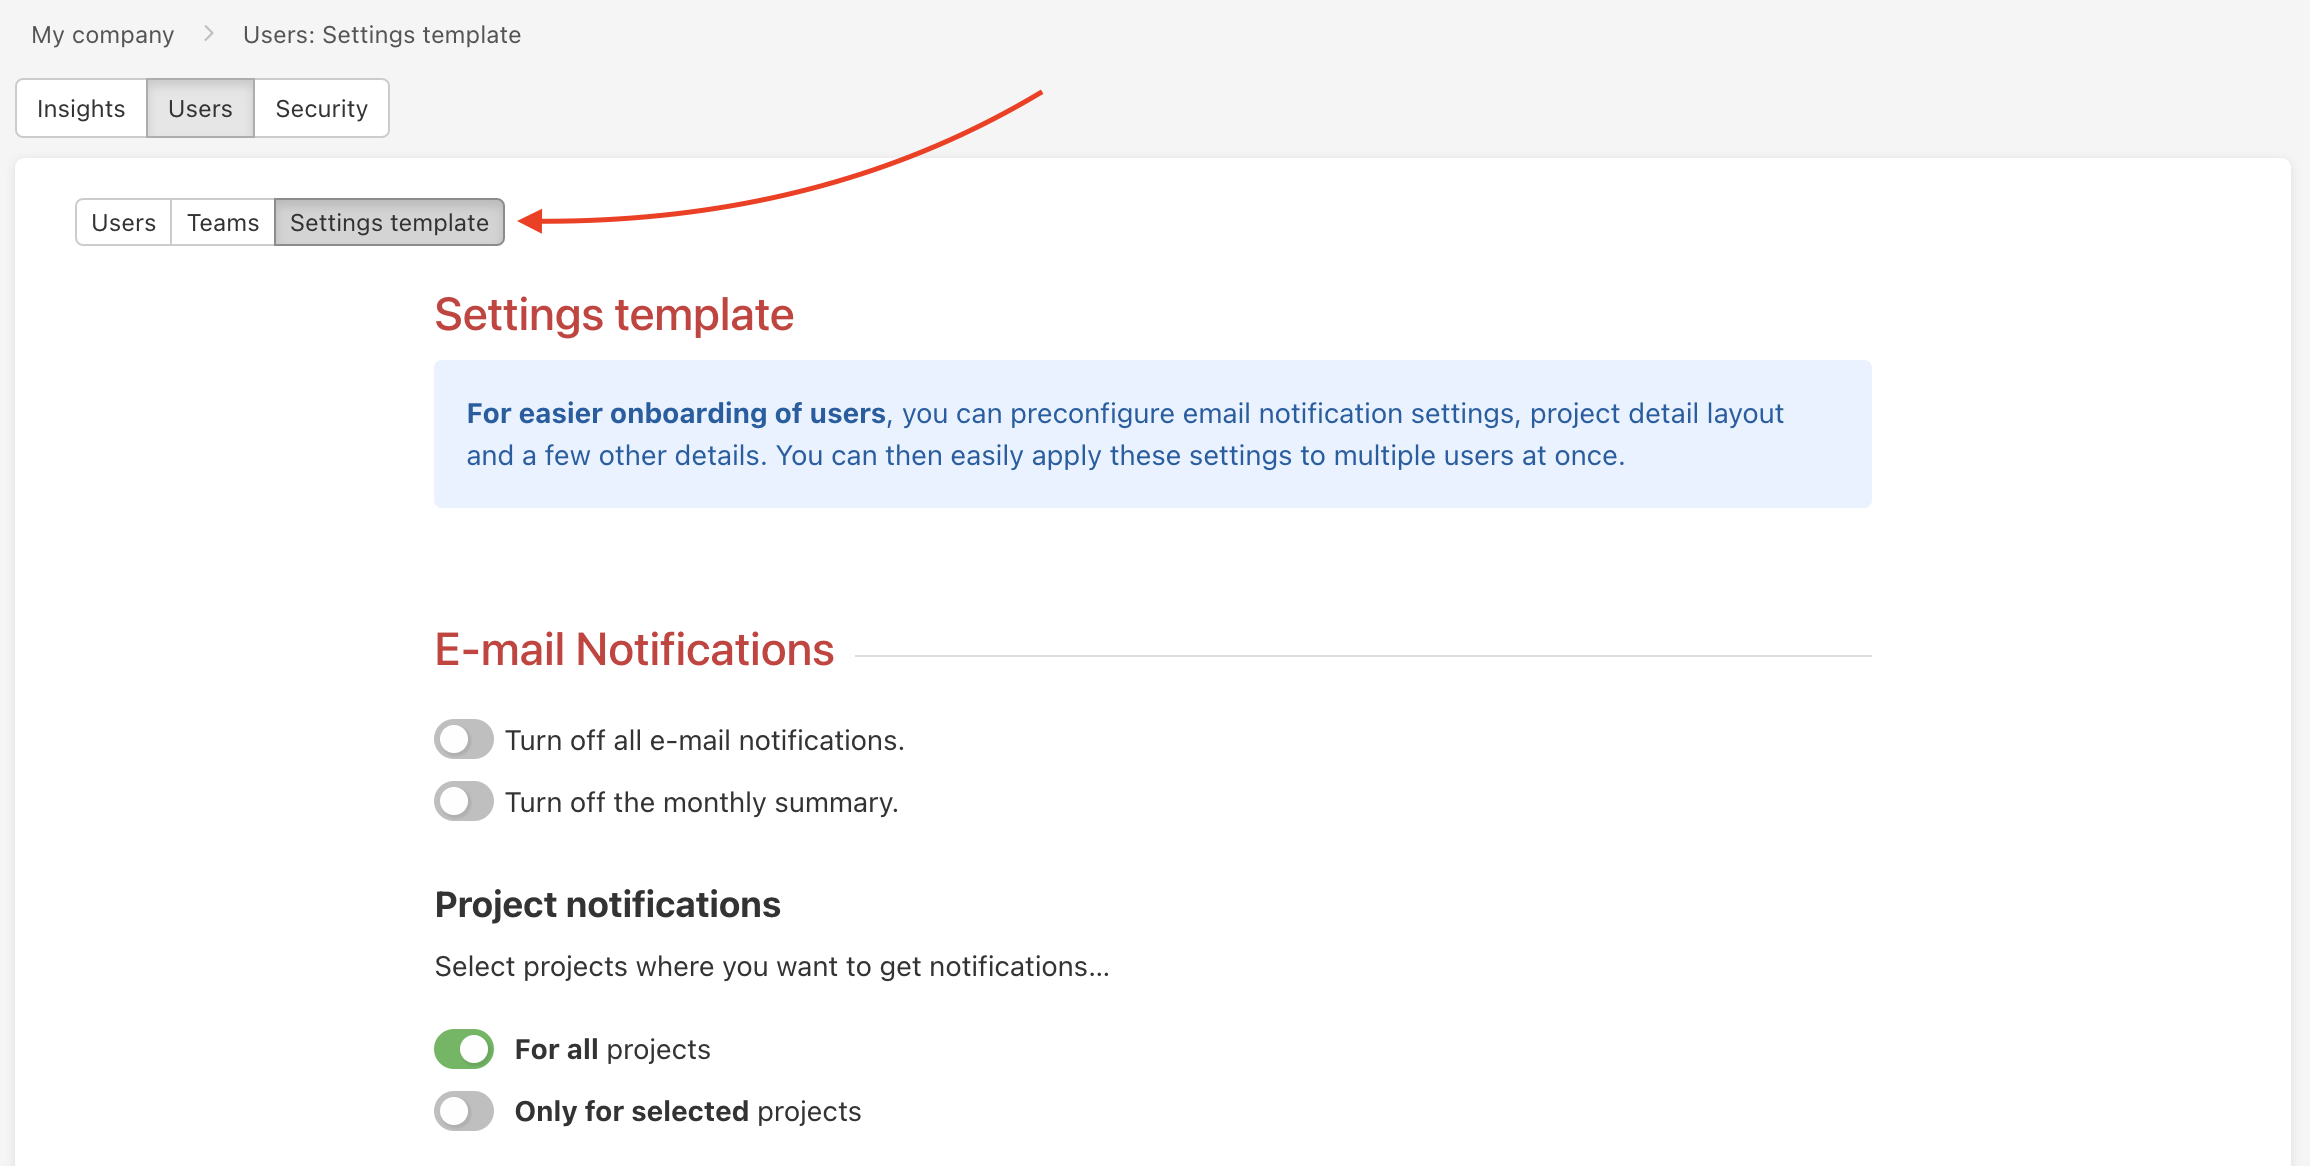
You can save the set template for future use. Or save it and apply it directly to selected users or teams.

Roles and Company Captain
Click the three-dot menu to find a feature Set Roles. There you can appoint Project Manager and Company Captain roles.

Project managers can create new projects under your account. Just click the checkbox, that turns green and confirm via Save roles.
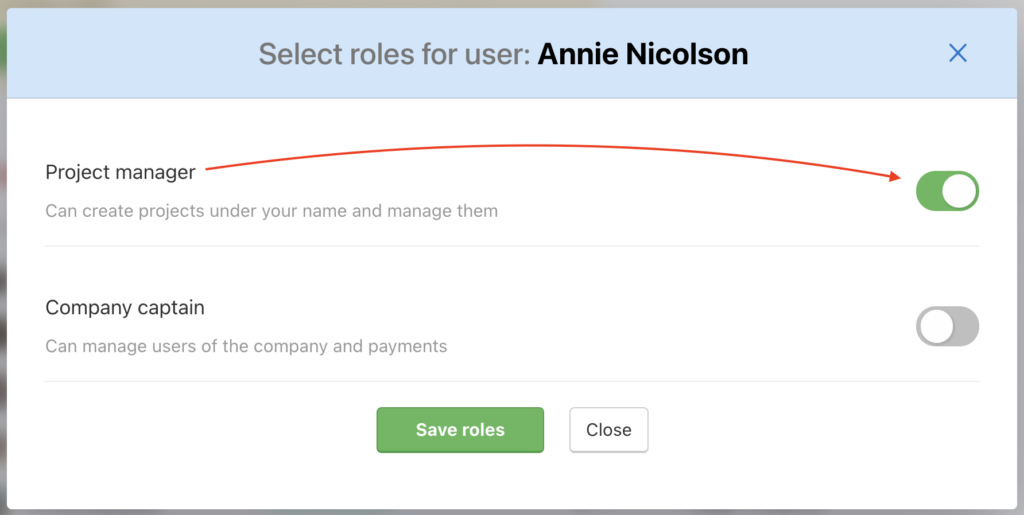
Project Manager is appointed by the Captain or another Company Captain.
Who is Company Captain
Company Captain is a role available in the Business plan only. It is a part of the Business panel. Company Captain has the same rights as the Captain. Thanks to this role users can:
- Create projects under a Captain
- Invite users and set access to To-Do lists
- See the financial side of a project
- Access Insights in Business panel
- Manage users in the Business panel
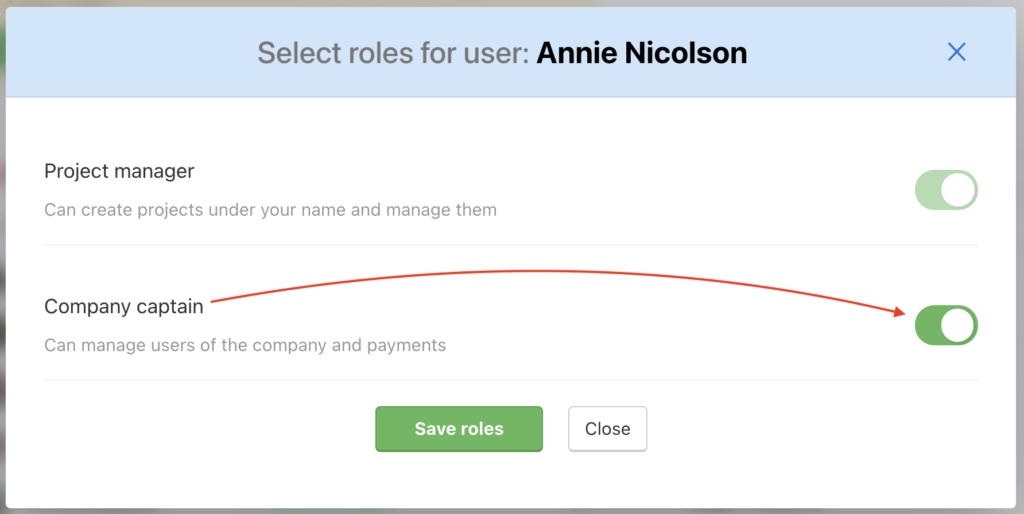
The Company Captain can be named by the Captain or another Company Captain. Company Captain is automatically a Project Manager and Admin of all projects.
Click the three-dot menu on a user > click Set Roles > click the checkbox by Company Captain (Project Manager is activated automatically) > Save roles.
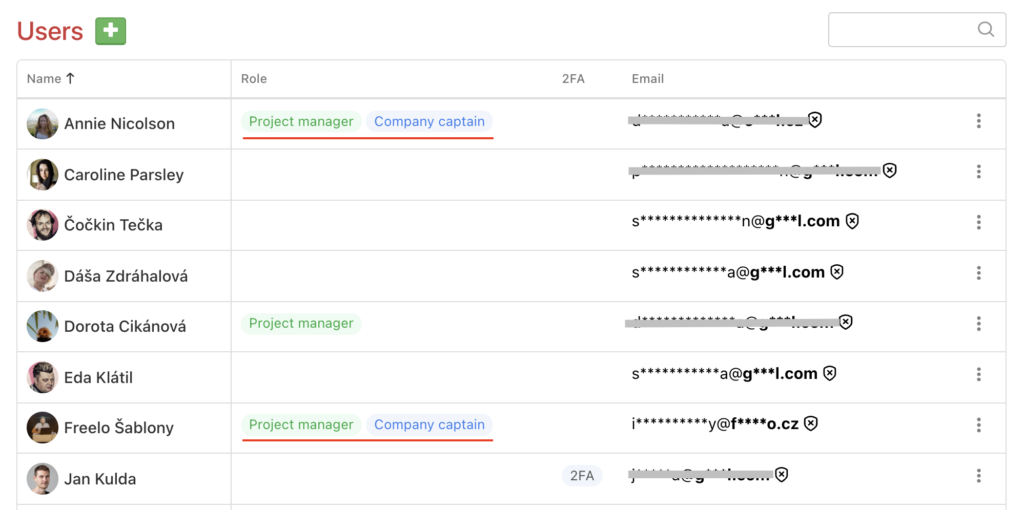
In the overview, you can see which roles the user has.
More features
More features are hidden under the three-dot menu on the right.

Adding a new user
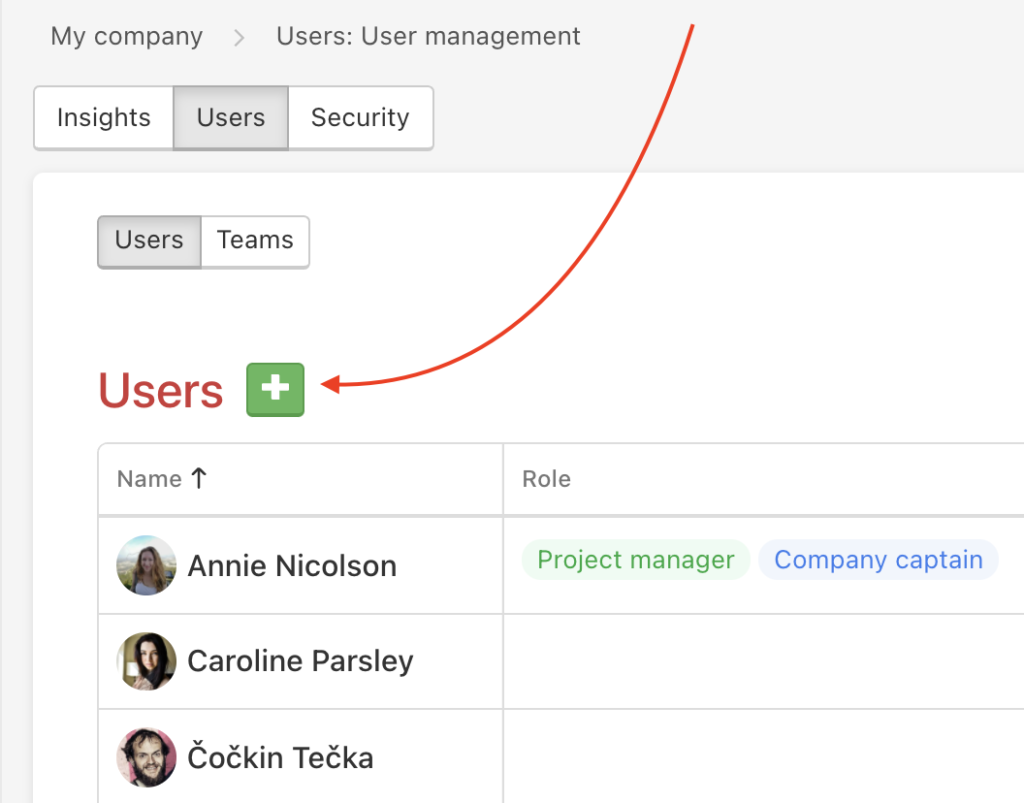
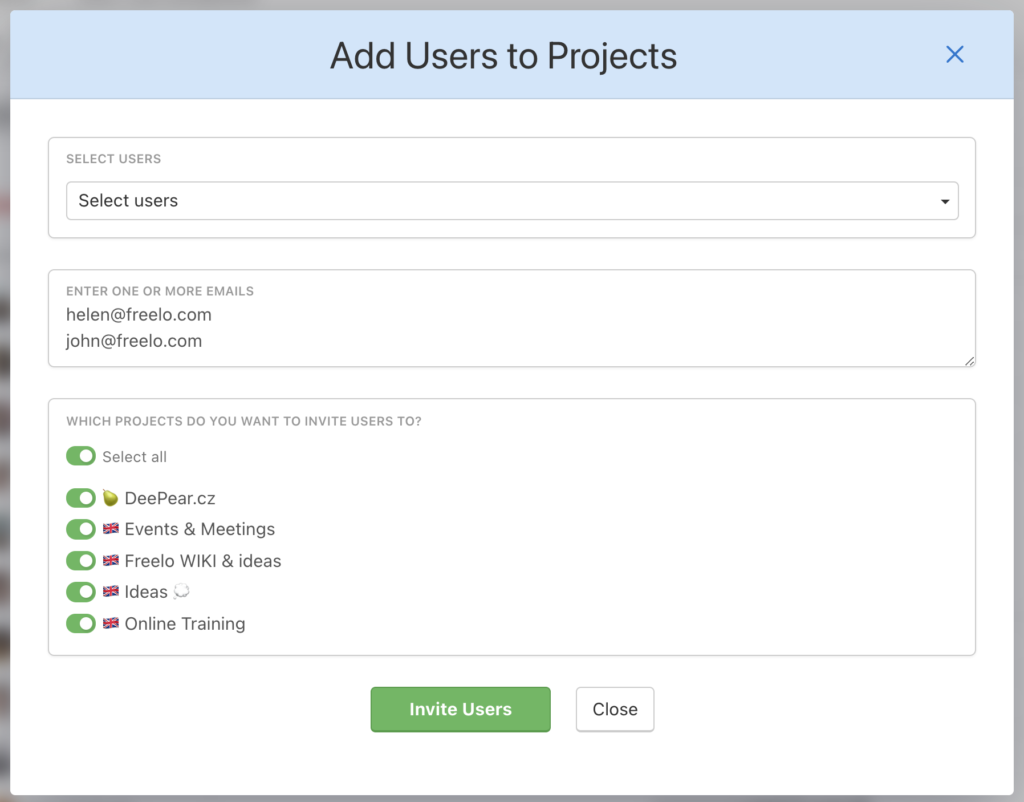
Via the green button + you can invite new users to your projects. After clicking on it, a form will appear where you select an already existing user or enter one or more email addresses.
Select users or enter emails and select projects to which you want them to have access to. Confirm via Invite Users.
Adding to projects in bulk
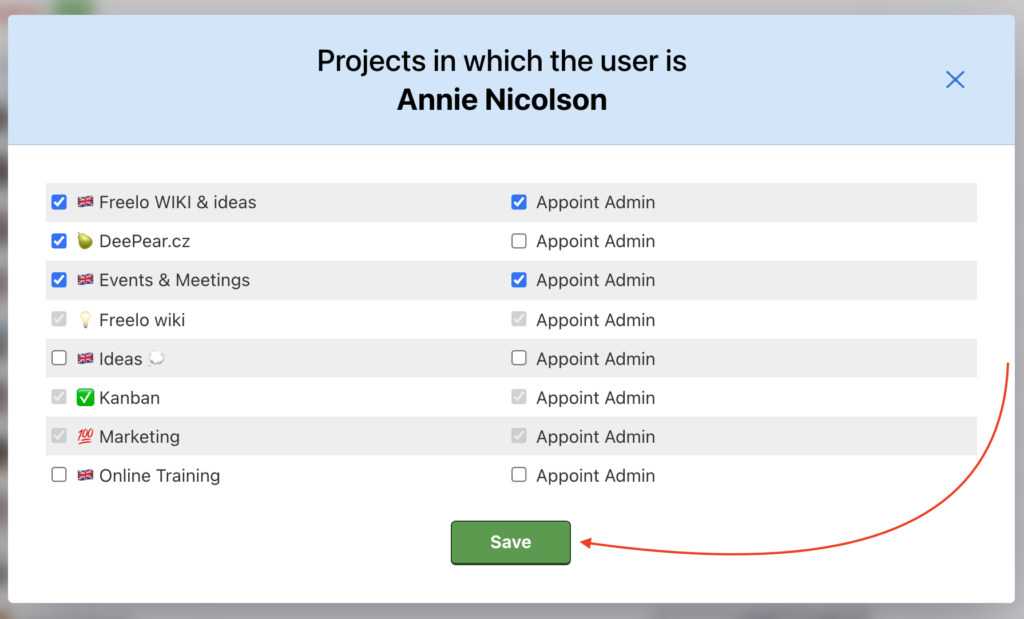
Click the three-dot menu on the right > Projects where… and select projects you want to invite the user to or uncheck the checkbox to remove the user from other projects.
In some projects, you can assign the Admin role. Click the checkbox Appoint Admin and confirm via Save.
User’s hourly rate
This feature allows you to set a user’s hourly rate across multiple projects and in different currencies. How to set hourly rate properly is described in our Help section User’s hourly rate. If you are captain of the paid plan, you can set hourly rate for yourself anytime.
Go to User management > three-dot menu > Hourly rate.
Replacing user
Replacing users is a great feature that can save you a lot of time when transferring tasks to a new assignee. It is useful when an employee leaves or changes position.
In the three-dot menu on the user, line find > Replace.

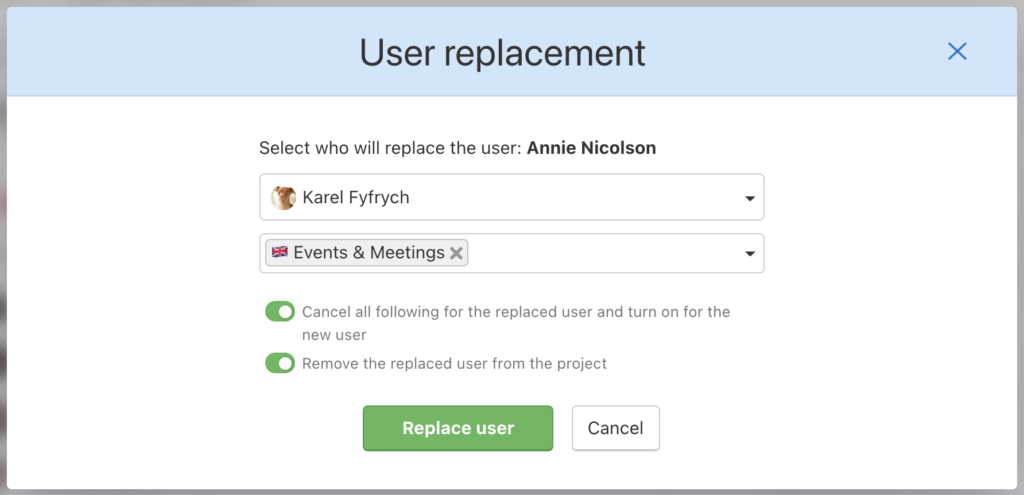
The current user can be replaced by someone else in all tasks. It is necessary to invite the user first.
What is going to happen?
- Tasks assigned to user A will be assigned to user B
- You will invite user B to all selected projects, where user A currently still is
- You can select if:
- User B is following all tasks that were followed by user A. User A will automatically unfollow those tasks. Option: Cancel all following for the replaced user and turn on for the new user
- User A is removed from the selected projects. Option: Remove the replaced user from the project
To apply the options above, click the checkbox. Save the setting via the green button Replace user.
Removing user
The last option in the three-dot menu > Delete.

A list of all your projects will appear. The user will be removed from all of them. Click the red button Remove user.
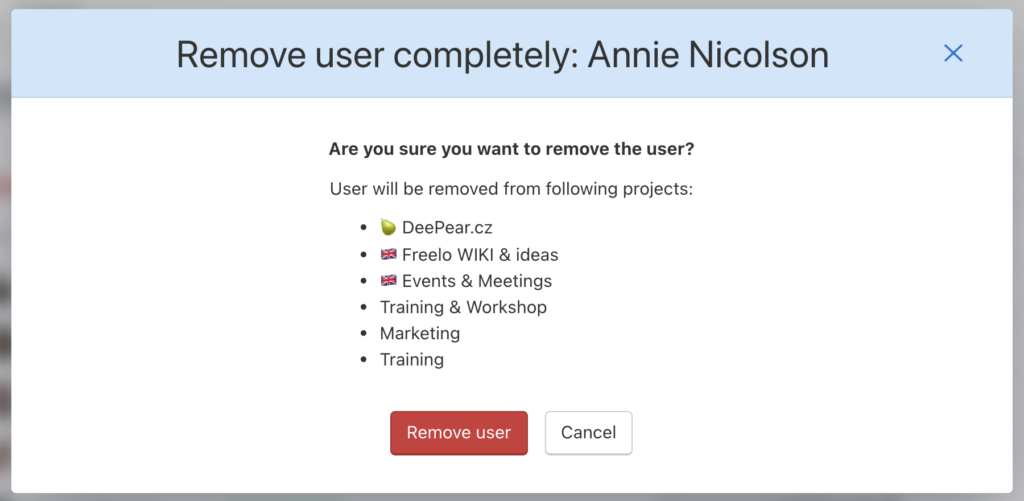
The user will no longer be in a list of users in the Business panel. If you share other captain’s projects, you will be able to find the deleted user on the All users page.