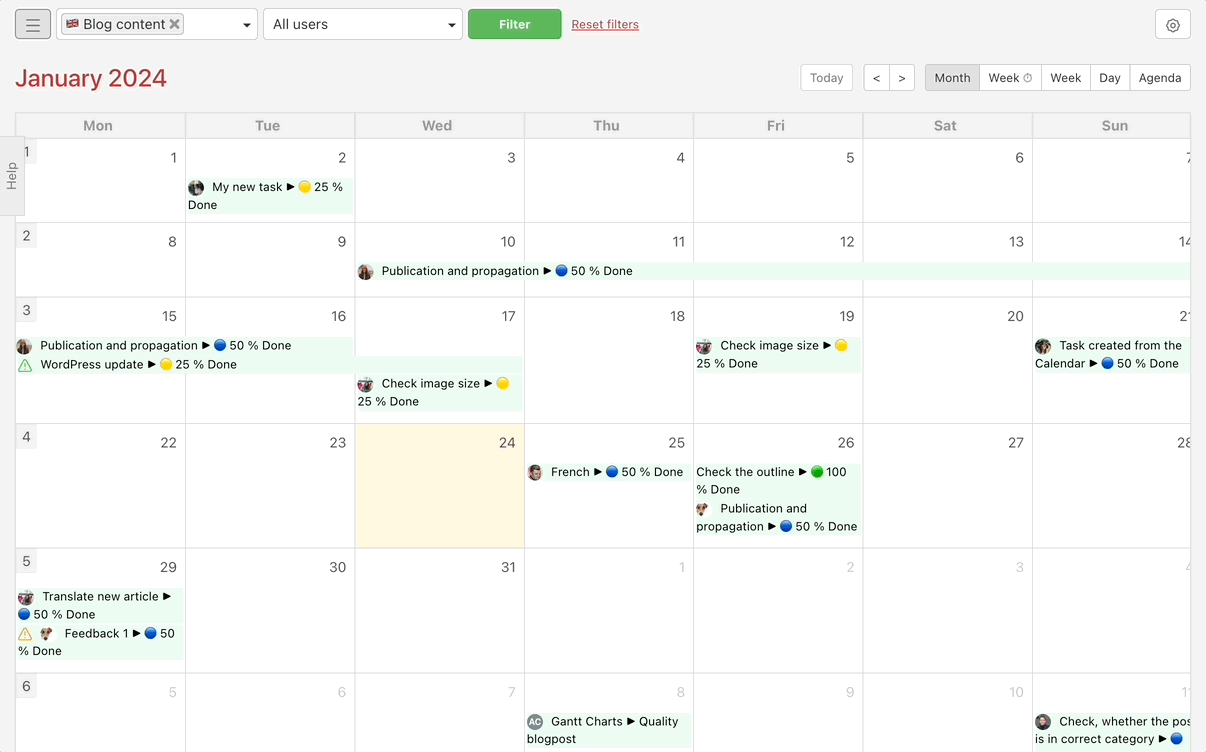
A calendar with tasks and subtasks can be really helpful. It’s an effective overview of all deadlines of the tasks and subtasks. It is an easy way to plan out work with your team, keep track of people’s workload or create new tasks directly for specific days.
Both tasks and subtasks can have a due date.
Find the Calendar icon on the right side of the top blue section.
You can view the task detail of each task and subtask using a keyboard shortcut. Hover over the sub/task + press Q or double click directly on the event name. This action opens a modal window where you can see the subtasks, discussion, add comments and edit the sub/task (assignee, follower, due date, report, add a task label or priority).
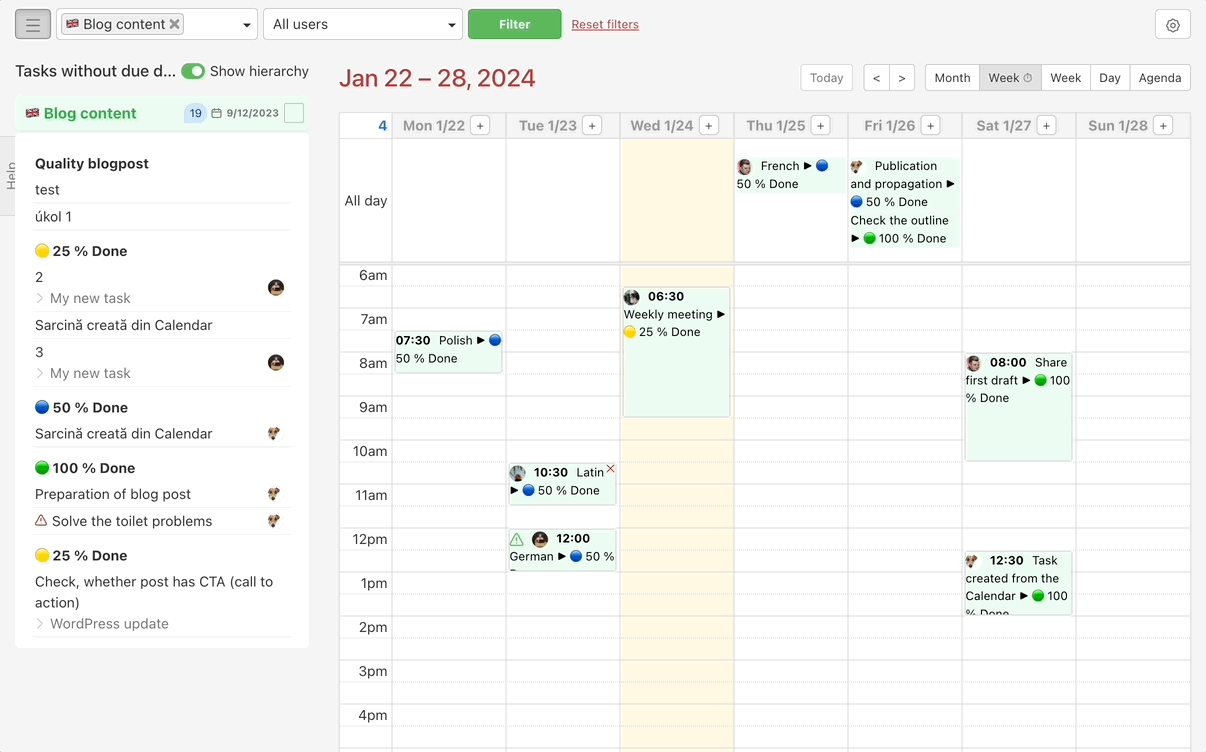
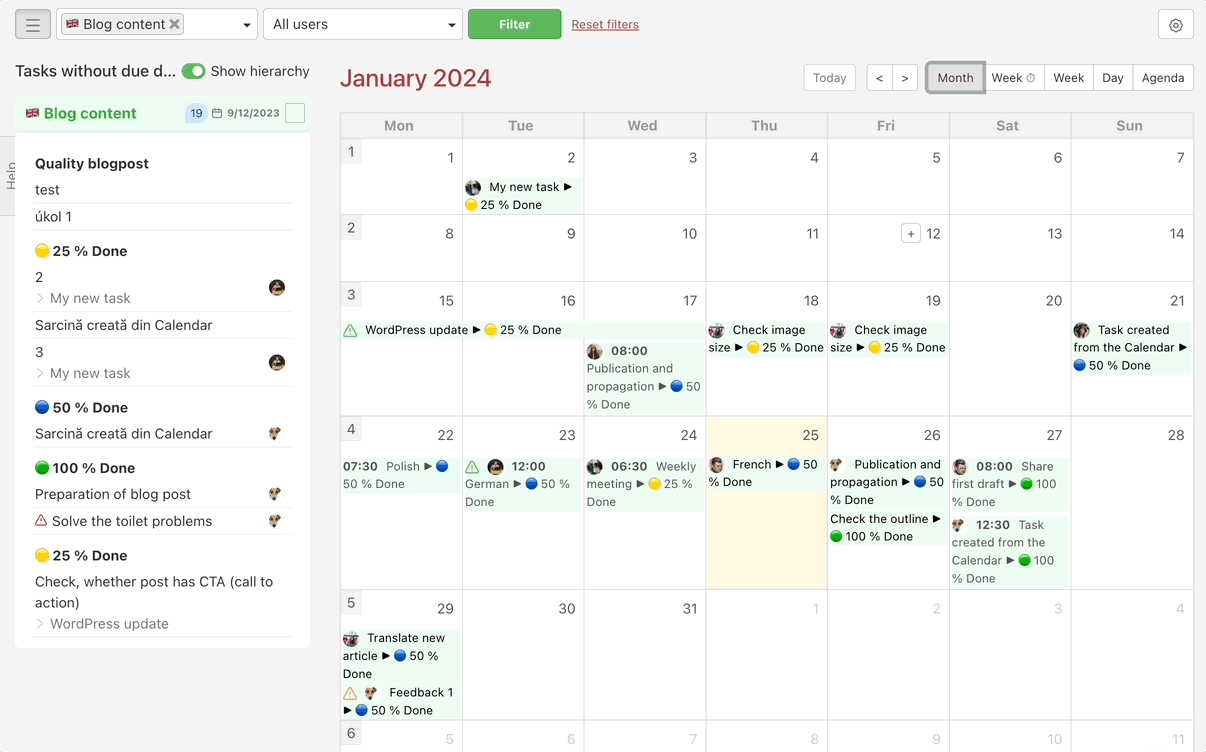
Plan tasks without due date
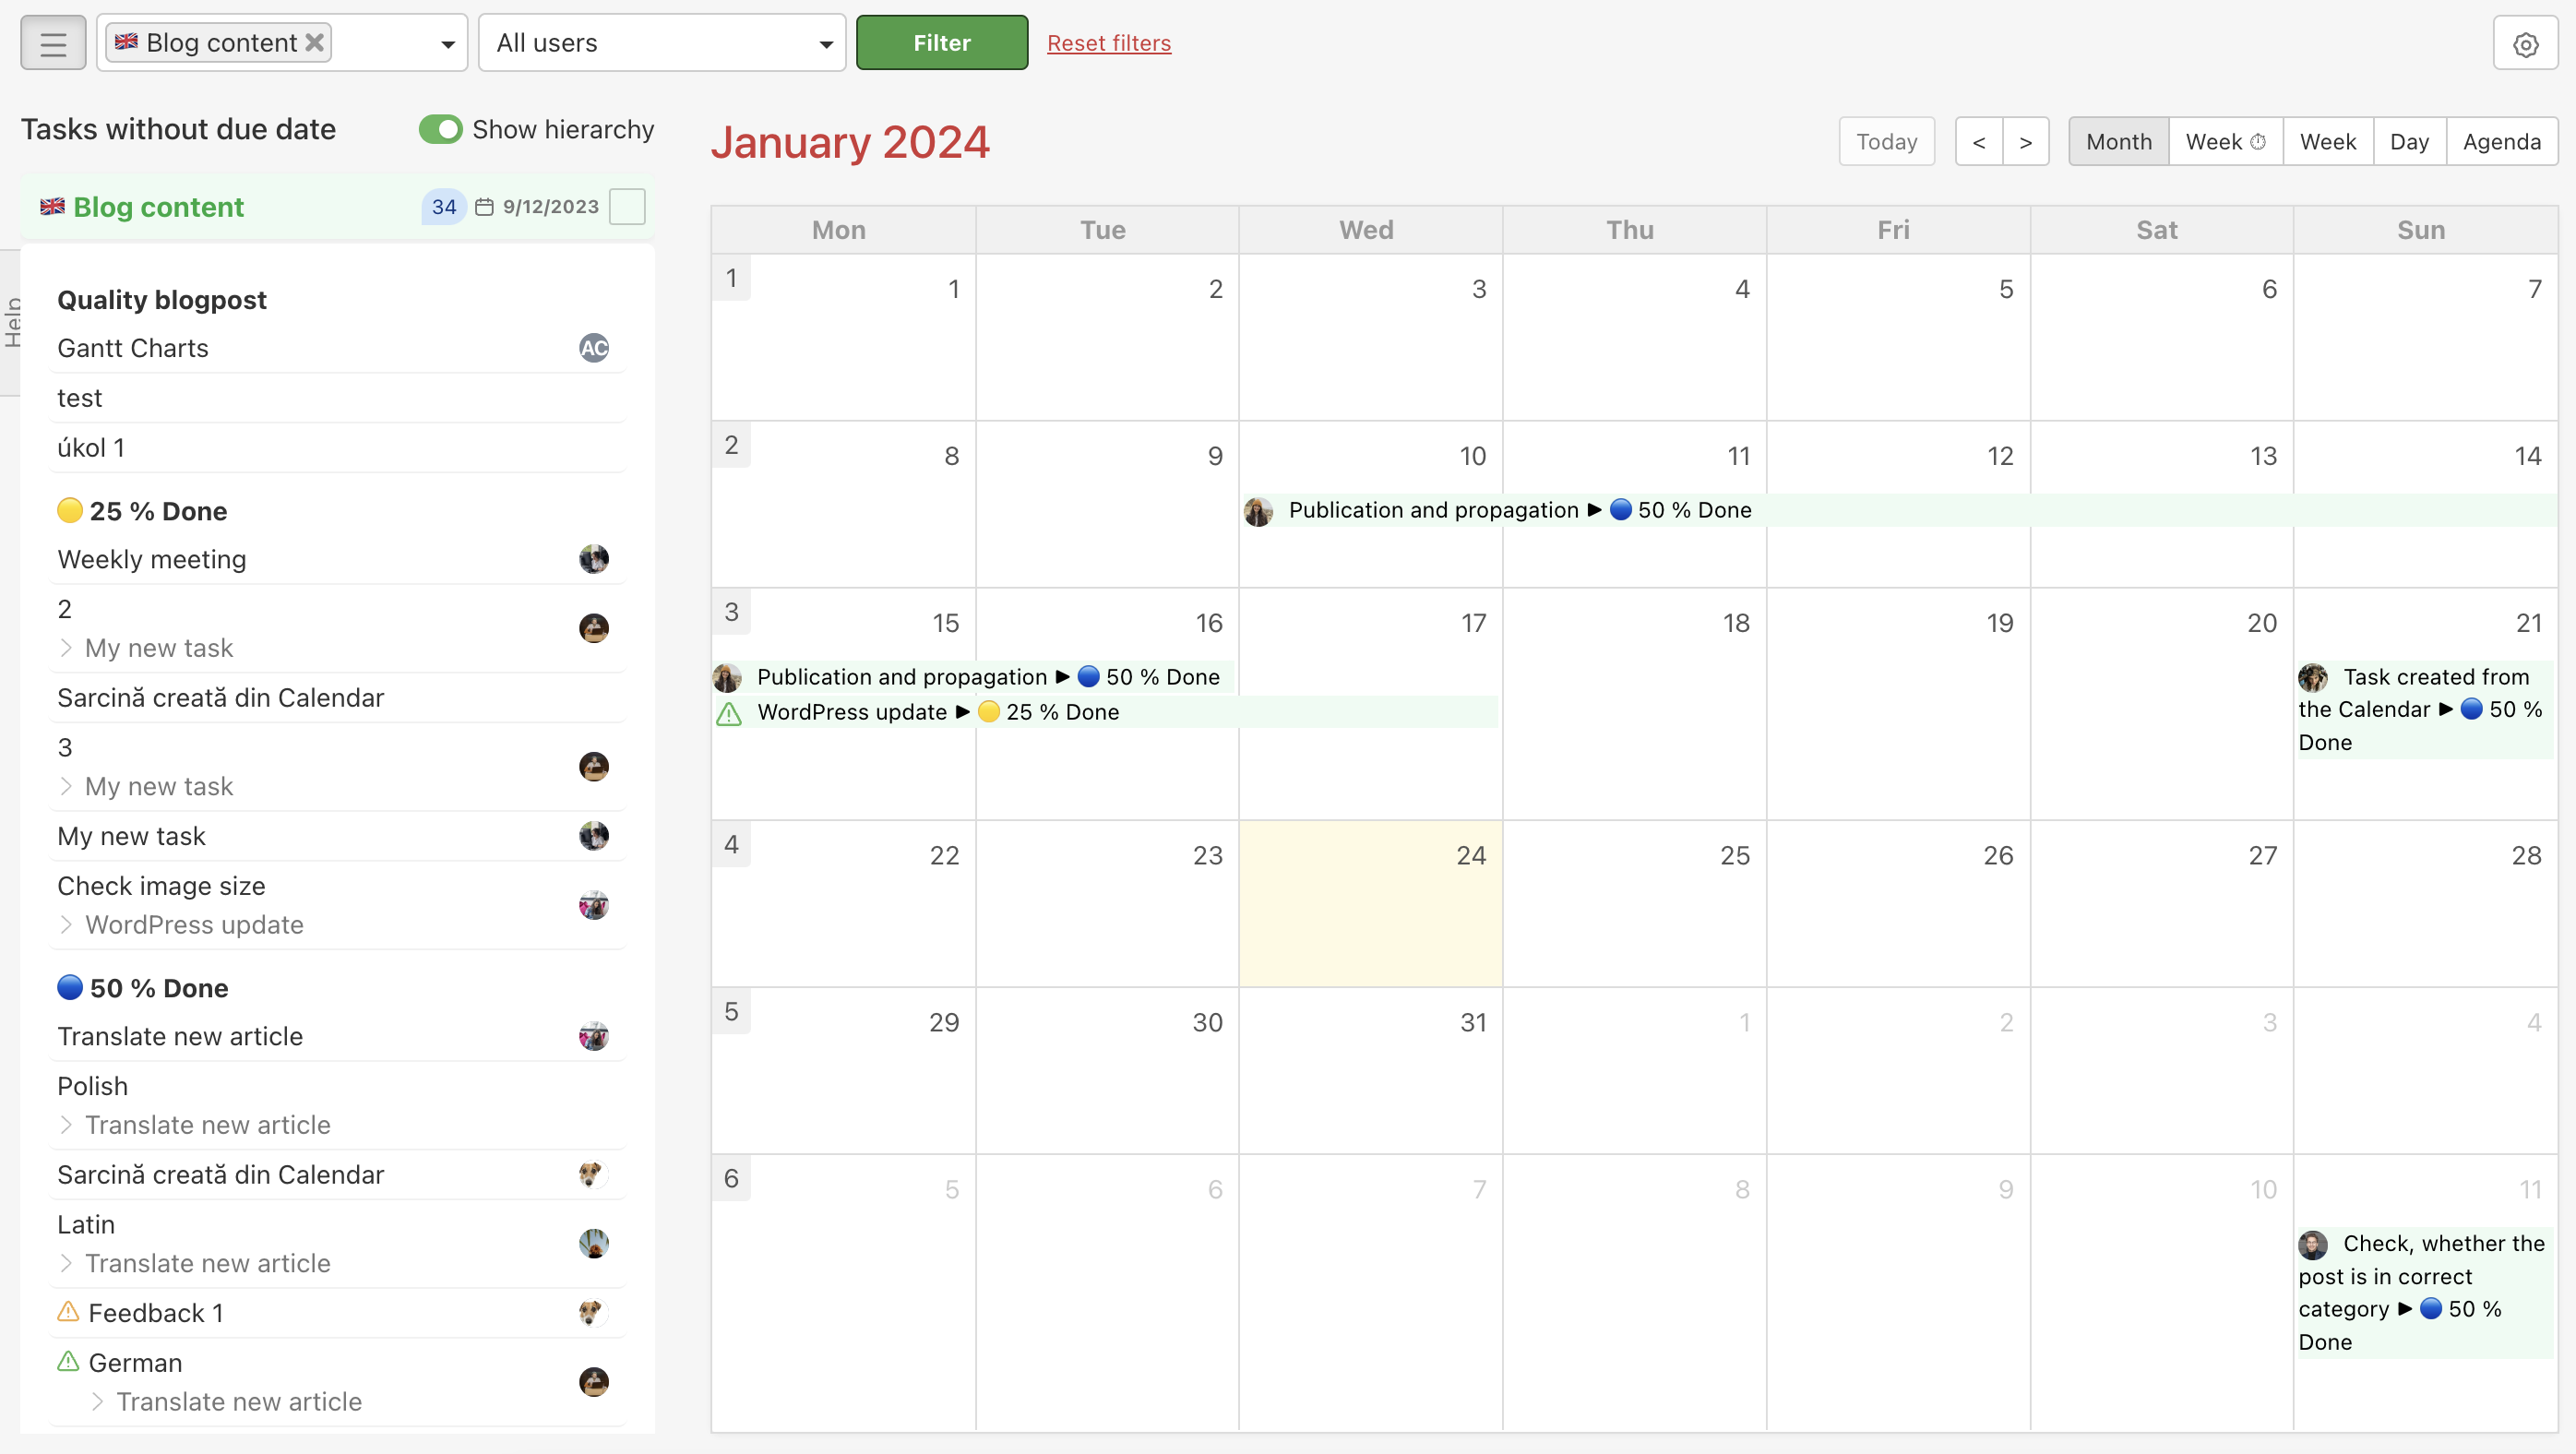
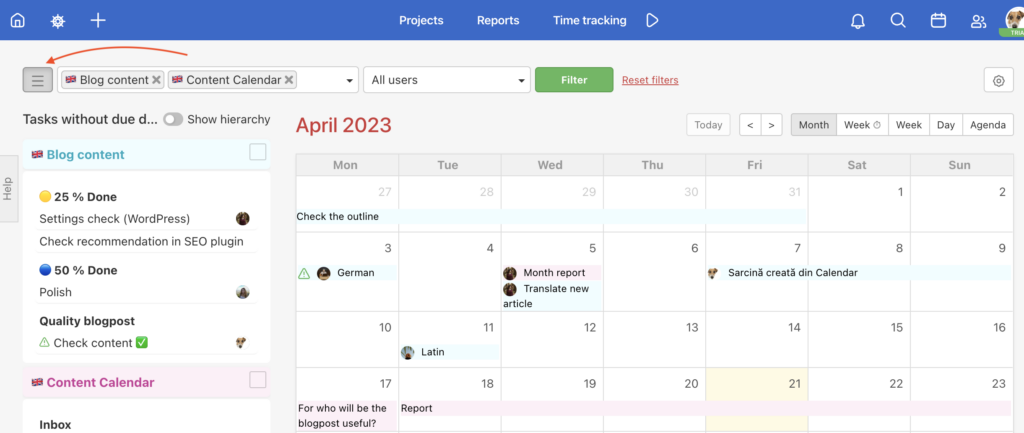
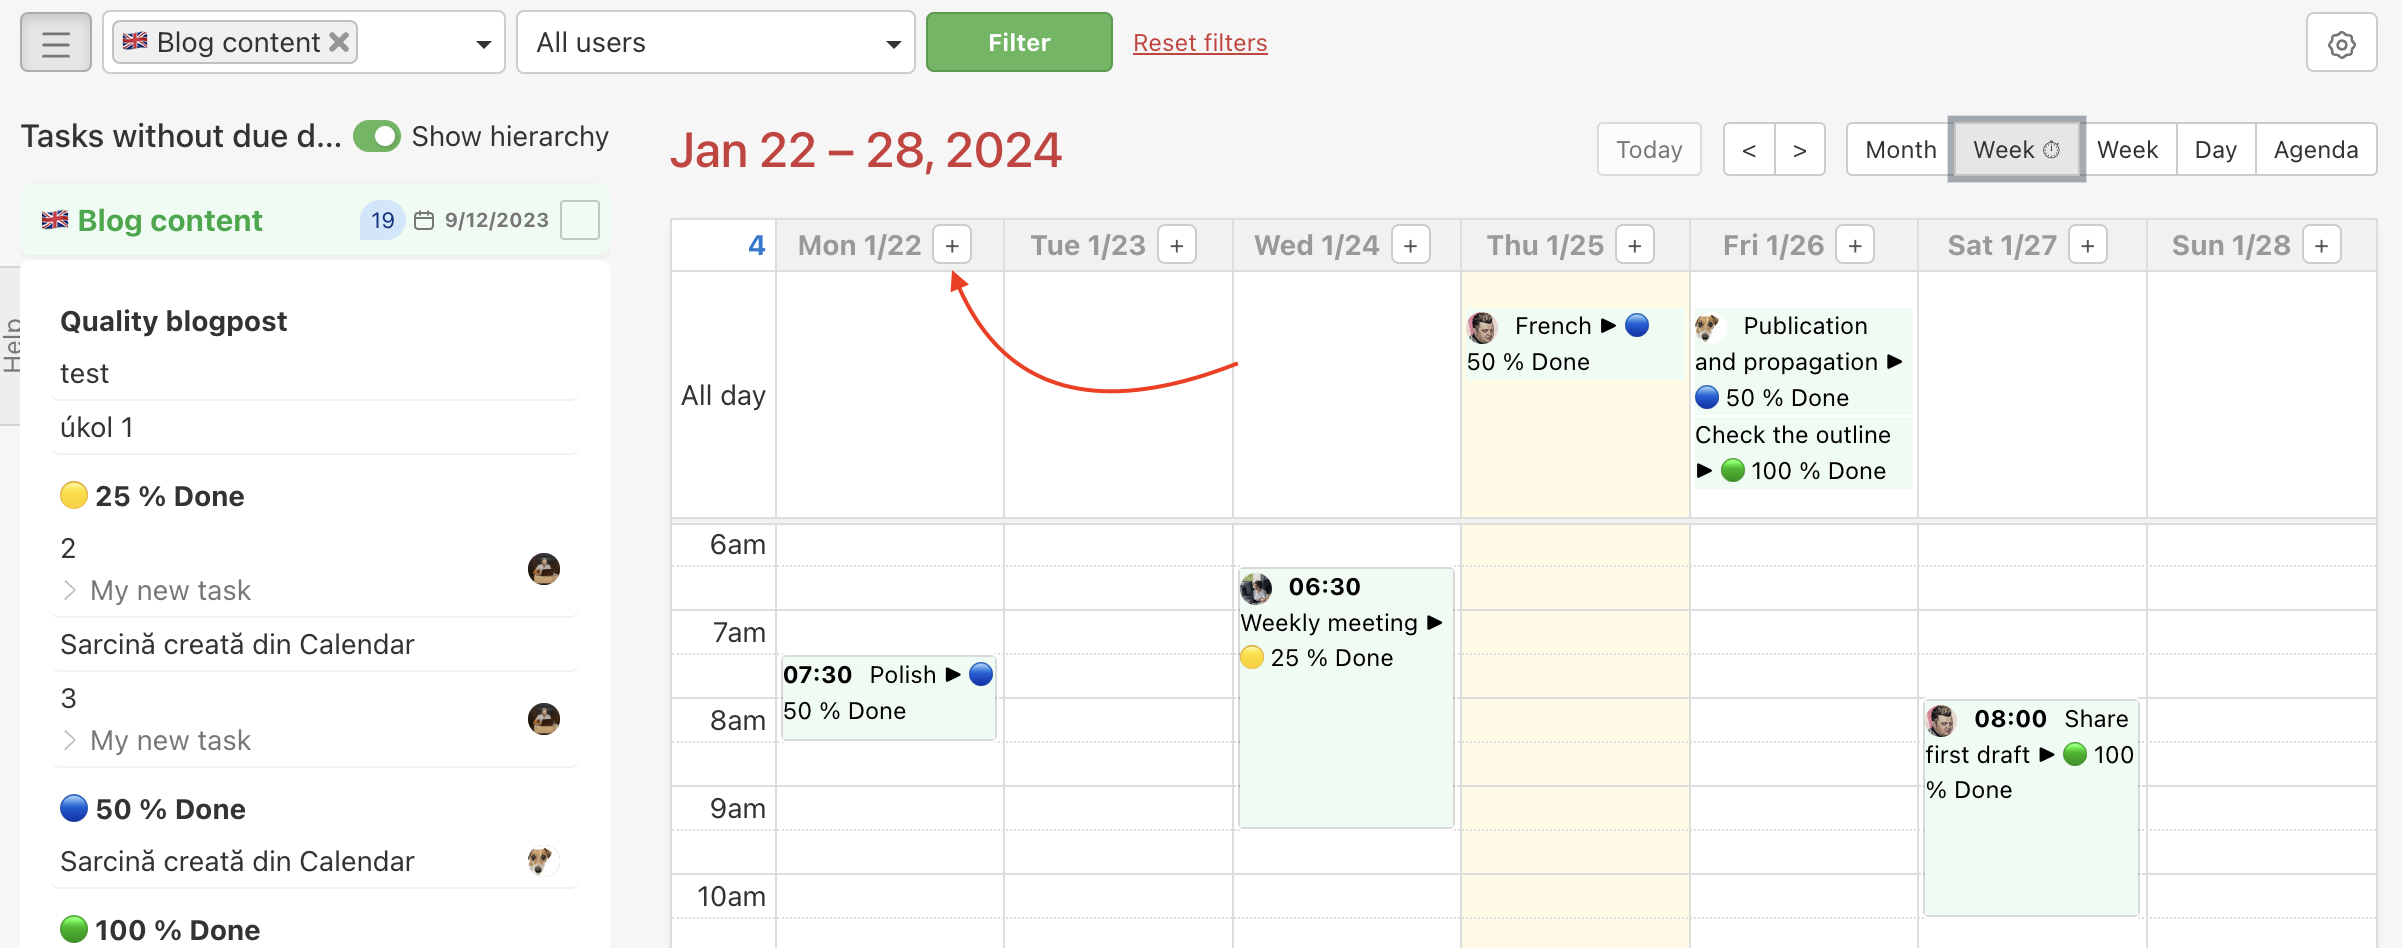
In the left column, you can find a list of tasks and subtasks that do not have a due date yet. In case you don’t see the list of Tasks without due date on the left, click the three-line button.
Use drag & drop to plan sub/tasks into the Calendar. Planning tasks this way is very quick and efficient since it instantly edits the due date of the tasks and subtasks.
Completed sub/tasks
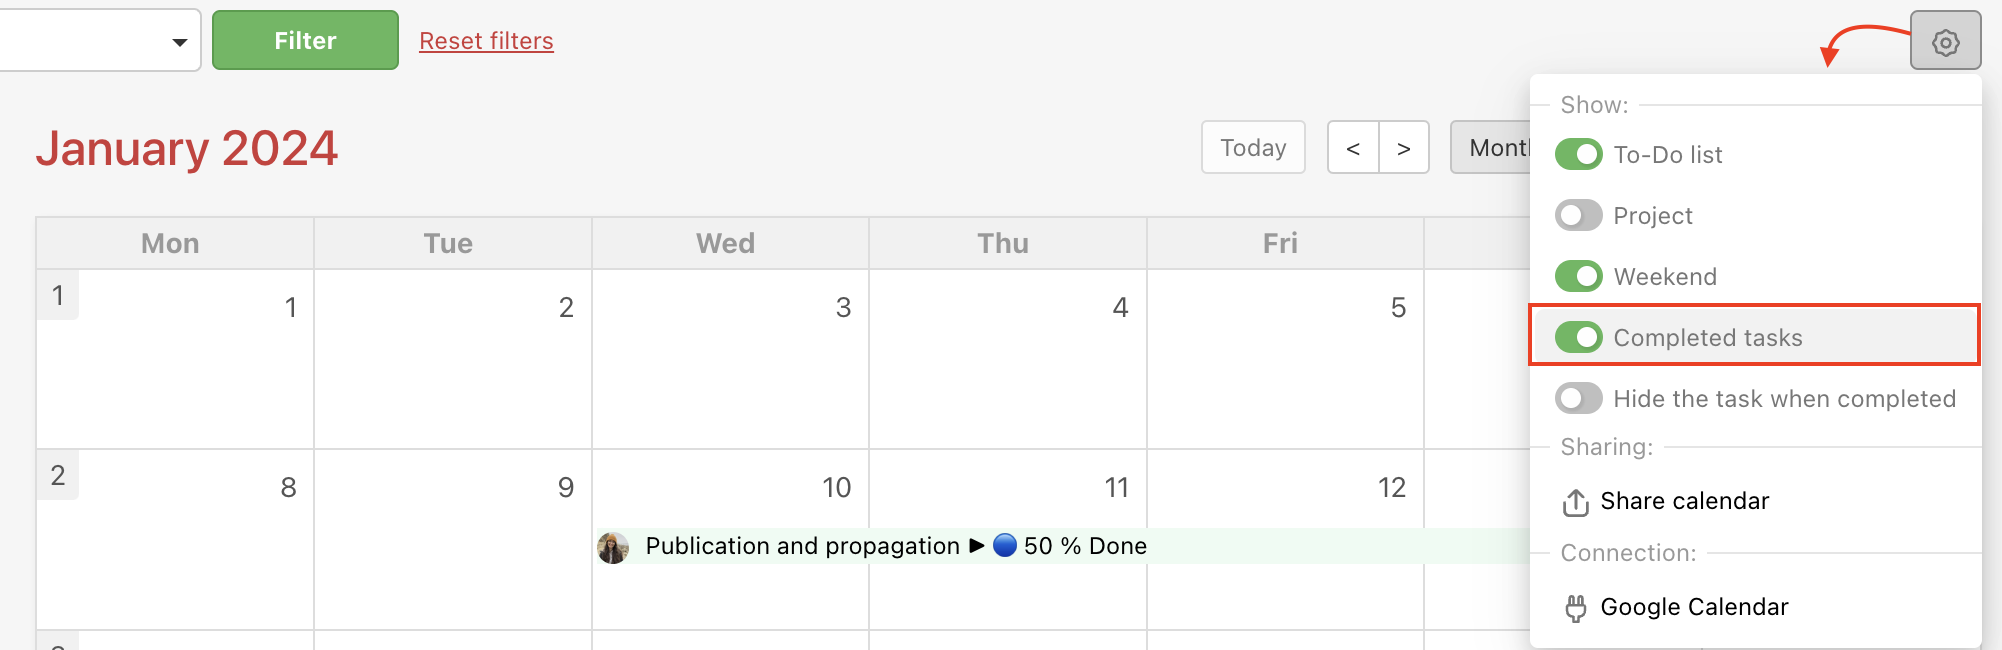
Calendar can also show completed sub/tasks which are crossed out just like on Dashboard. Click the Settings icon at the top right and turn on the Completed tasks checkbox.
Their visibility in the calendar allows a better overview of the capacity of the projects.
Reschedule sub/tasks using drag & drop
Use drag & drop to plan tasks and subtasks within the Calendar. In the calendar, you can move the task by dragging the cursor.
Go to the edge of the sub/task and when the arrow shows, pull it item to the right to extend its duration.
How to schedule the exact time
You can schedule the exact hour range for the sub/task. Switch the calendar view to Week or Day to do so.
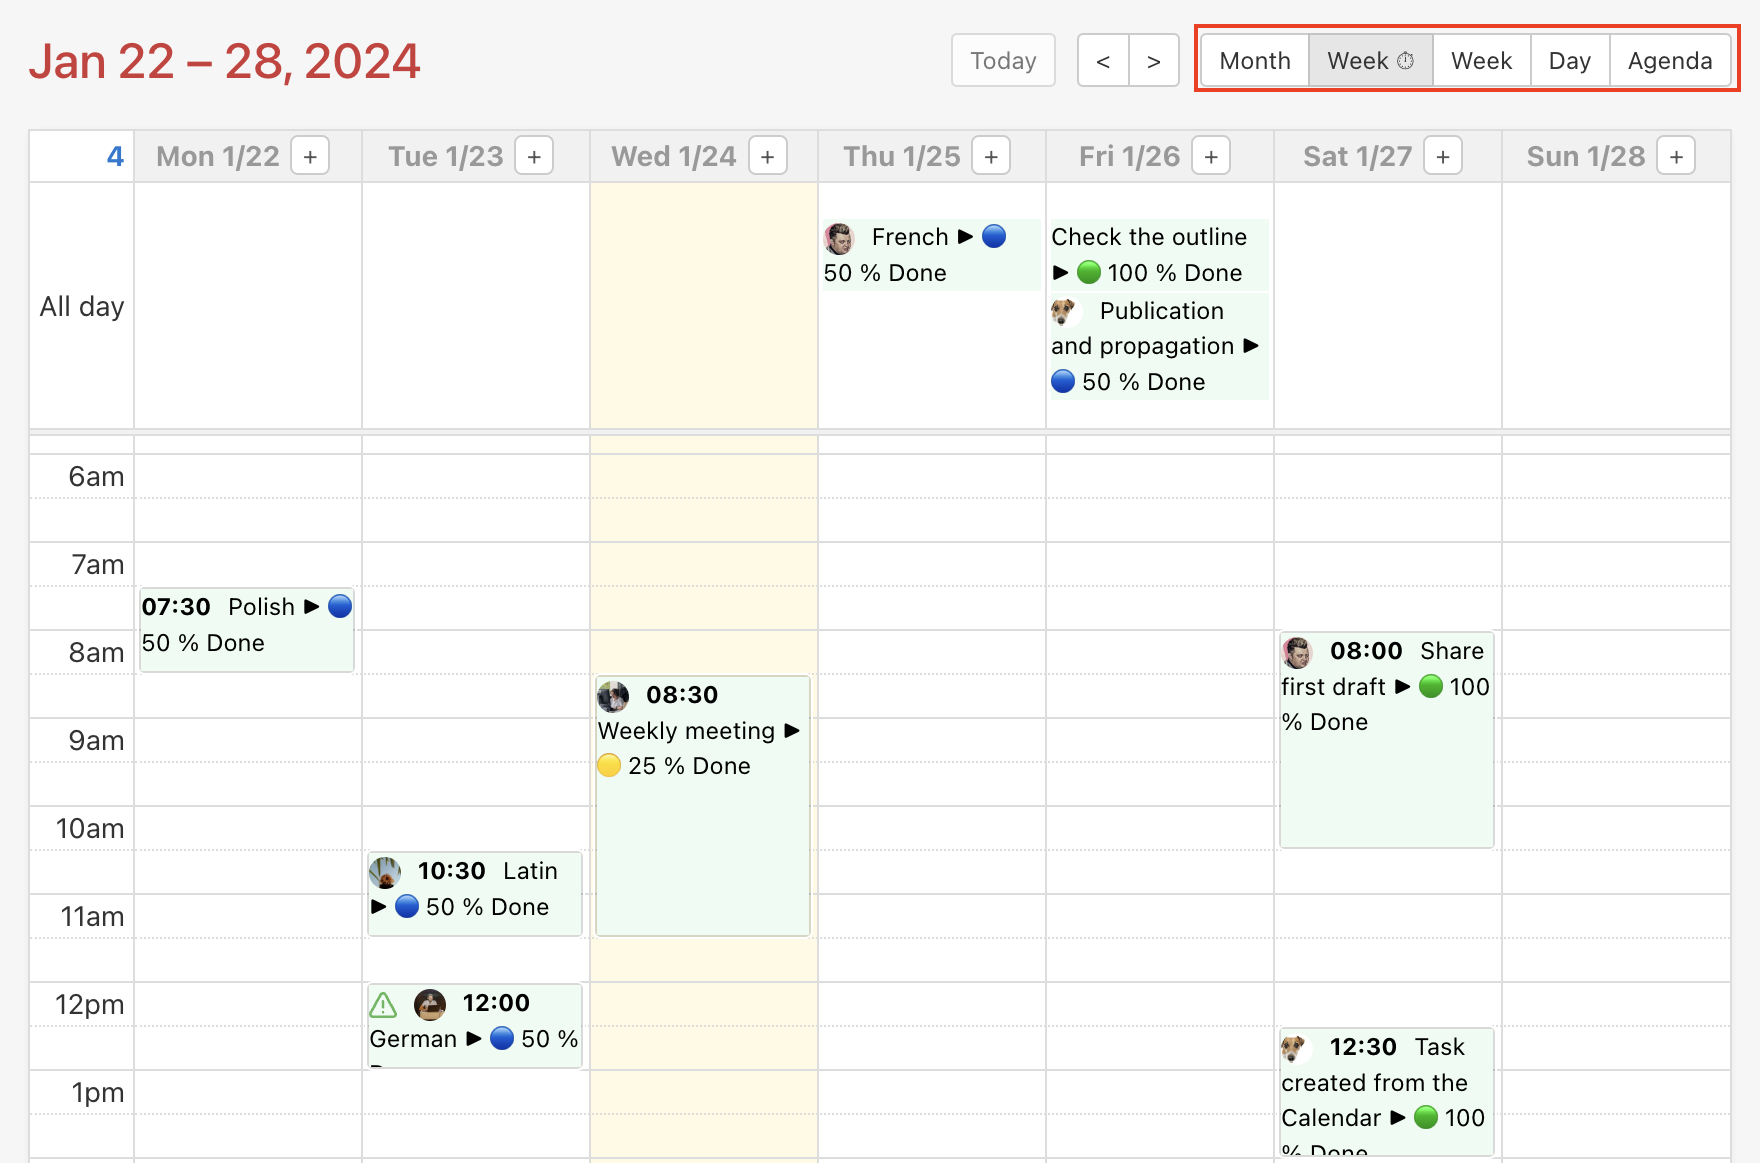
Switching between months, weeks, days
Use the arrow keys on the keyboard to move between different months, weeks, and days when on the calendar page.
Additionally, while dragging the mouse (when rescheduling a sub/task), you can move between months, weeks, or days using the arrow keys on the keyboard.
Create a new task
You can double-click directly in the calendar to create a new task in any view (month, day, week). It works similarly to Google Calendar for example.
Double-clicking in an empty field triggers a modal window which allows you to add a task. You need to select the project and To-Do list where the task will be created and also enter the task name. The date will be set automatically (depending on where you click in the calendar). You can add a task description, assign the task to a user, set followers, priority, and task labels and add subtasks.
Finish creating the task by clicking Enter key or the green Save button. Freelo remembers your last selected project and To-Do list, which can speed up the process when creating next potential tasks.
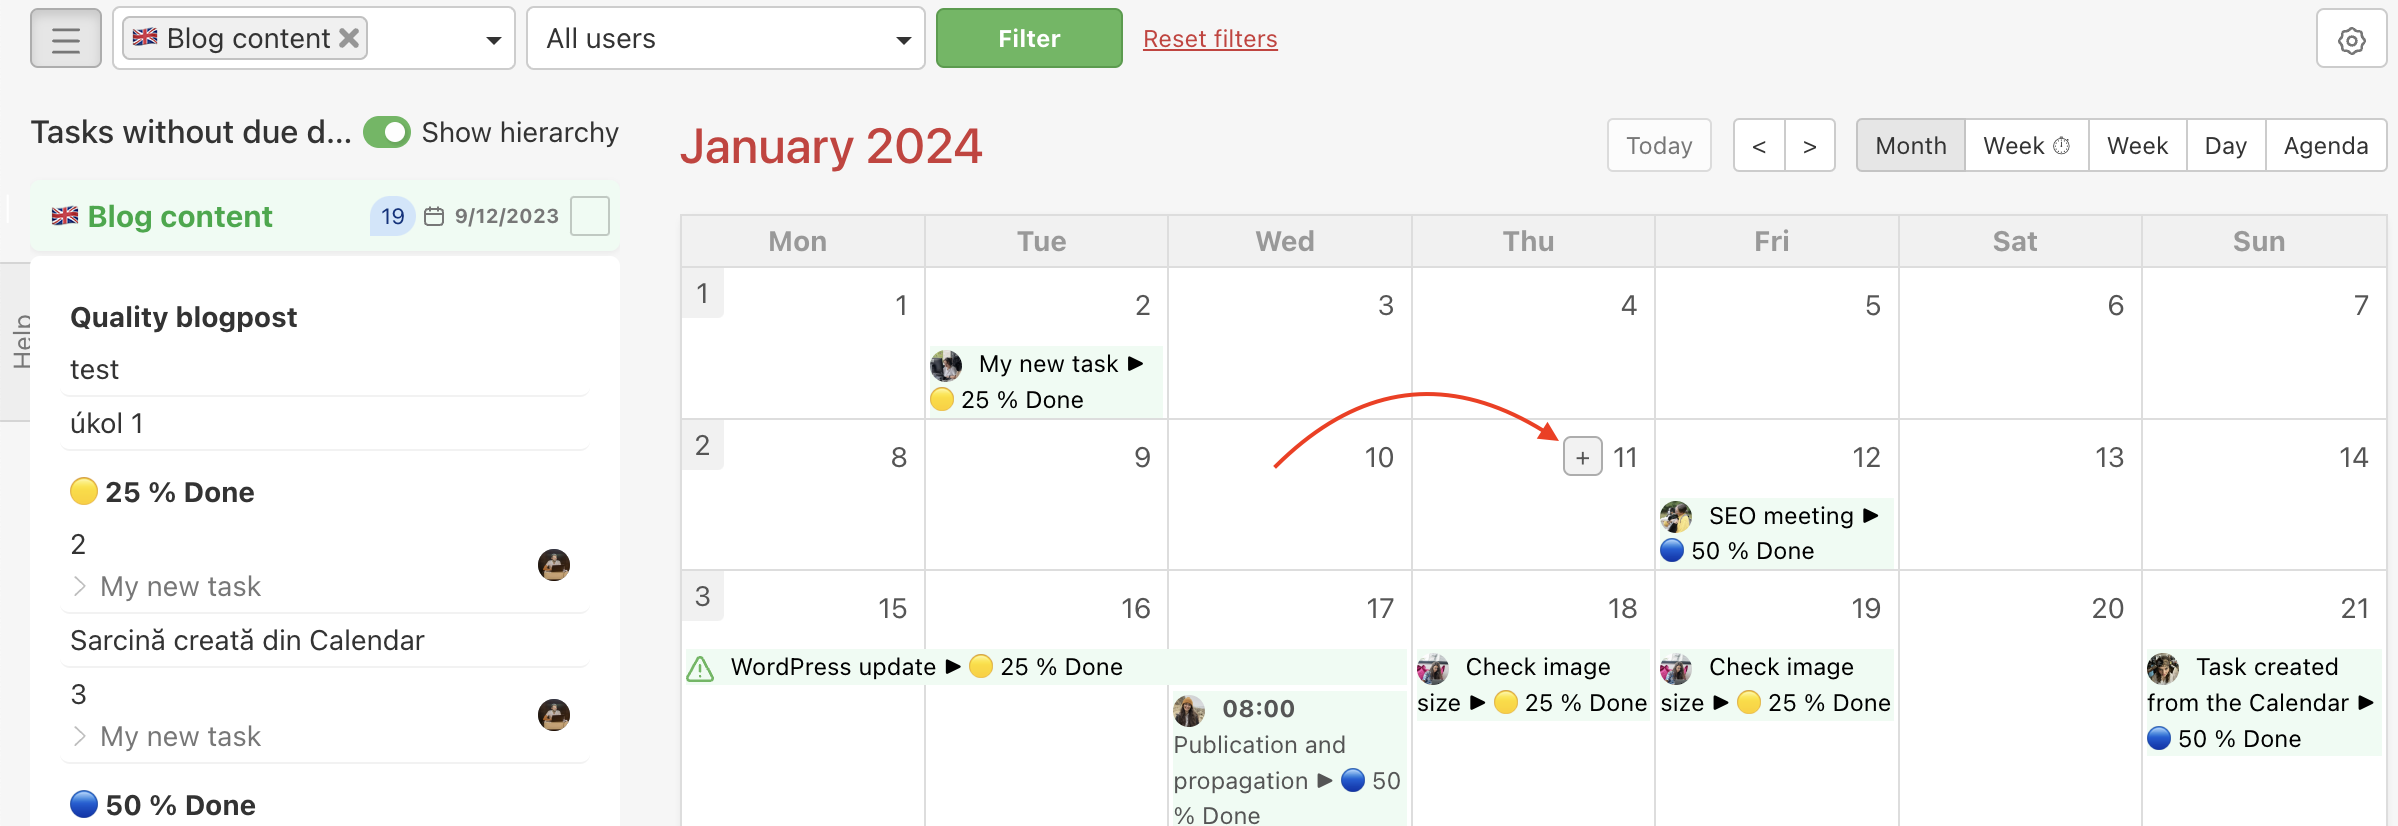
You can also use the plus button to open the same modal window.
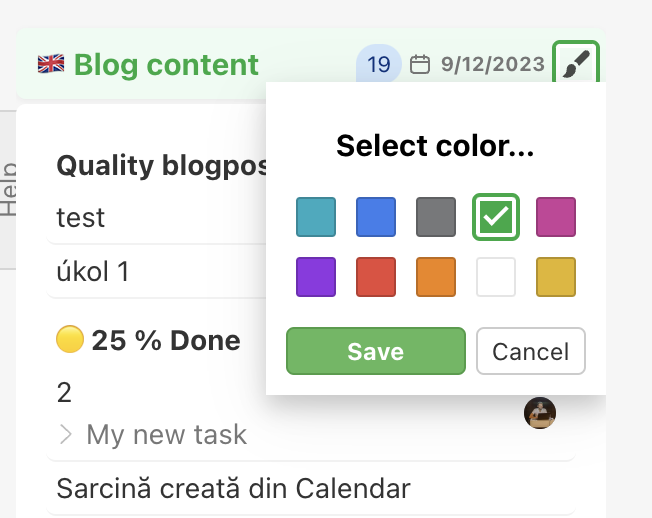
Change the project color
In Freelo calendar, you can change the color for each project. All tasks and subtasks from one project always have the same color.
As soon as you change the project color, all other users invited to the project will see it in the same color. Similarly, the color can be changed by anyone.
Click the checkbox next to the project name in the left column. Select whichever color you like and confirm this action via Save.
Synchronize Calendars
You can easily synchronize Freelo tasks and subtasks with Google Calendar, Outlook, or any other calendar you have.
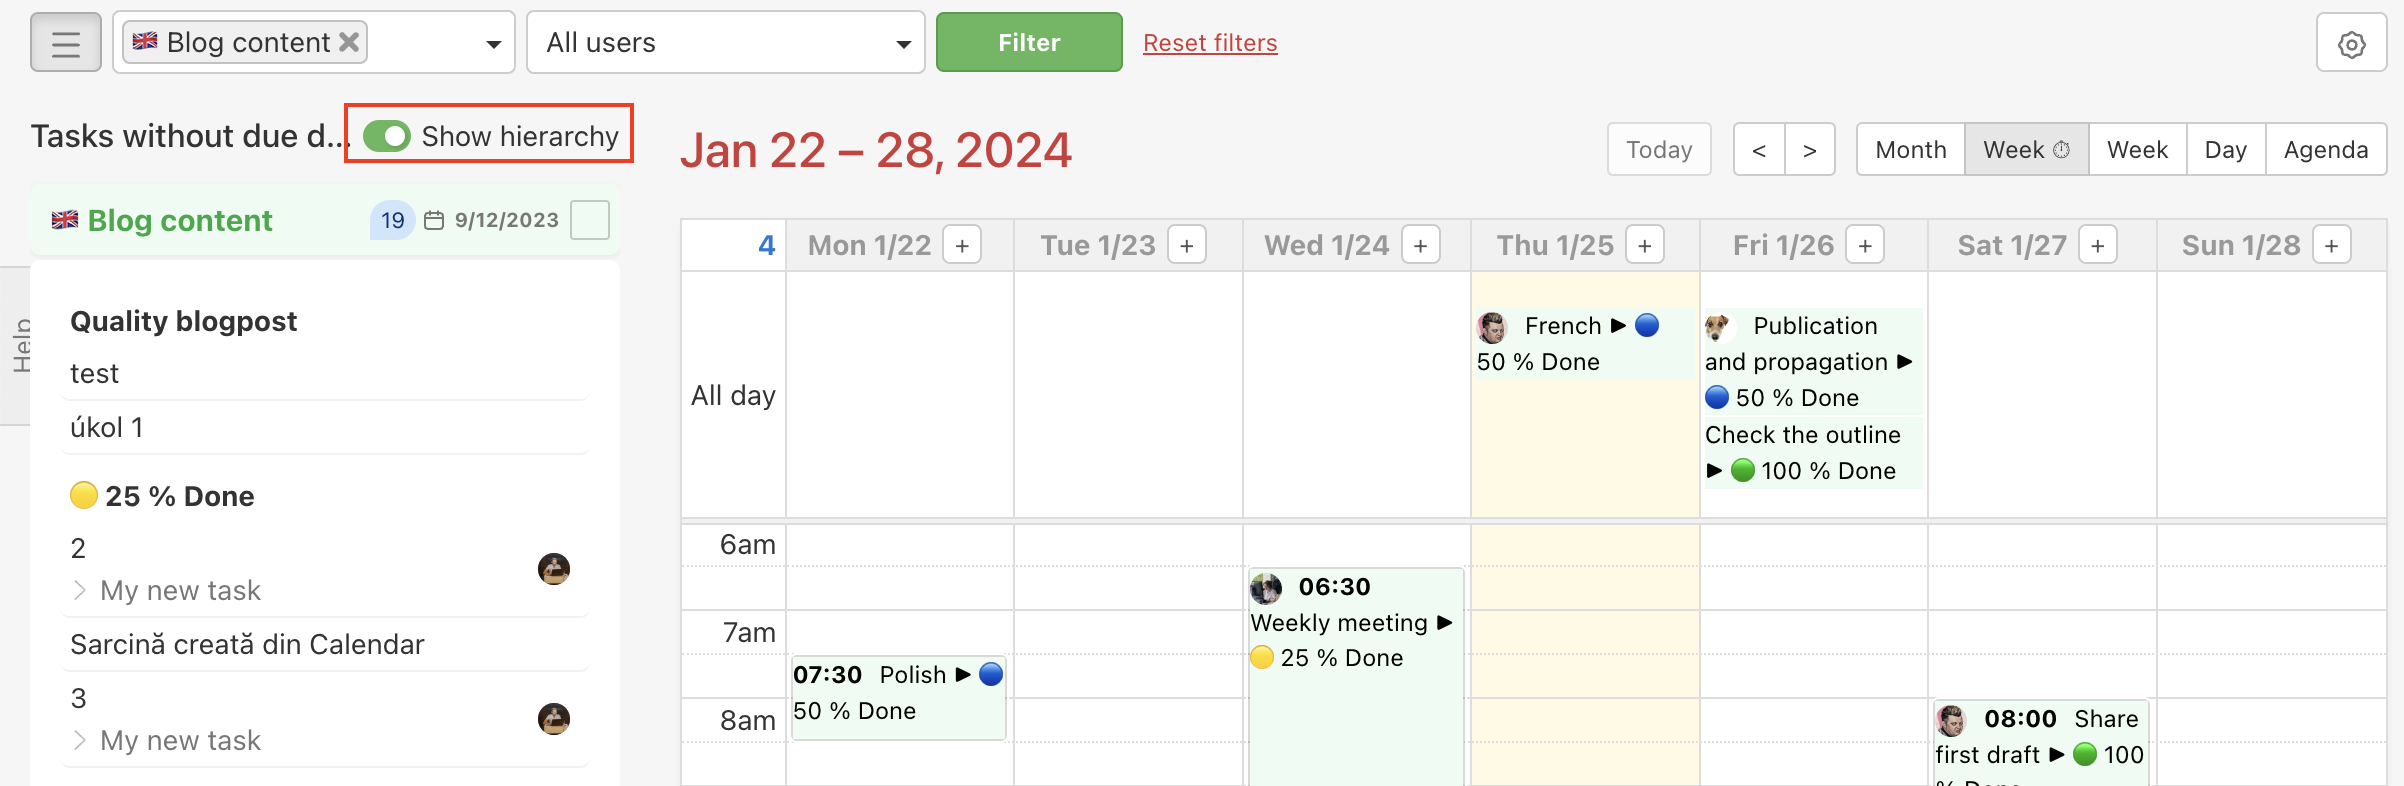
View hierarchy
When adding subtasks with deadlines to the calendar, you can see the navigation and view parent tasks in the view. In the calendar, you can switch on Show hierarchy which enables you to see parent tasks for subtasks. This can be done in the left column Tasks without a due date. Switch on the checkbox under the filters.