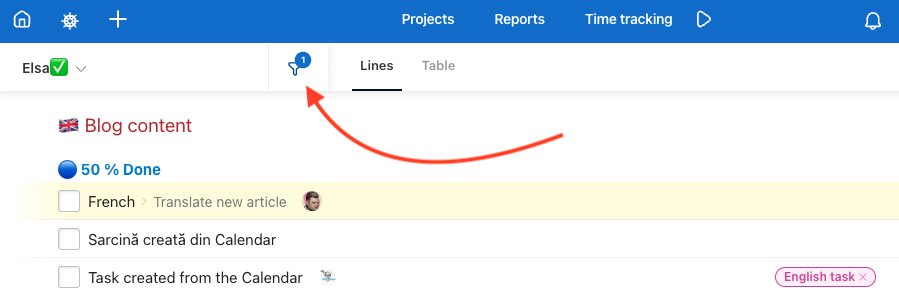
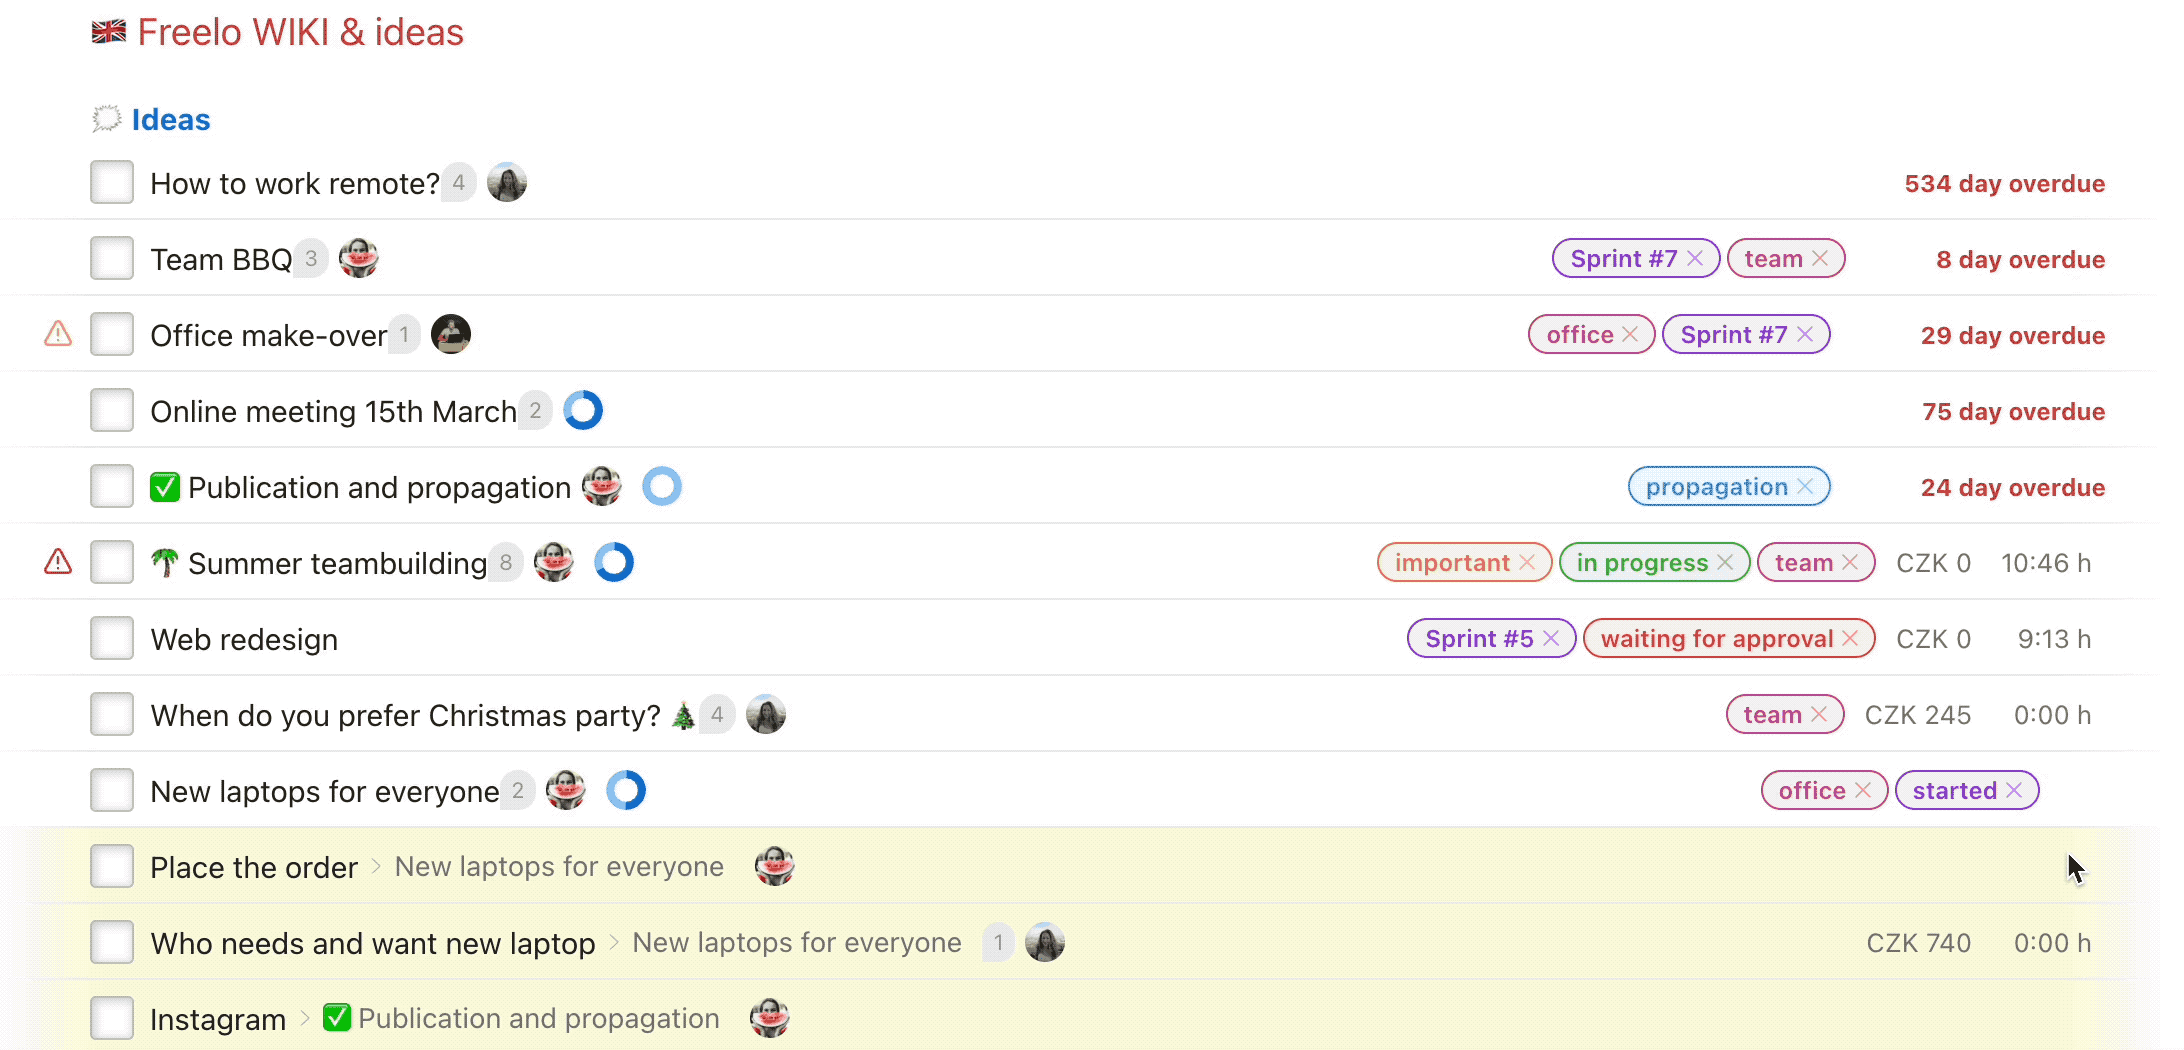
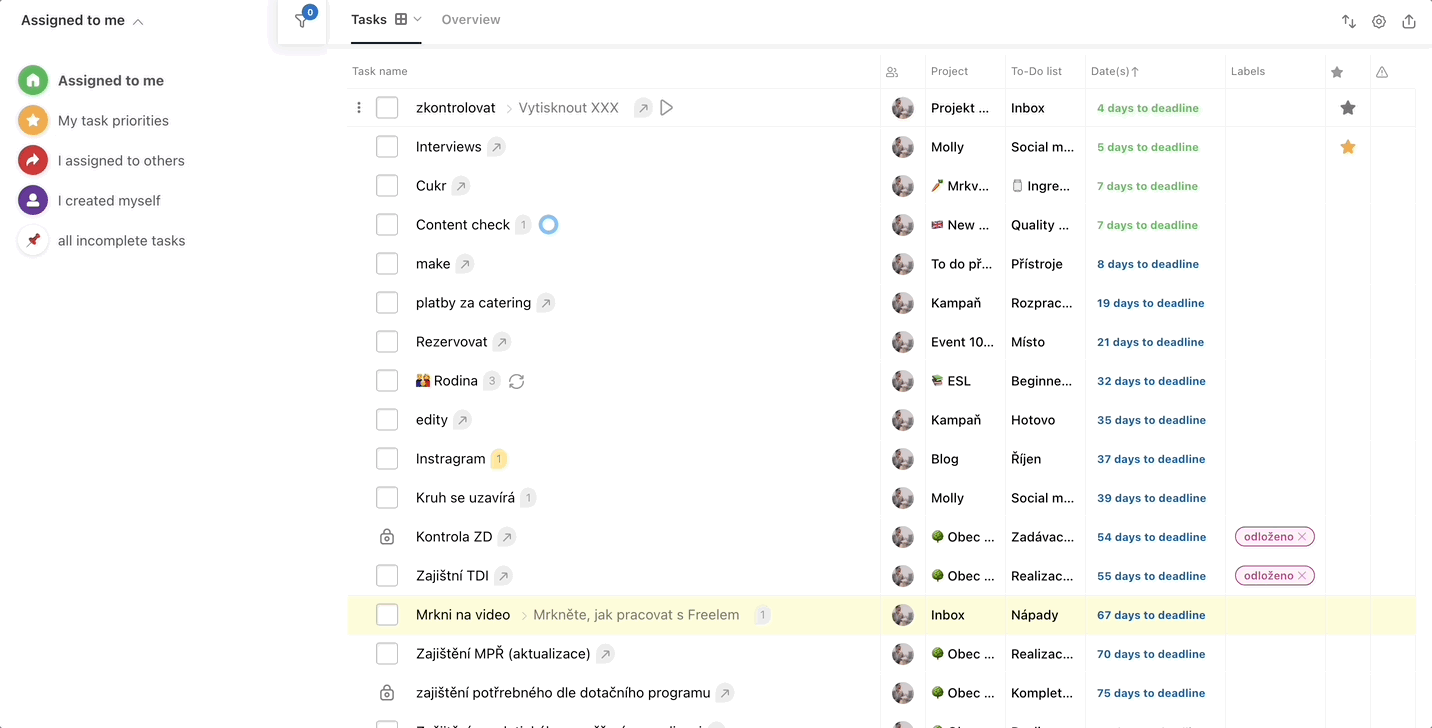
The Dashboard in Freelo’s main page and the general board of all the sub/tasks across projects. You can edit, start tracking time or finish the sub/tasks straight from the Dashboard. Smart subtasks are colored yellow for better orientation.
Click the house icon in the upper left corner and go there from anywhere in the app.
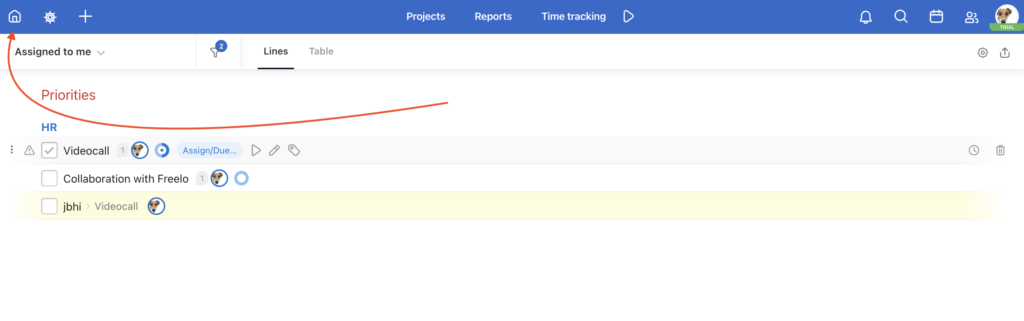
Dashboard remembers the last used filters – even the ones you did not save. So when you go to a task detail and back to the Dashboard, you can continue where you left off. The Dashboard is divided into 4 parts.
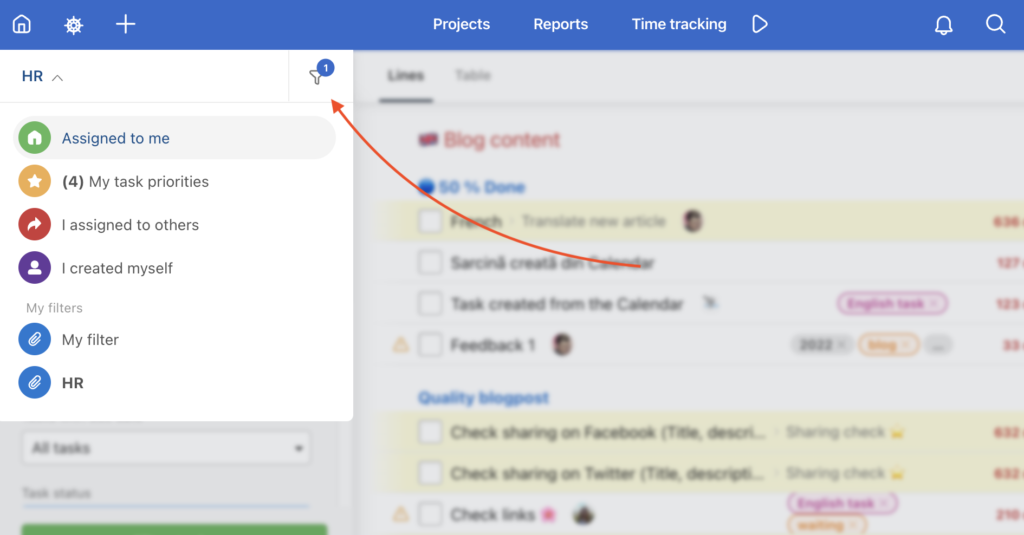
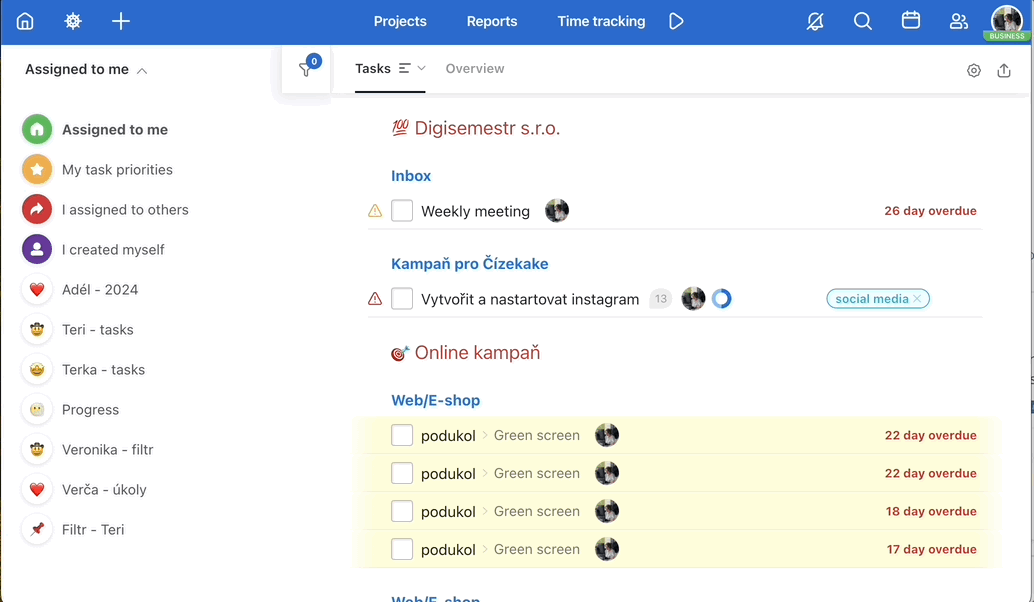
1. Assigned to me
This is a list of all tasks and subtasks assigned to you across all the projects. These sub/tasks are sorted by the due date and ordered in To-Do lists from the particular projects. It is the default filter/view.

Use filters on the right to specify what you are looking for. You can choose whether you want to see the subtasks and tasks, or tasks only. Show the subtasks via the checkbox in the upper right part > Showing subtasks.
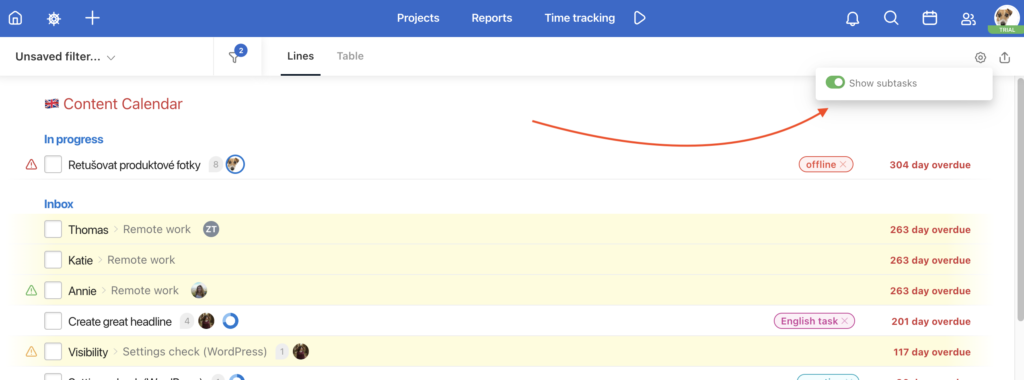
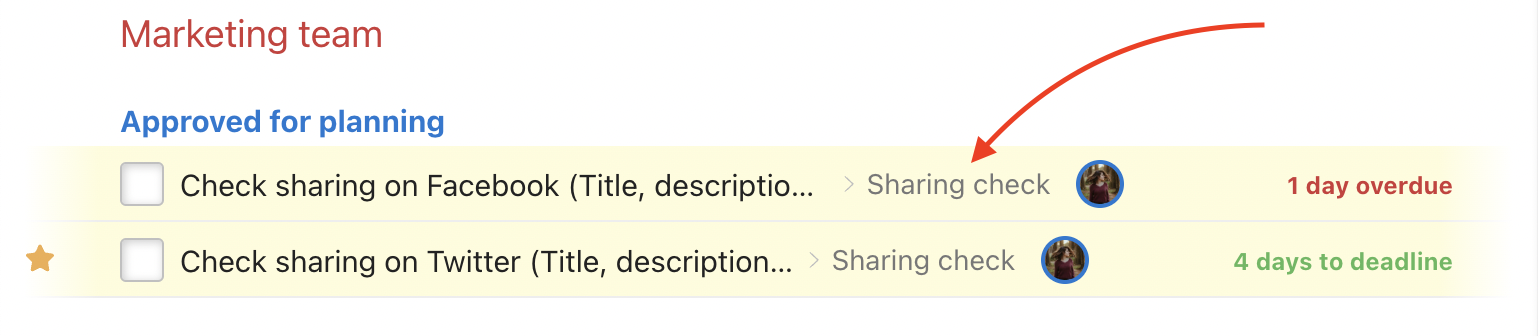
Subtasks on the Dashboard have a breadcrumb navigation with superior task names.
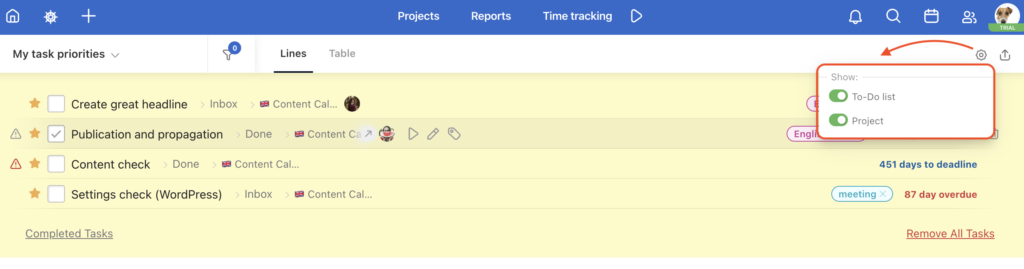
2. My tasks priorities
The section My task priorities is the shortlist of tasks and subtasks you marked as important. You can add more tasks in this section by marking them with a star. This section is only visible to you.
This is useful when, for example, you plan what to do the next day. You have an instant view of the tasks that are important to you. You can set priority to your tasks or the tasks assigned to someone else.
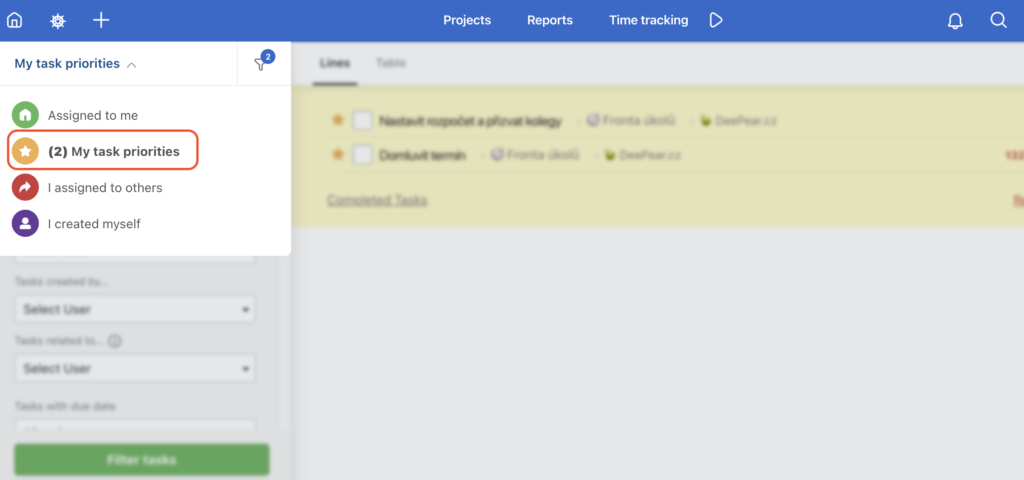
How to add a task to your priorities
In the sub/task detail via the menu on the right side click My priorities. In the same way, you can remove a task from your priorities.

Another and faster way is to click on My priorities via the three-dot menu on the Dashboard and the task will be marked immediately.
In the right corner of My tasks priorities, you can set up the view of the task’s navigation. Click on the settings menu and select To-Do list, Project, or none.
How to work with tasks
When you complete the task directly by clicking on the checkbox, it will automatically disappear from your list.
If you or someone else completes the task elsewhere in the application, the task remains in the My tasks priorities grey in the list – that means it has been completed. It is up to you whether you keep it on the list.
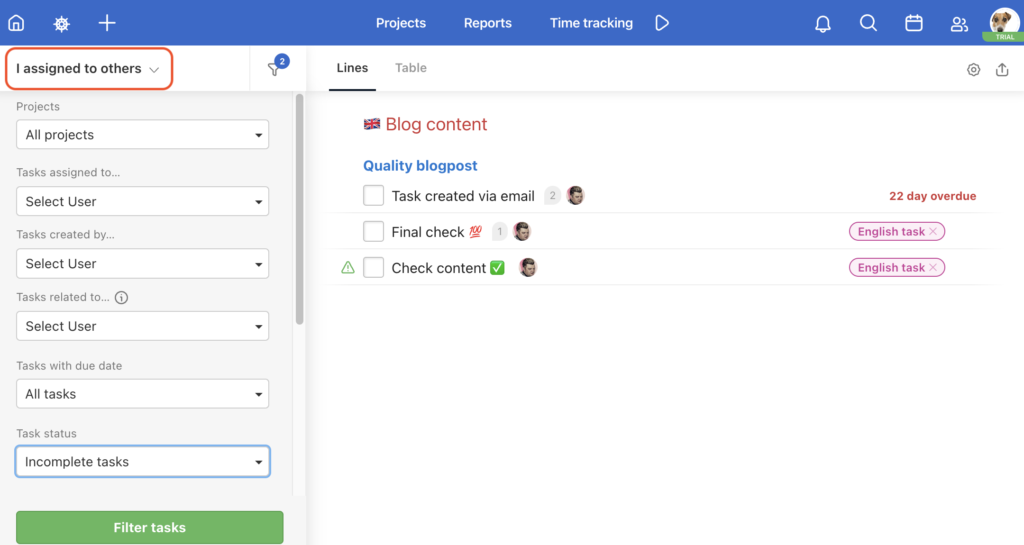
3. I assigned to others
It is a list of all the tasks across all the projects you’ve assigned to someone else.
4. I created myself
It is a list of all the tasks across all the projects created by you.
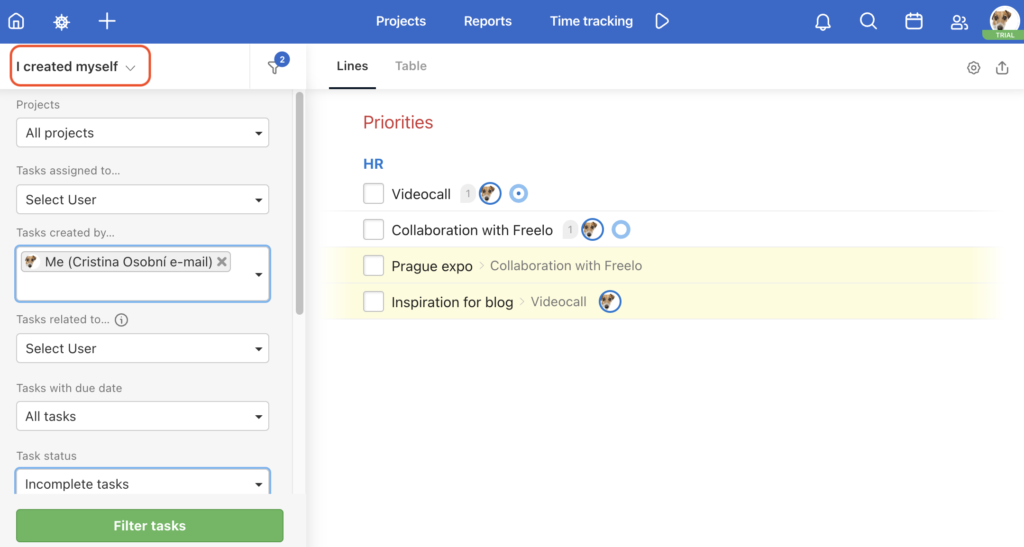
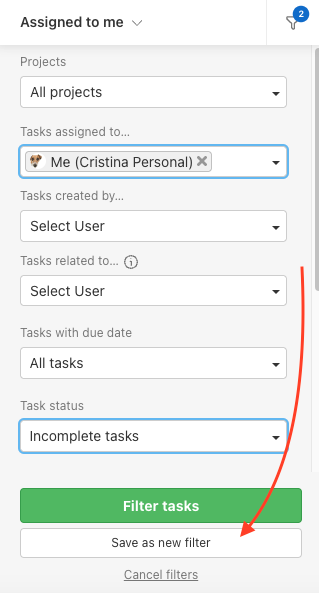
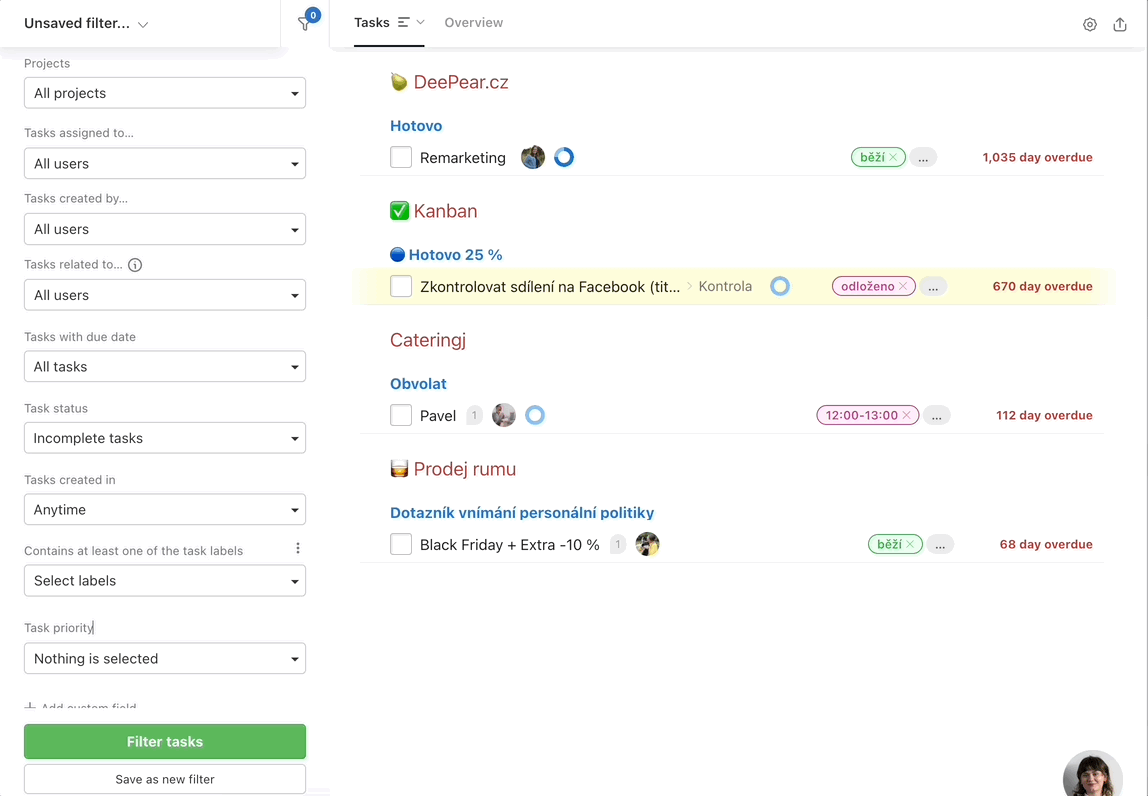
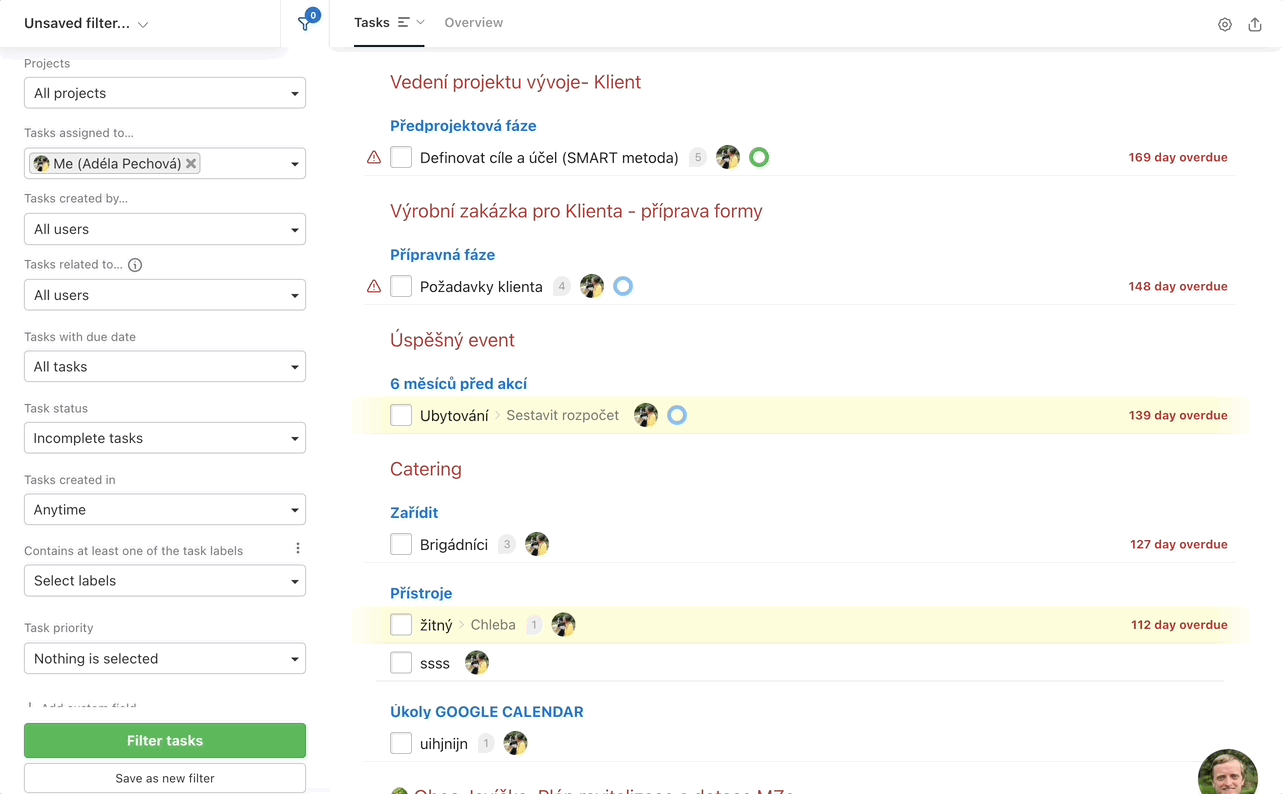
Filters in the Dashboard
In the left column, you can use various ways to filter tasks and subtasks. There, the filters can be saved as your own. Then they will be saved under the previous 4 default views.
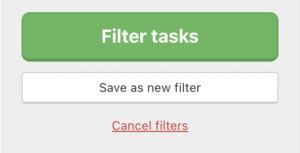
All filters you enter need to be confirmed via the green button Filter Tasks below.
You can hide the filter options. Show filters as below.
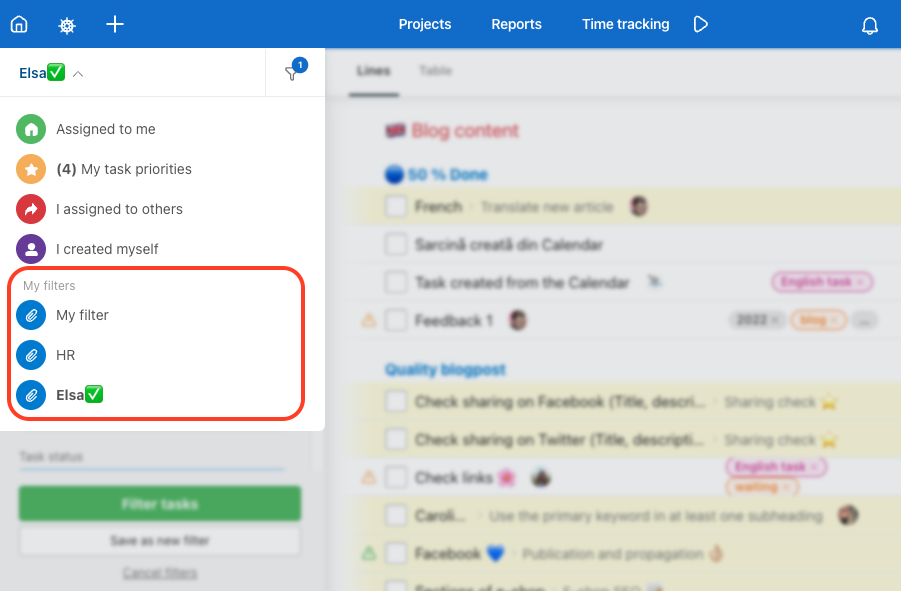
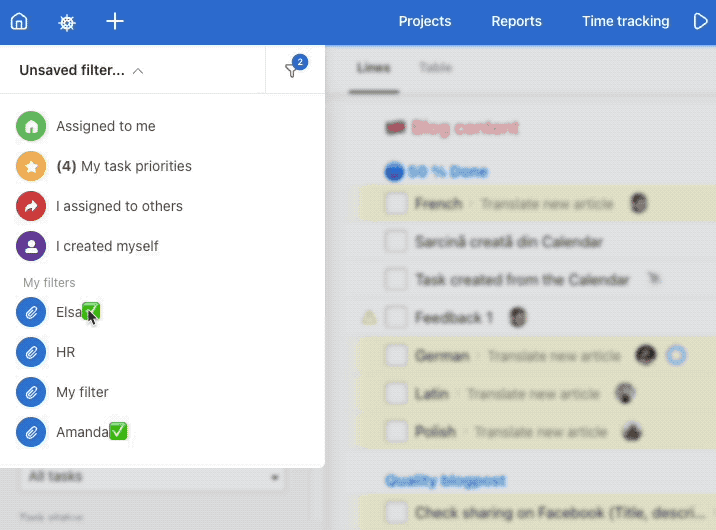
Custom views (Saved filters)
In the Dashboard, you can save new filters as your own to switch between them quickly. The active filter is always highlighted and says which parameters you have pre-set in the right menu.
Such a filter allows you to check the tasks that someone has recently completed or has missed a deadline. We recommend you try the filters out and save the ones you use frequently. Task control is then much faster and more efficient.
Select filters and when done, scroll down to Save as a new filter. In the following form enter the name of the filter and confirm via Save new filter.

The filter is immediately visible in the upper part of the Dashboard. Drag and drop the filter name and order them as you like. Please note that the first 4 default filters cannot be changed or moved.
Filtering tasks with multiple criteria
When it comes to filtering task labels with multiple criteria, you can do so on Dashboard. This means you can set different conditions when filtering different task labels.
Examples of entering different criteria when filtering labels
Do you want to filter tasks from one department (label HR) but only view tasks that are not so important at the moment (label Important)? Simply do so by using the condition Does not include all task labels.
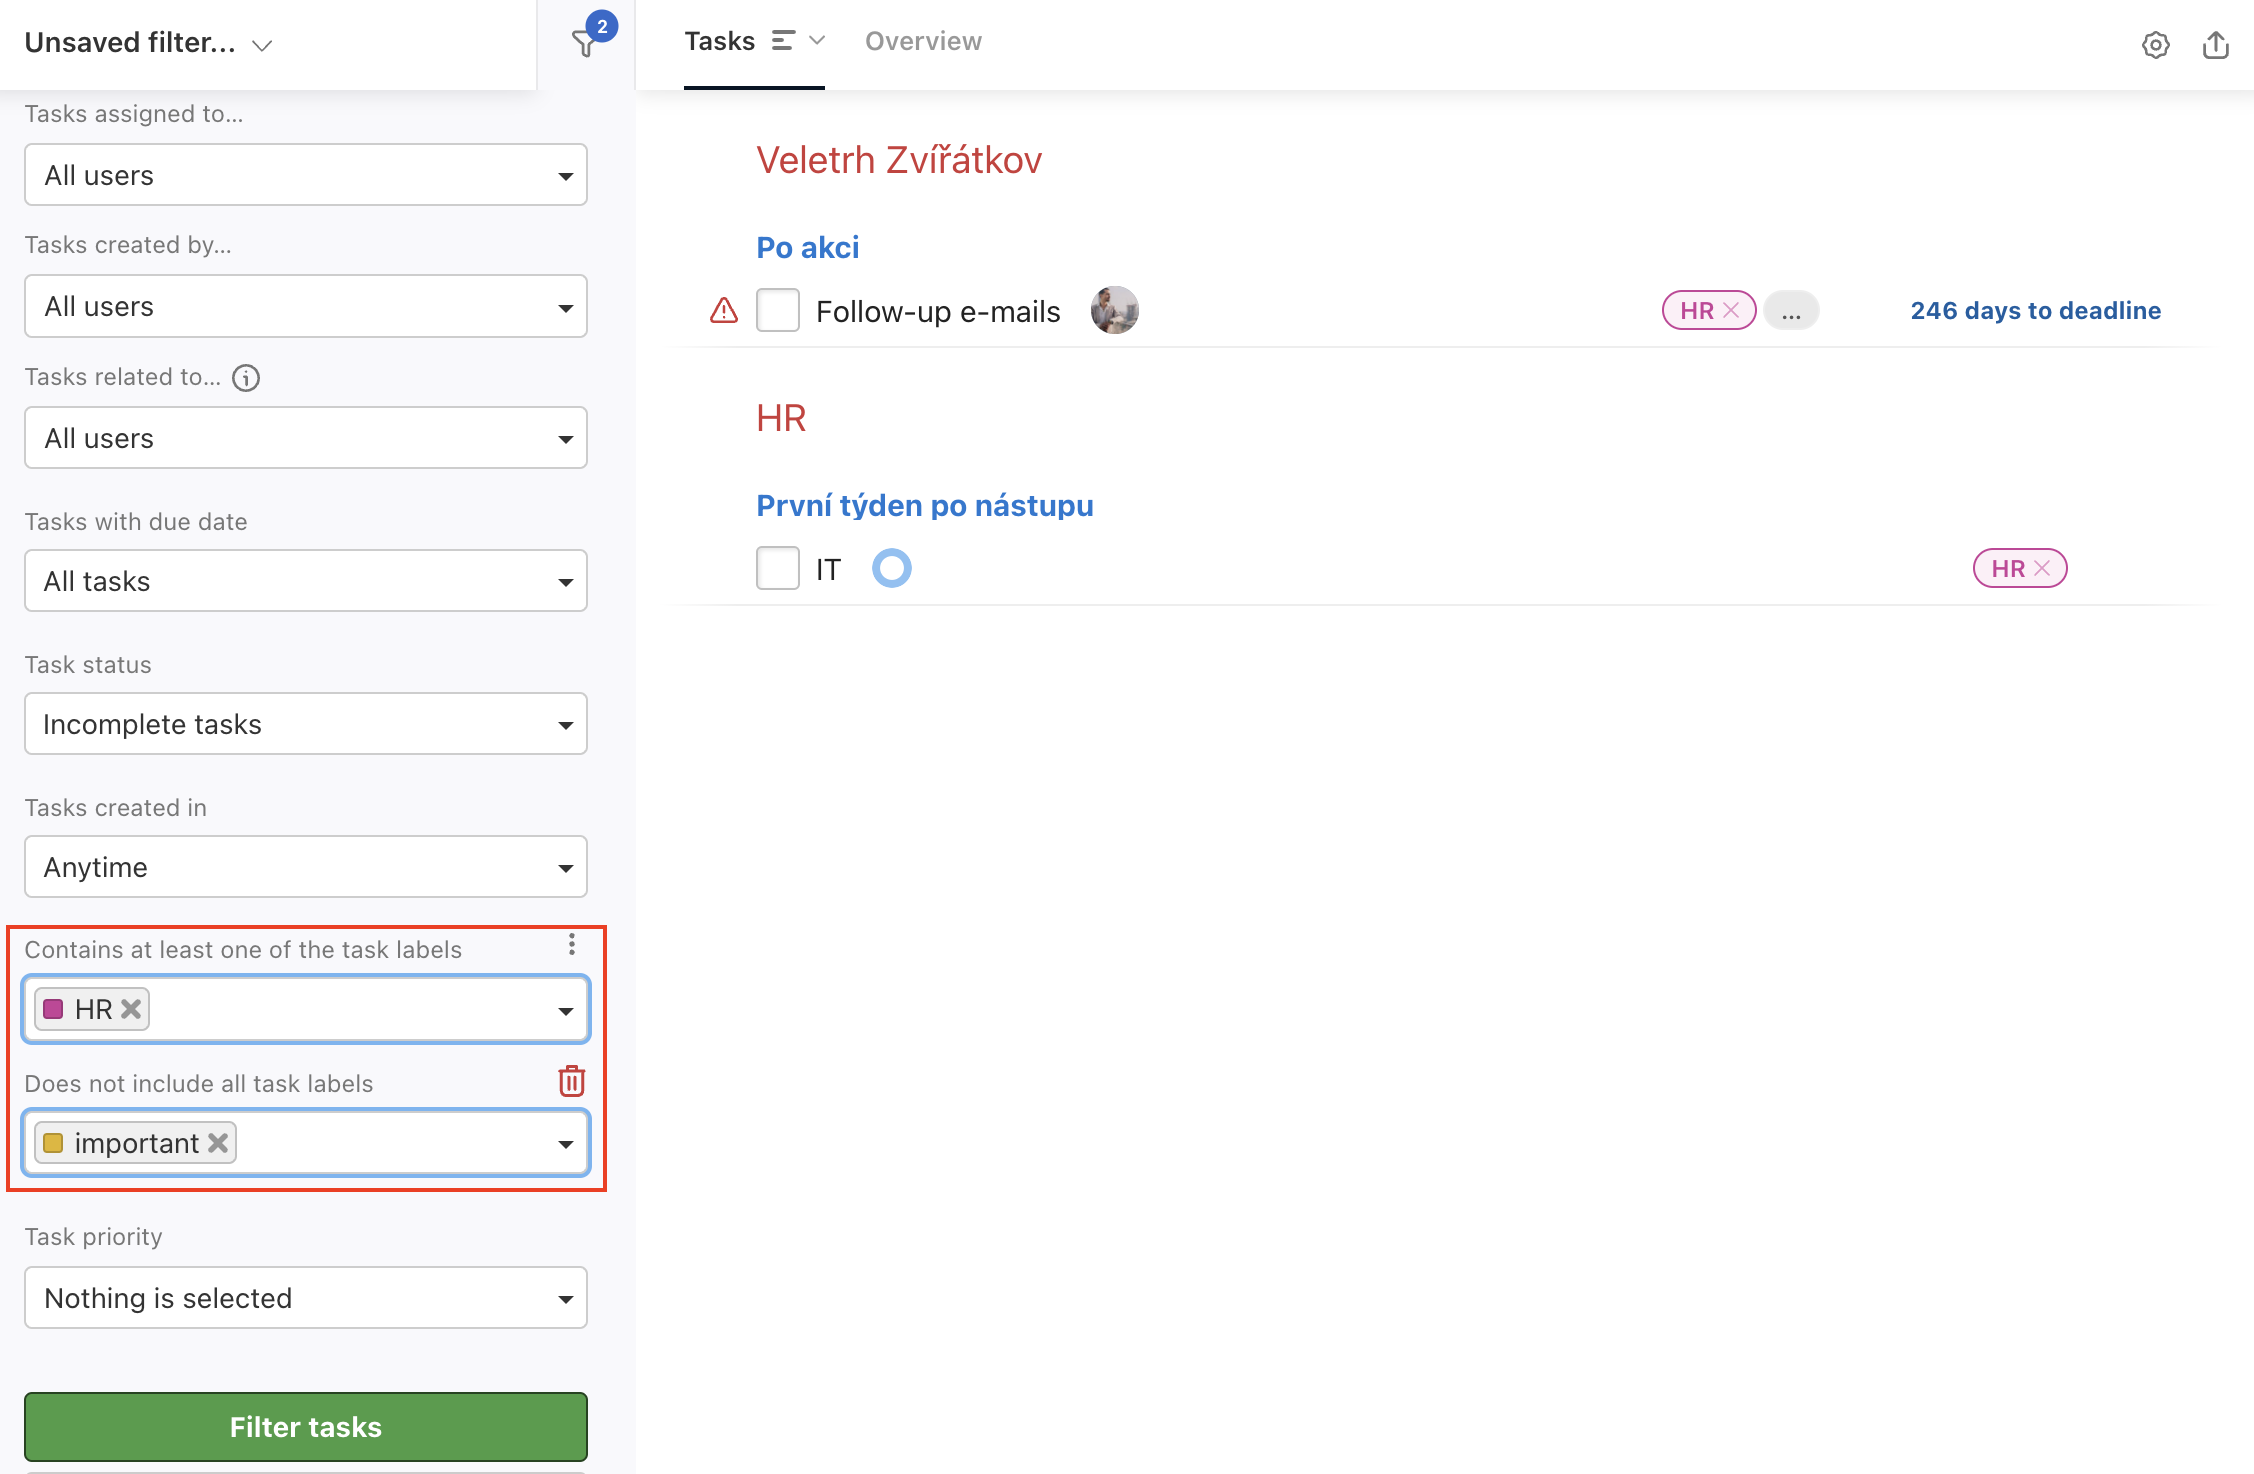
Do you use labels to recognize tasks related to your client but at the same time want to only view those which are currently labeled as work in progress – WIP? That is possible as well.

You can also filter task with no labels at all.
You can easily save any of these filter settings and have them always ready when you need to.
Filter icons for differentiation
Custom filters can be distinguished using an emoji as an icon next to the filter name. Just click the pencil in the circle next to the filter name.
Favorite Views (Filters):
How to sort filters
For saved custom filters and default filters on the Dashboard, we can change the order by dragging the mouse (Drag&Drop).
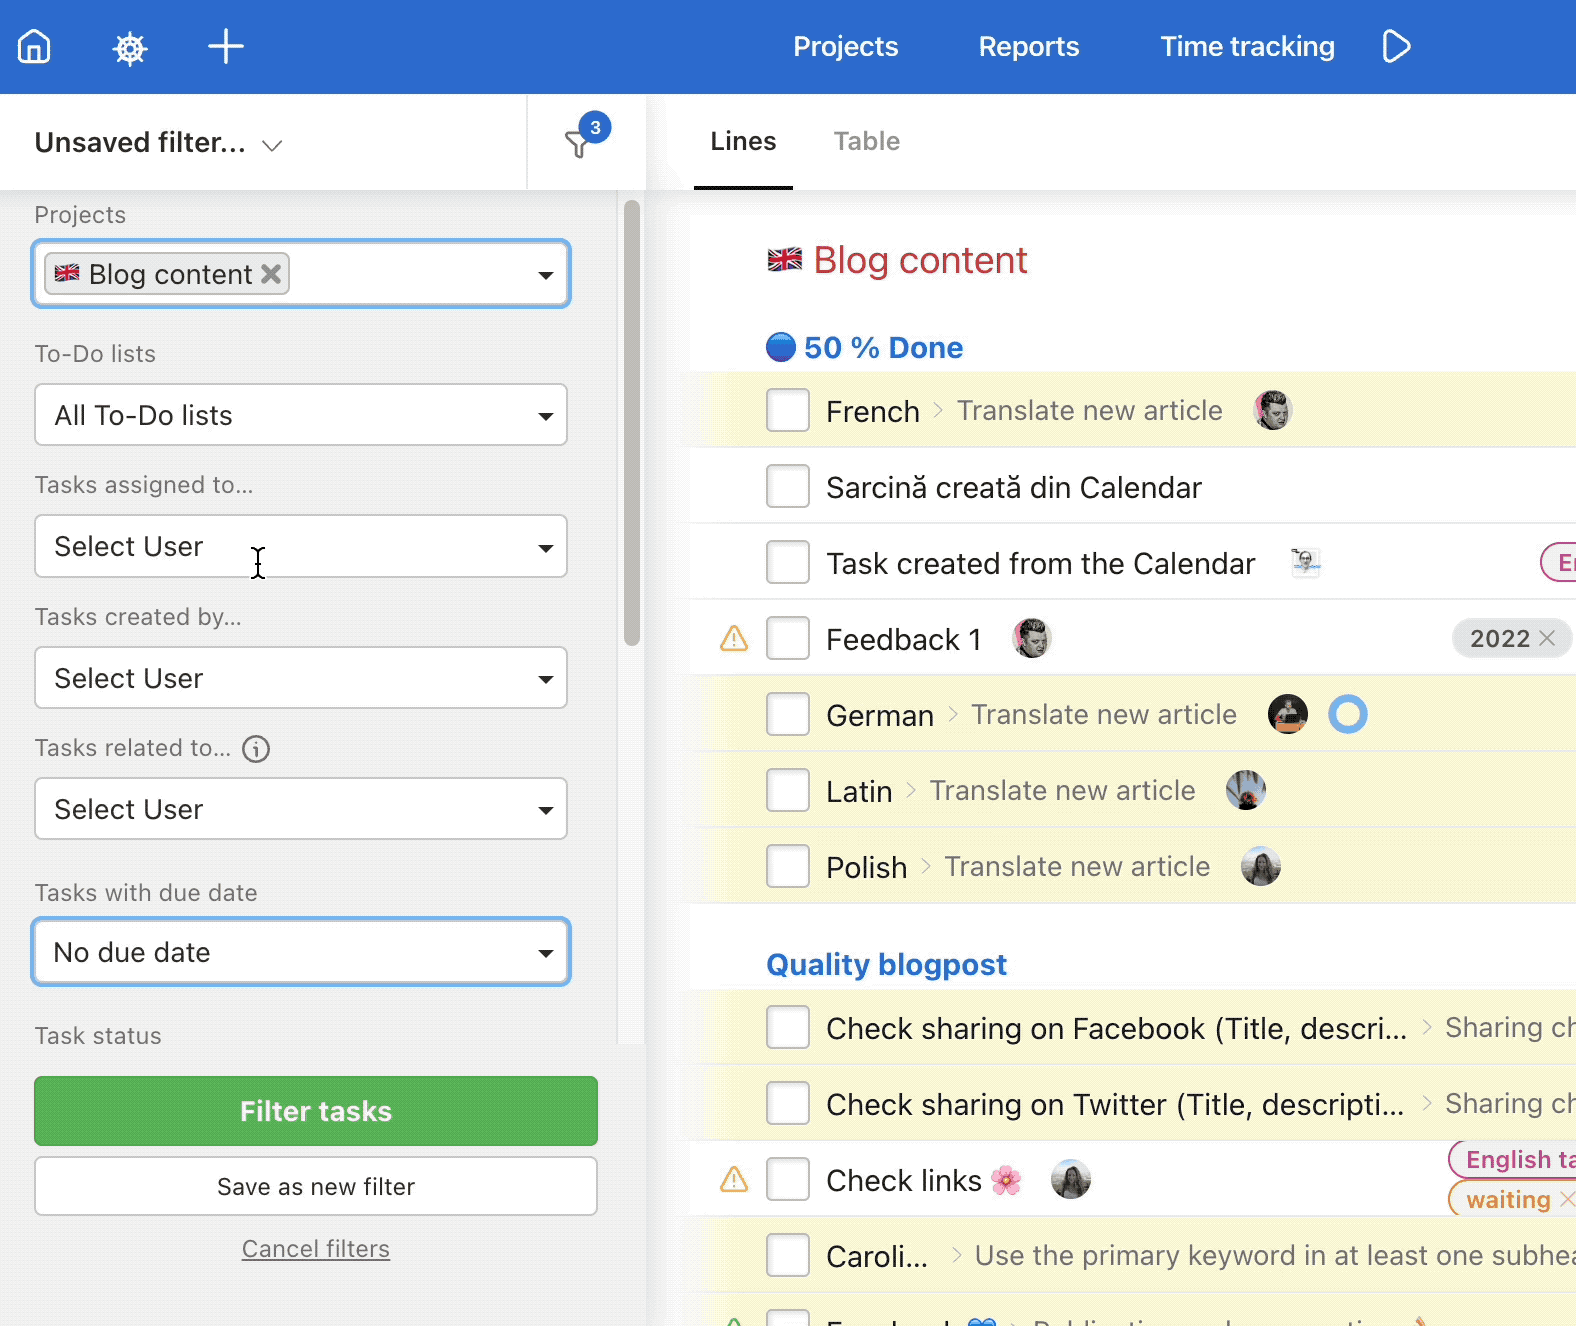
Filter: Tasks without a deadline
You can find out if there are any tasks across your projects without a deadline.
- Projects: All projects
- Assigned to: Select all
- Tasks with due date: No due date
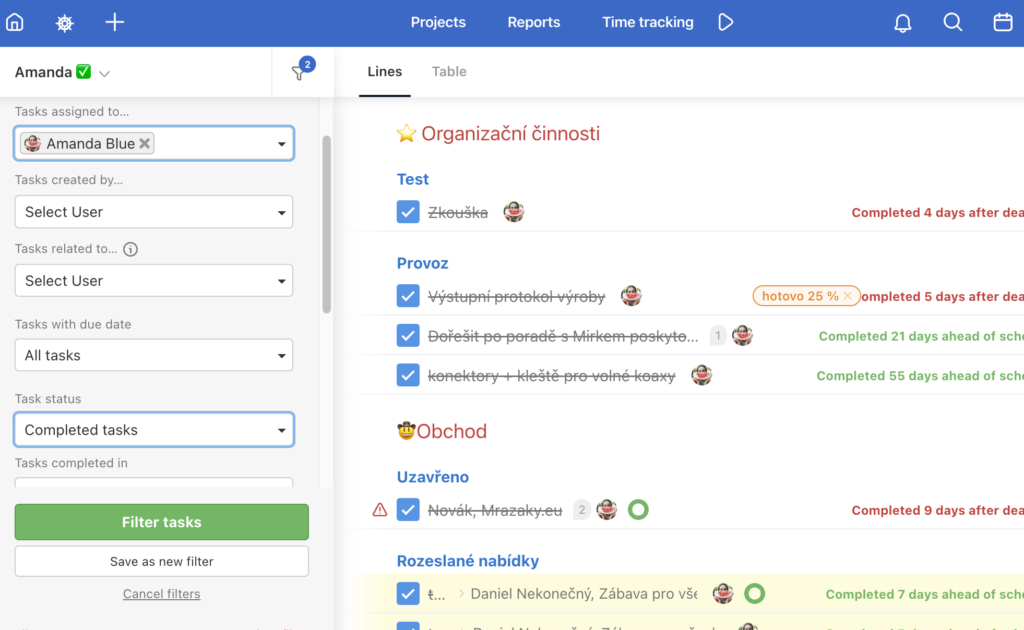
Filter: Completed tasks of „Amanda Blue“
You can find out what tasks assigned to Amanda are completed across all the projects.
- Selected or all projects
- Tasks assigned to: select the particular user
- Task status: Completed tasks
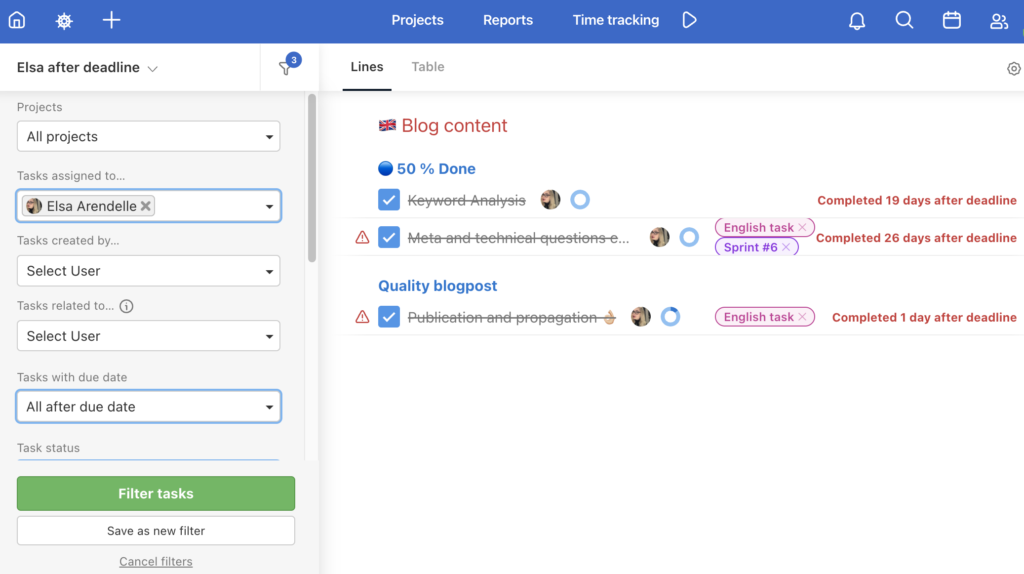
Filter: Tasks after the deadline „Elsa Arendelle“
You can find out which tasks related to Elsa have missed the deadline.
- Selected or all projects
- Tasks assigned to: select the particular user
- Tasks with due date: All after the due date
Filter: Deadline not met
You can find out which tasks have not been resolved by the deadline.
- Selected or all projects
- All tasks after the deadline
- Tasks with due date: All after the due date
- Task status: Incomplete tasks
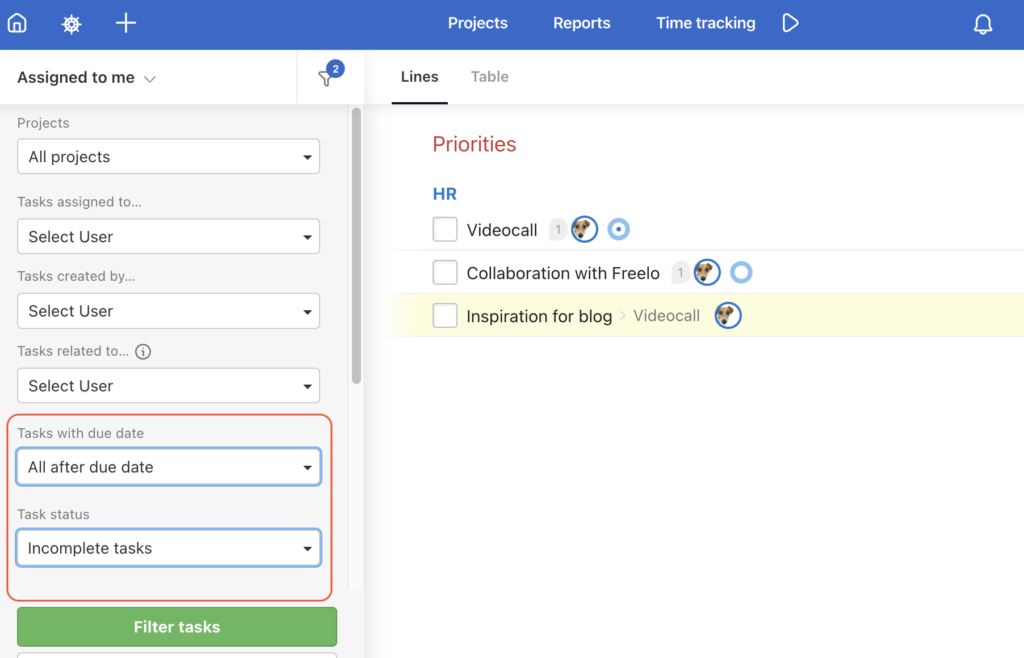
All incomplete tasks after the due date.
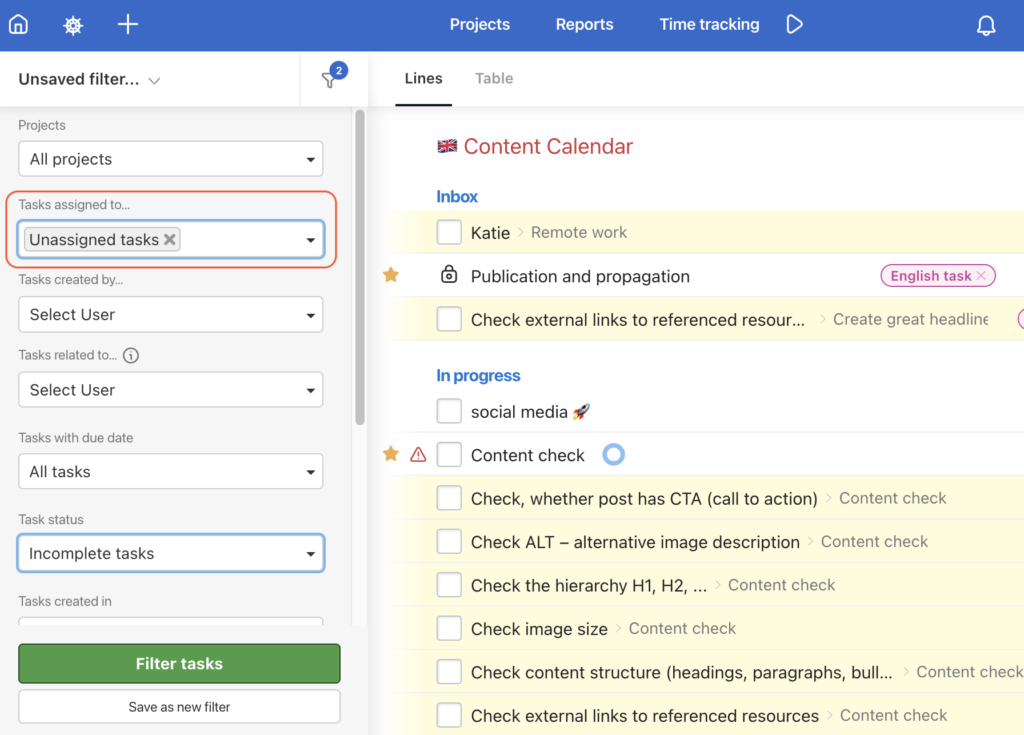
Filter: Tasks without an assigned user
You can find out which tasks through projects do not have an assigned user.
- Selected or all projects
- Tasks assigned to…: Unassigned tasks
- Task status: Incomplete tasks
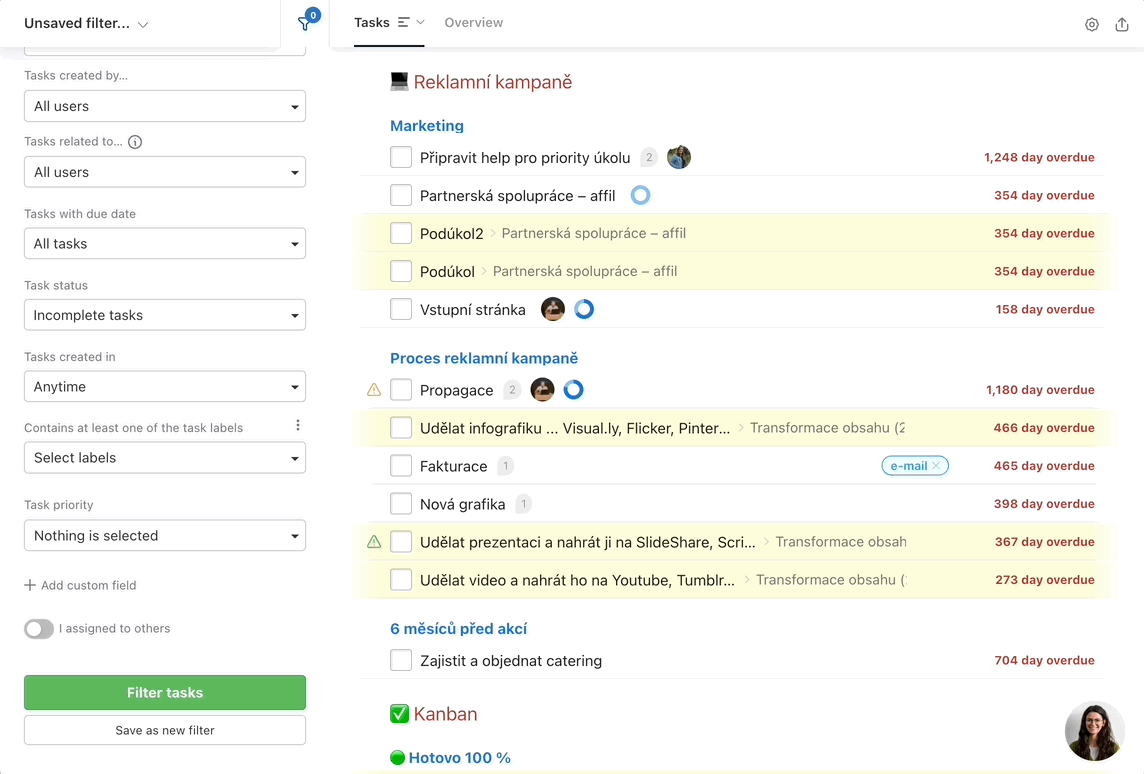
Sub/tasks on the Dashboard
You can work with sub/tasks on the Dashboard. Sub/tasks can be edited, completed, or deleted. Moreover, you can track the time or money via the clock icon.
Editing sub/tasks
There is a three-dot menu for editing to the left of the sub/tasks title. Any changes you make to sub/tasks in their details or project details can be made directly in the Dashboard. For example, you can assign a user to a sub/task or labels, change the deadline, move it to another project/To-Do list or delete the sub/task.
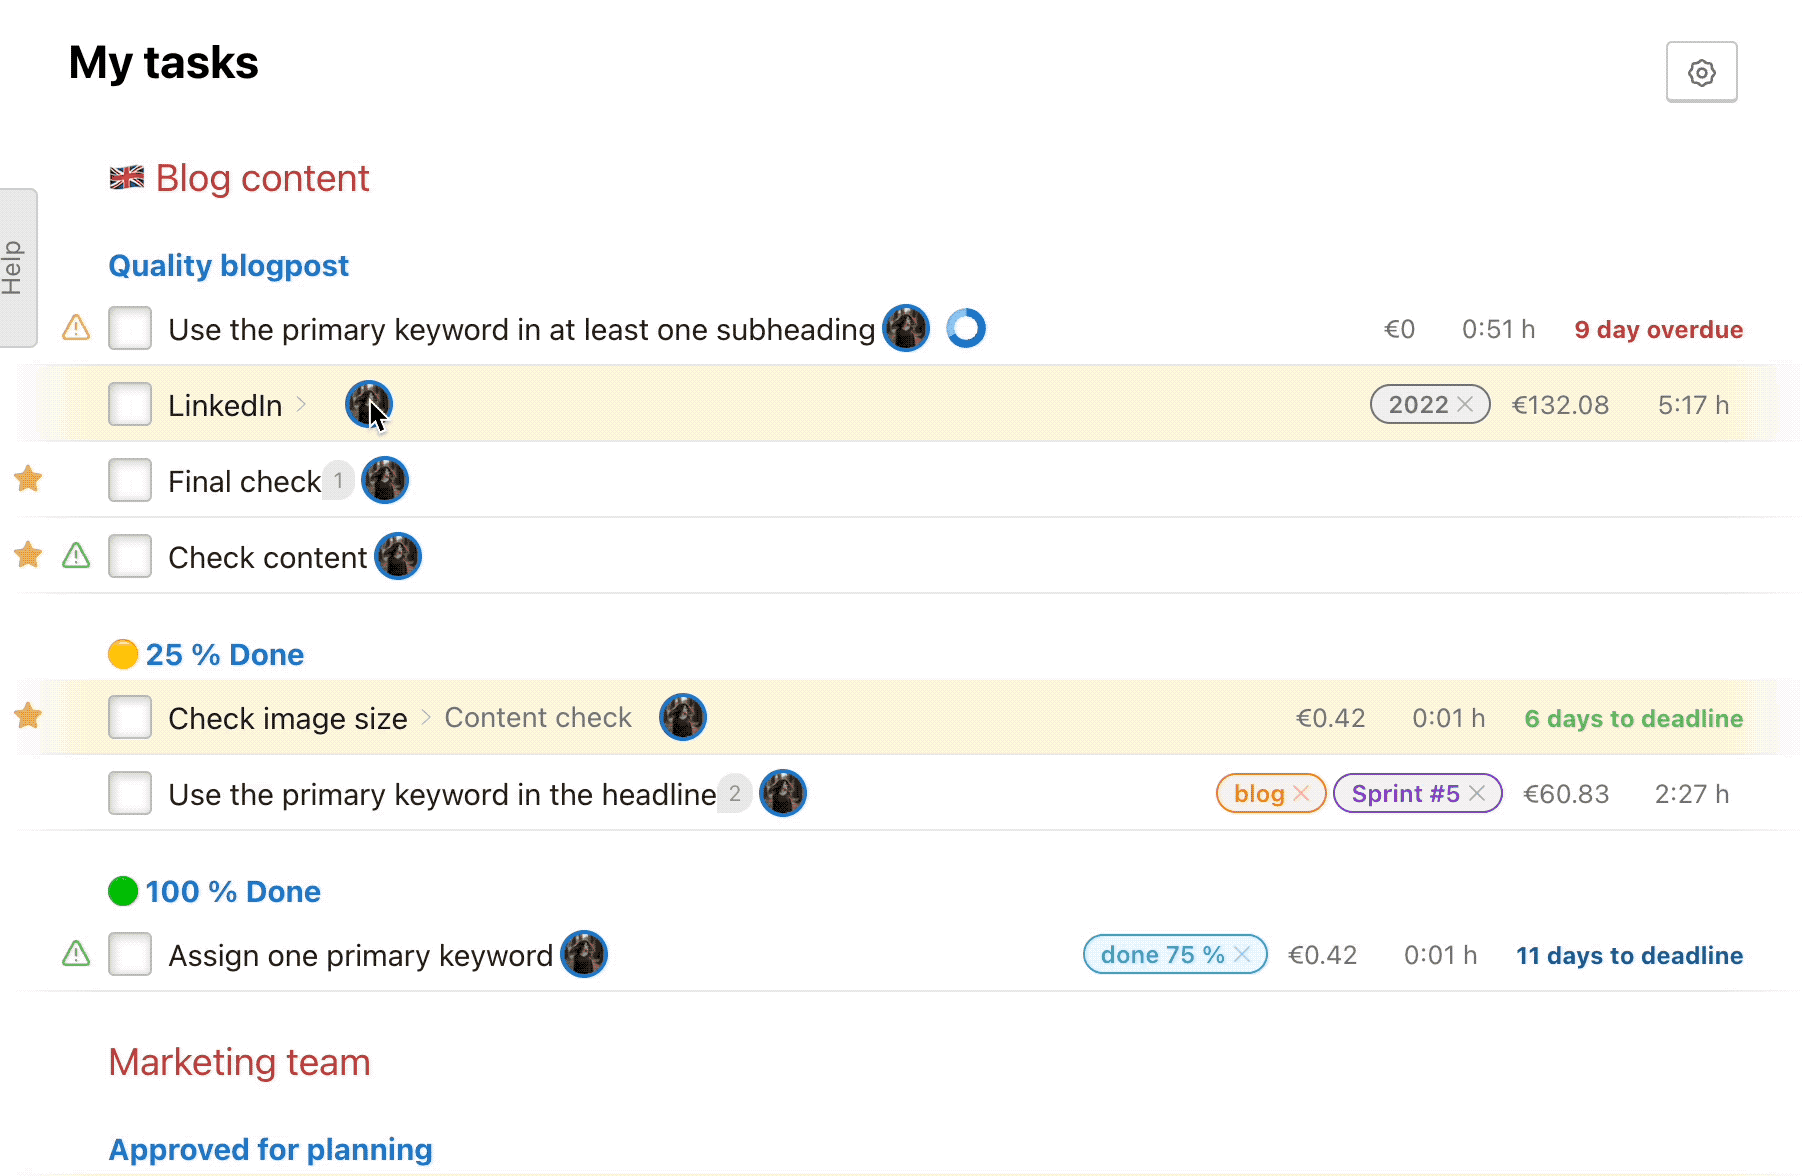
Time tracking of sub/tasks
To track time spent on a task or smart subtask, click on the play icon to the right of the sub/task name. The report for the previous task is automatically saved. To turn off tracking for a task, click the track icon in the same location or in the top blue menu next to Time tracking.
Manual time and cost reporting
You can manually add time and cost reports for sub/tasks. Click on the clock icon (or an already tracked time or cost) on the right side of the sub/task and add the report. If you have set up your hourly rate, it will automatically appear when reporting for the sub/task in the hourly rate/budget/cost.
Completion of sub/tasks
Do you have several completed tasks and smart subtasks across projects? Great! Close them straight in the Dashboard.
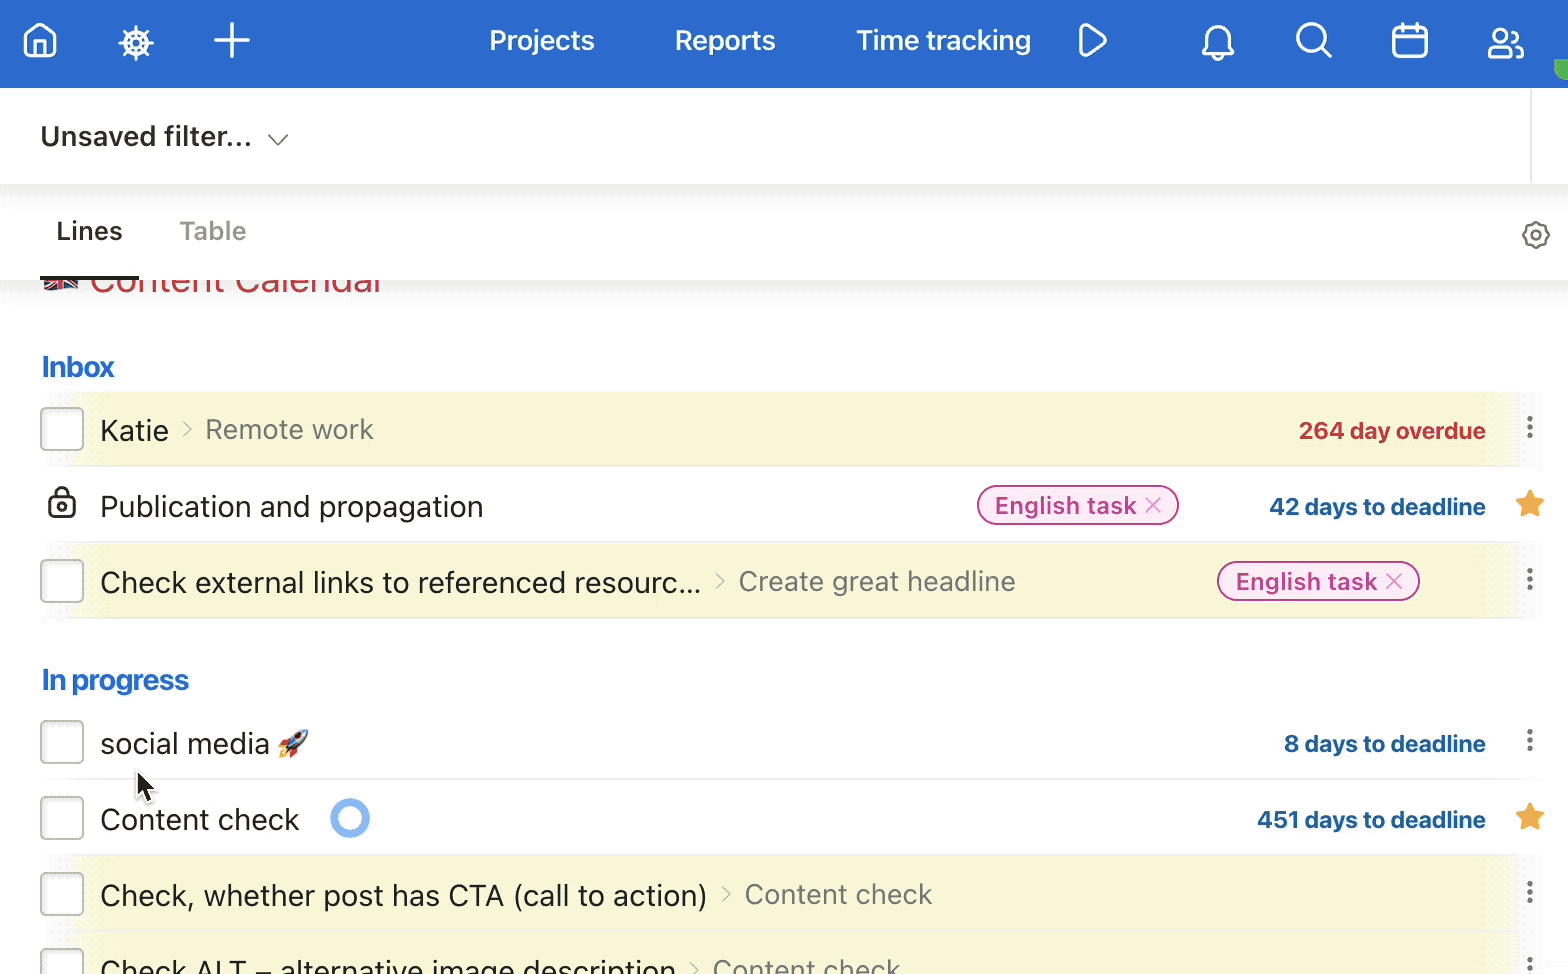
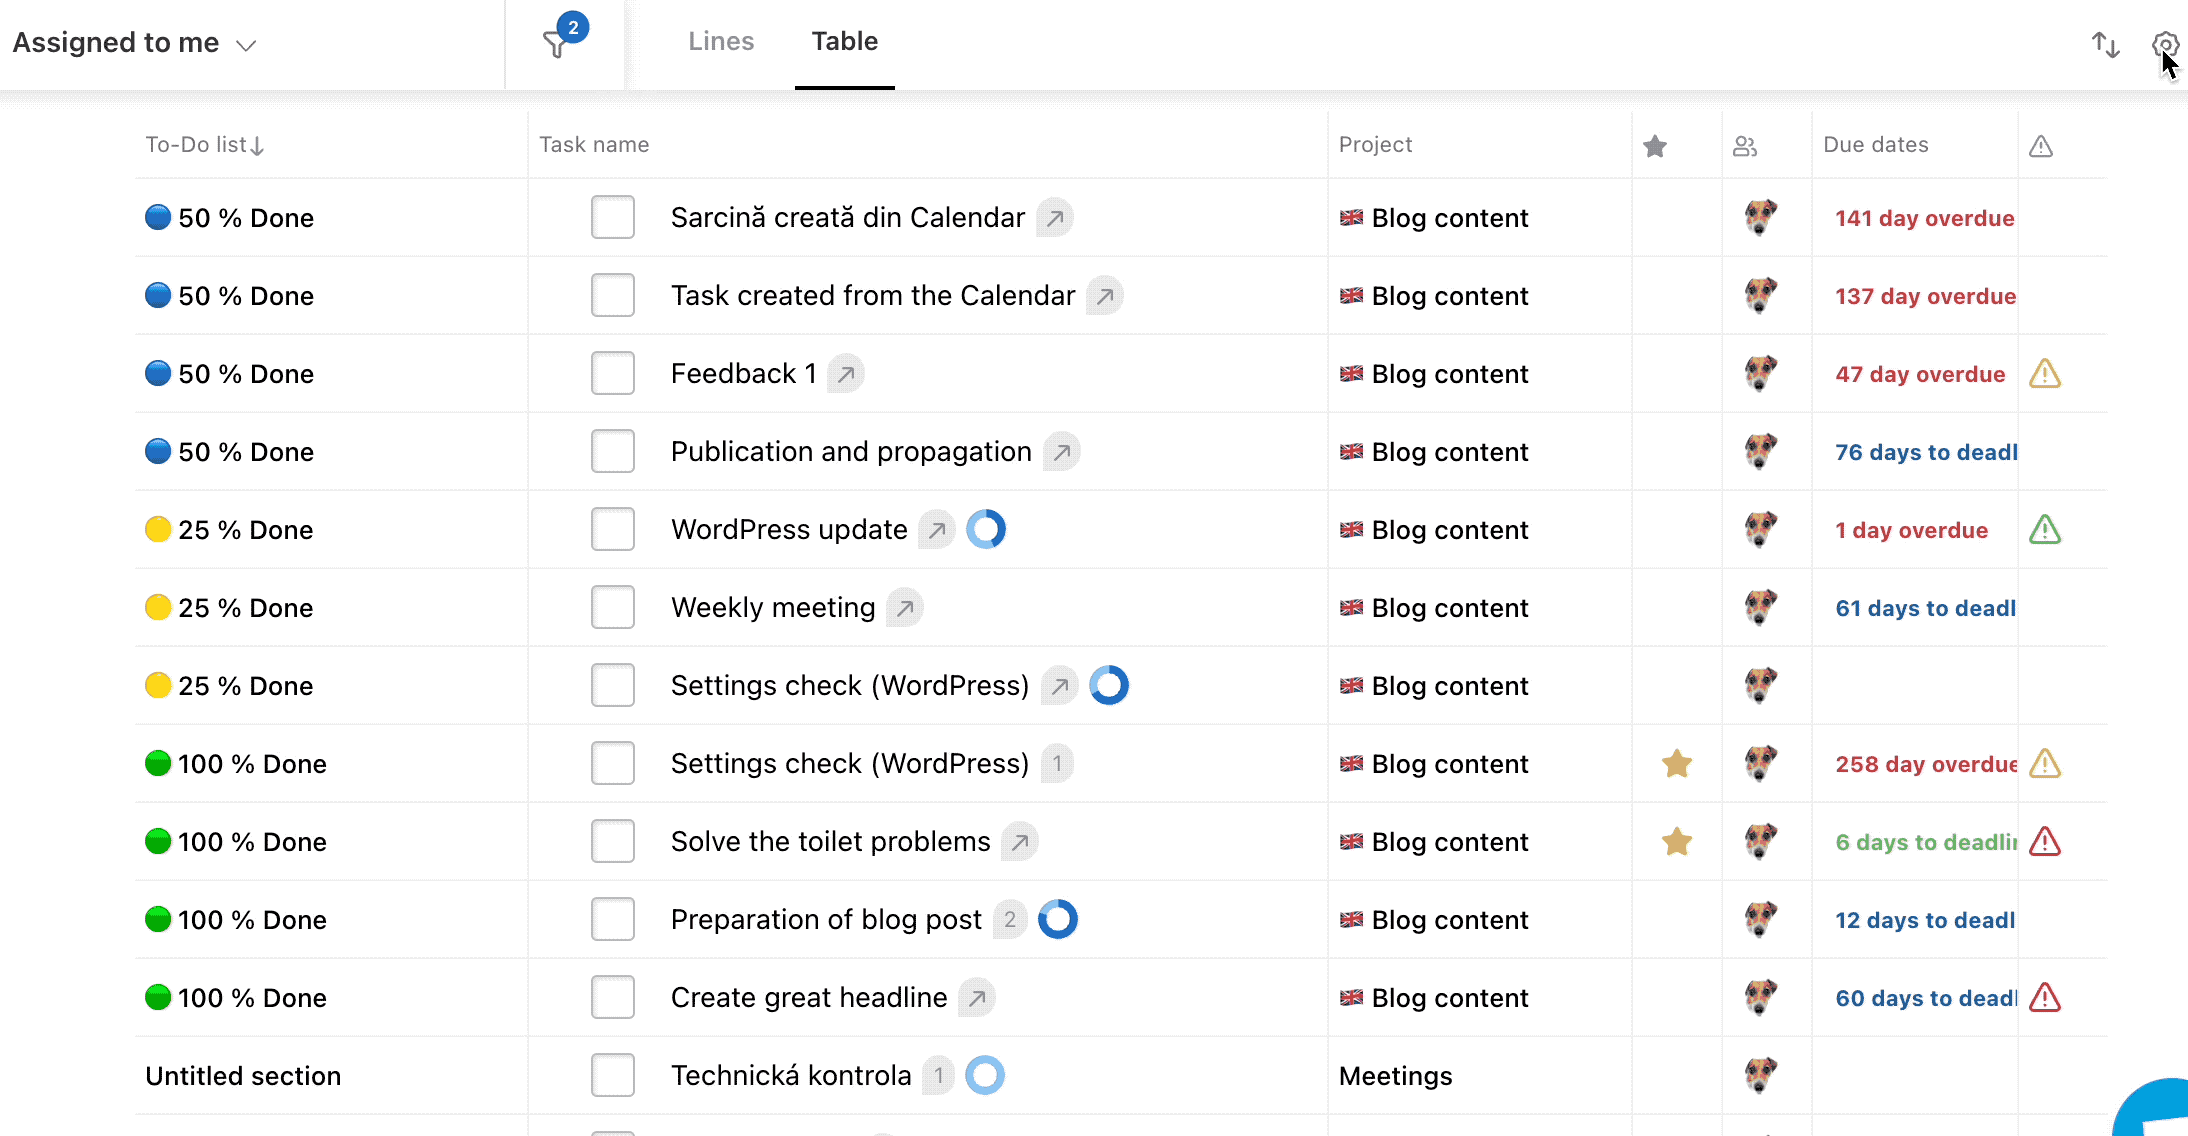
Table View
You can switch the view of the Dashboard from the default to the Table view via Tables button. Check out the screenshot below.
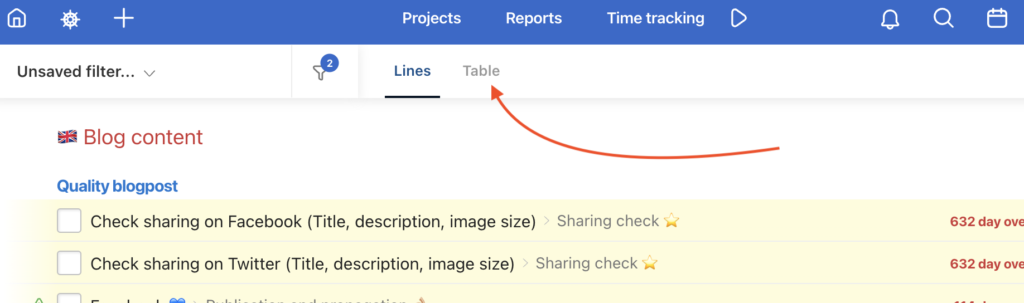
Table sections
You can set up the dashboard with a table view according to your needs. Similar to the project settings you can show/hide and change the order of these sections:
- Task name – this section can not be hidden
- Projects
- To-Do lists
- Due dates
- Labels
- My task priorities
- Priority
- Assignee
- Custom field
- Creation date
- Date of completion
Edit table layout via the Settings icon > Customize > drag & drop to sort the sections as needed.
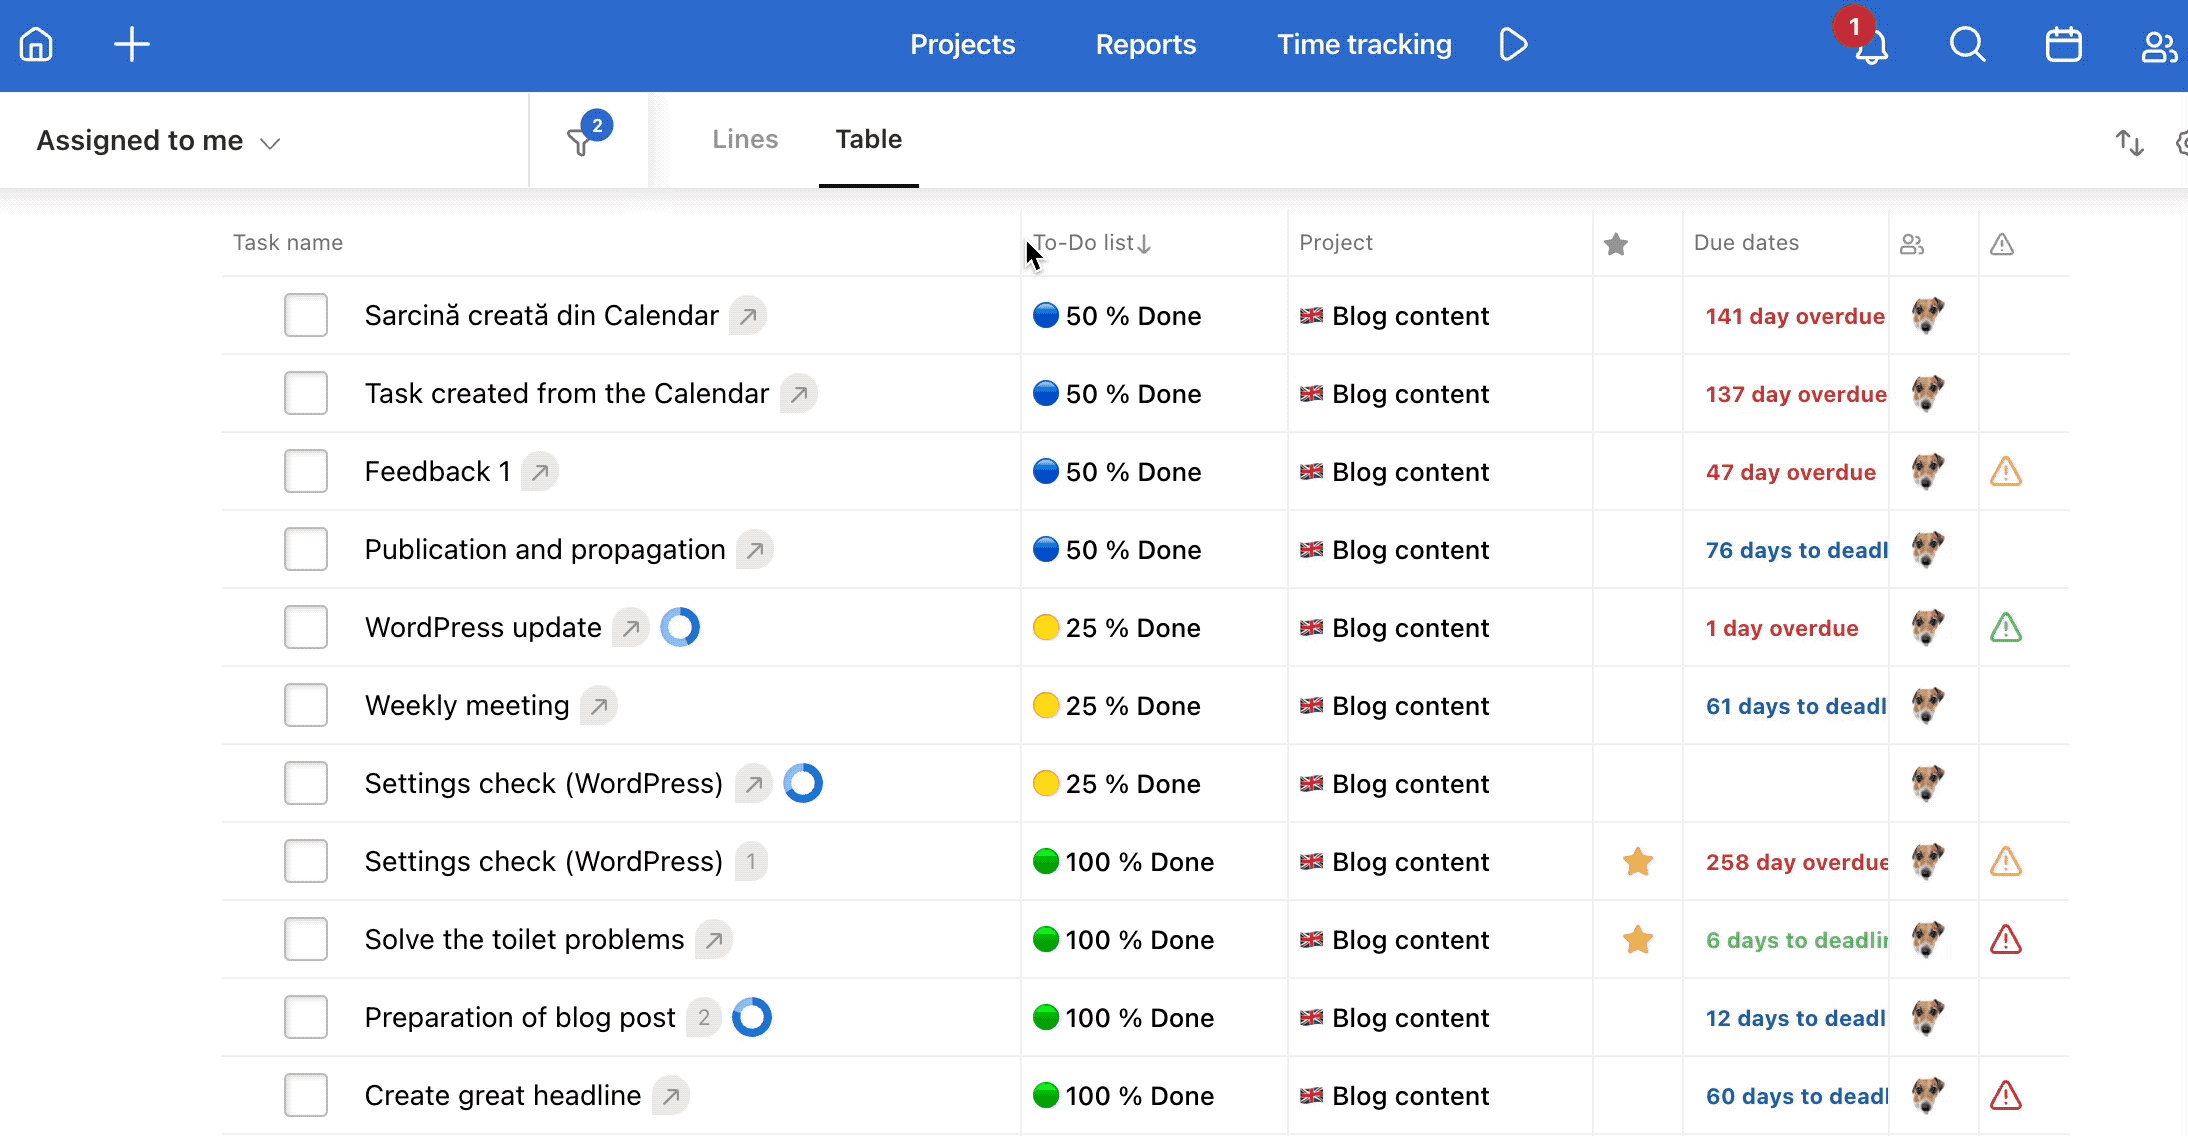
Working with columns
Columns of the table view can be moved, hidden, expanded, or reset their width. To show the hidden column again, click the gear icon > Customize > check the section (column) you want to show. Then click on the cross. The Dashboard appears with the column (section) restored.
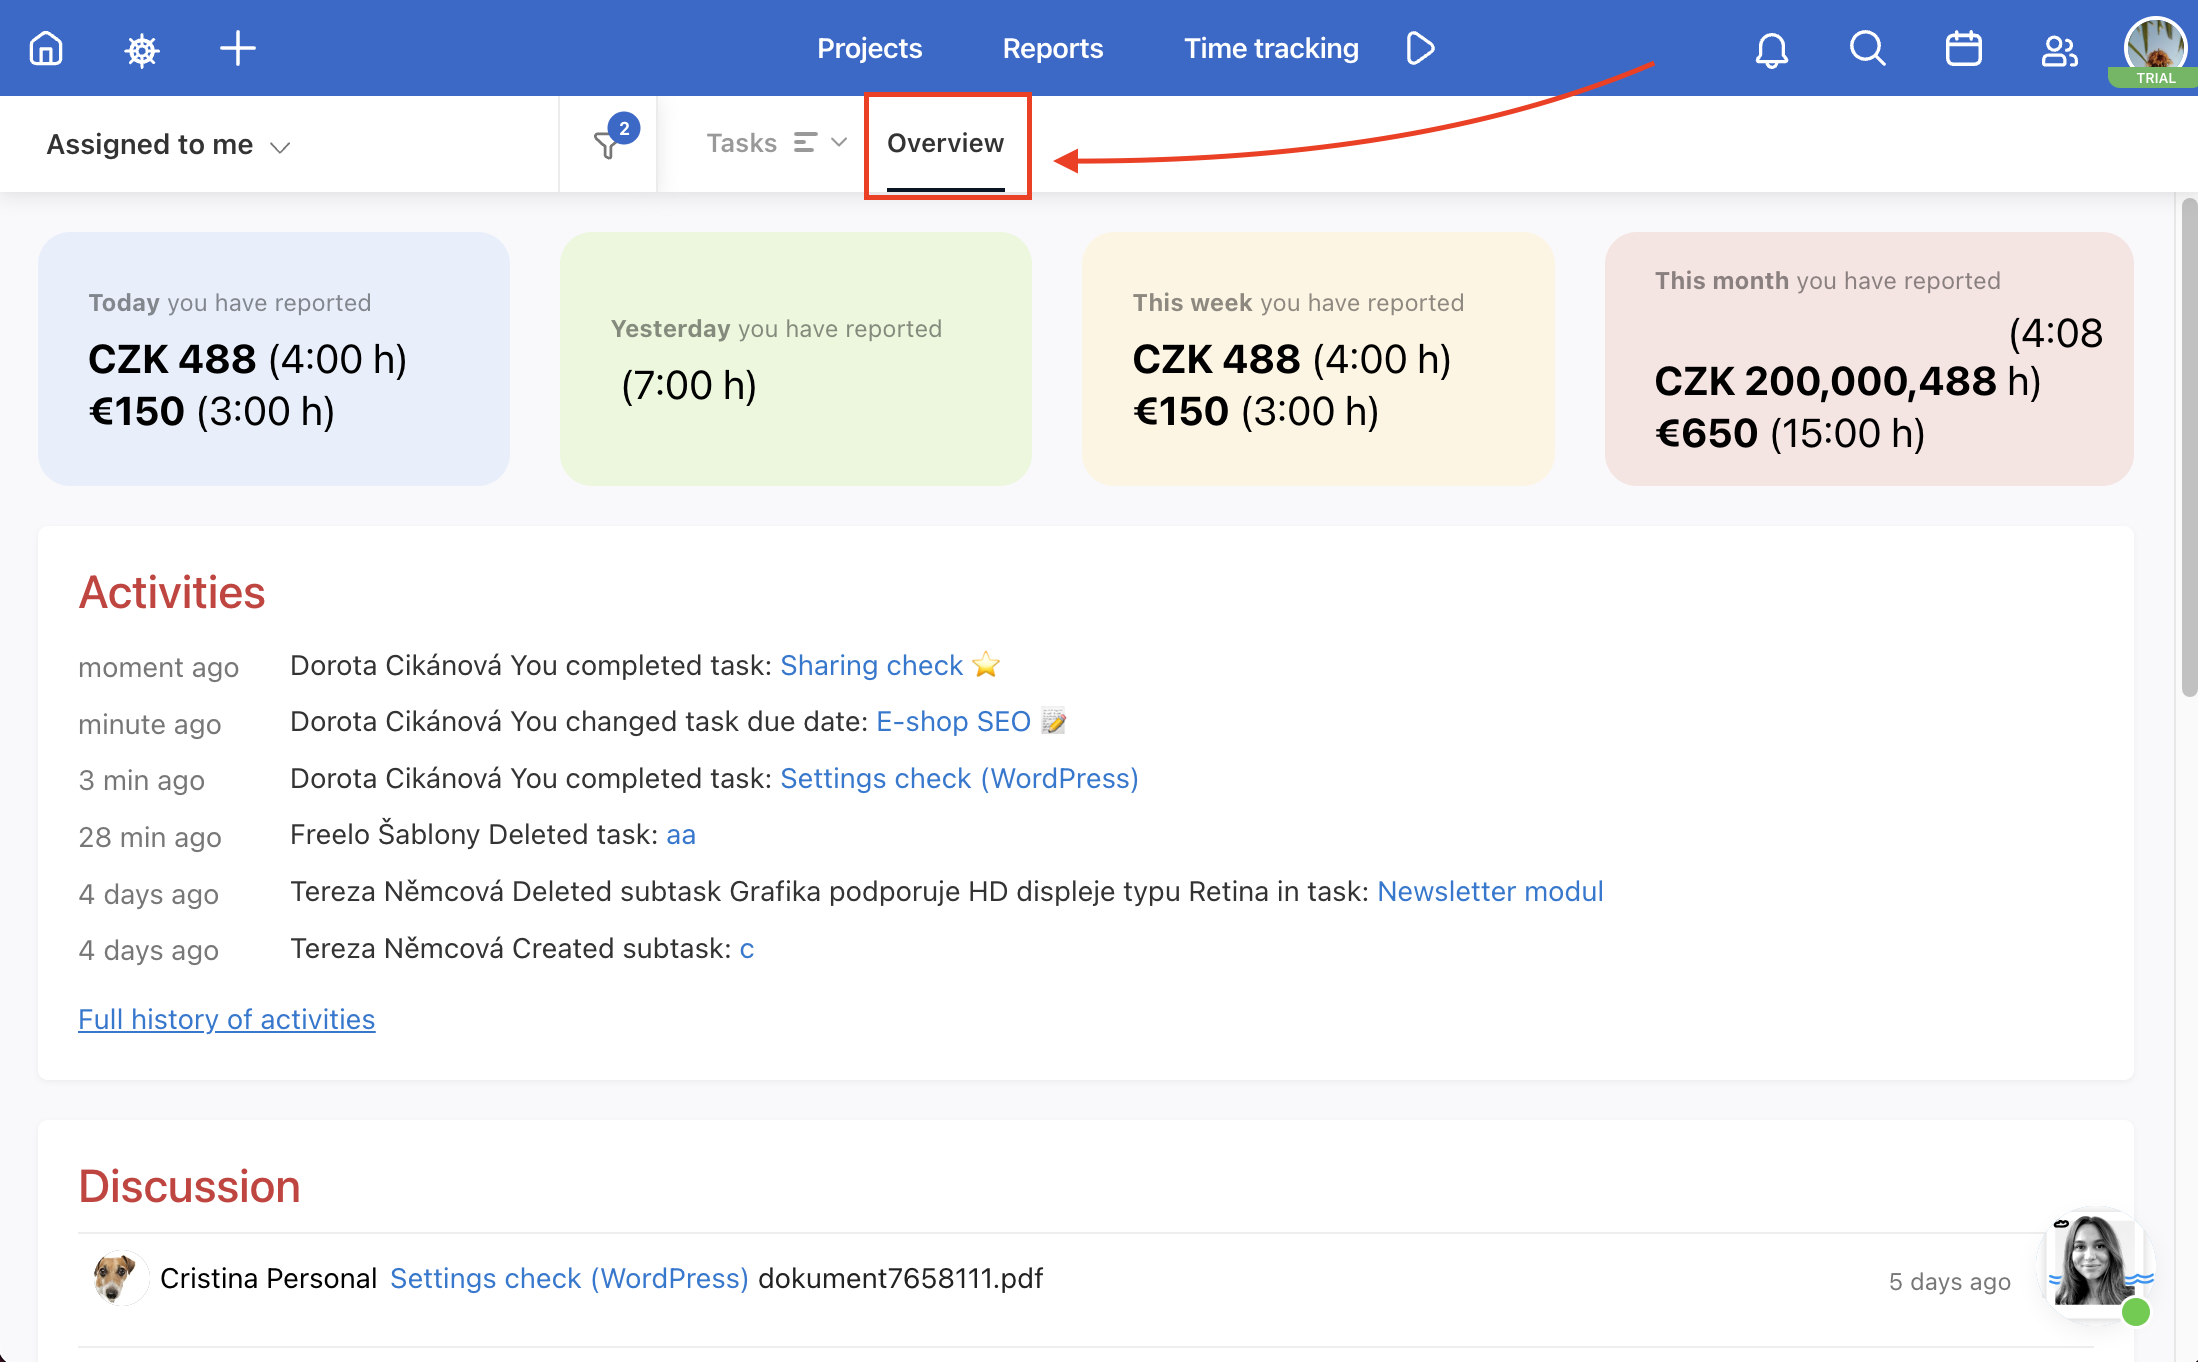
Overview on Dashboard
In the overview section, you can see the reports for today and yesterday, as well as the total reports for this week and month. Moreover, you can see the latest activity on projects, new comments in discussions, and the last completed tasks.
You can access the overview at the top of the dashboard as shown in the image below.
Show exact dates on Dashboard
On the Dashboard, you can see how many days there are left until the due date by default. Additionally, you can personalise this and choose to see the exact dates (set as due dates for tasks). Do so by clicking on the cogwheel icon > Show: Exact Dates.
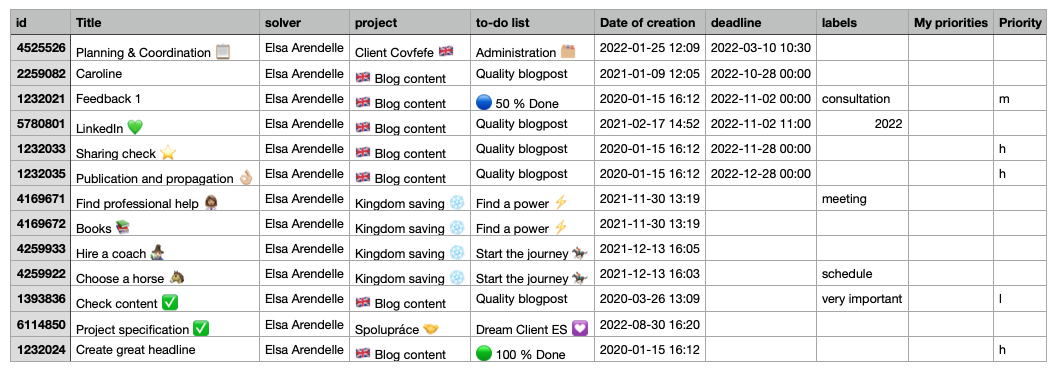
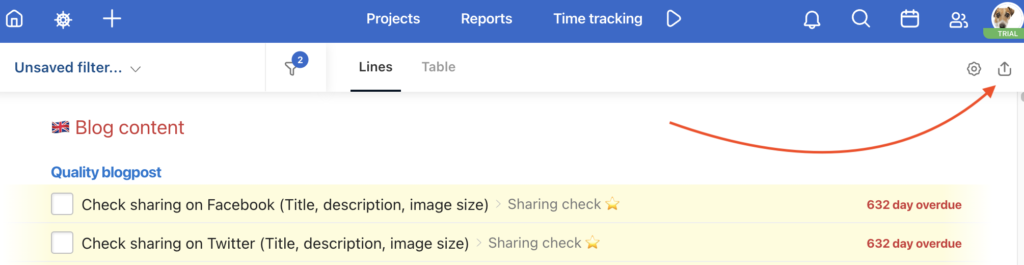
Data export from Dashboard
If you need to work with the data from the Dashboard further, or simply have it in another place for some reason, you can easily export it. Just click on the export button at the top.
The data is exported as a CSV table, which can look like this: