Do you prefer the Kanban view and you rather see your tasks categorised in columns? In Freelo, you can create a Kanban Board, which is a board with tasks organized in columns. Each To-Do list corresponds to a column so you can name them according to the individual phases of the project such as Inbox, In progress/WIP, Done etc.
Switching to Kanban in a project
You can set a kanban board as a layout for tasks when creating a new project or later on in any existing project.
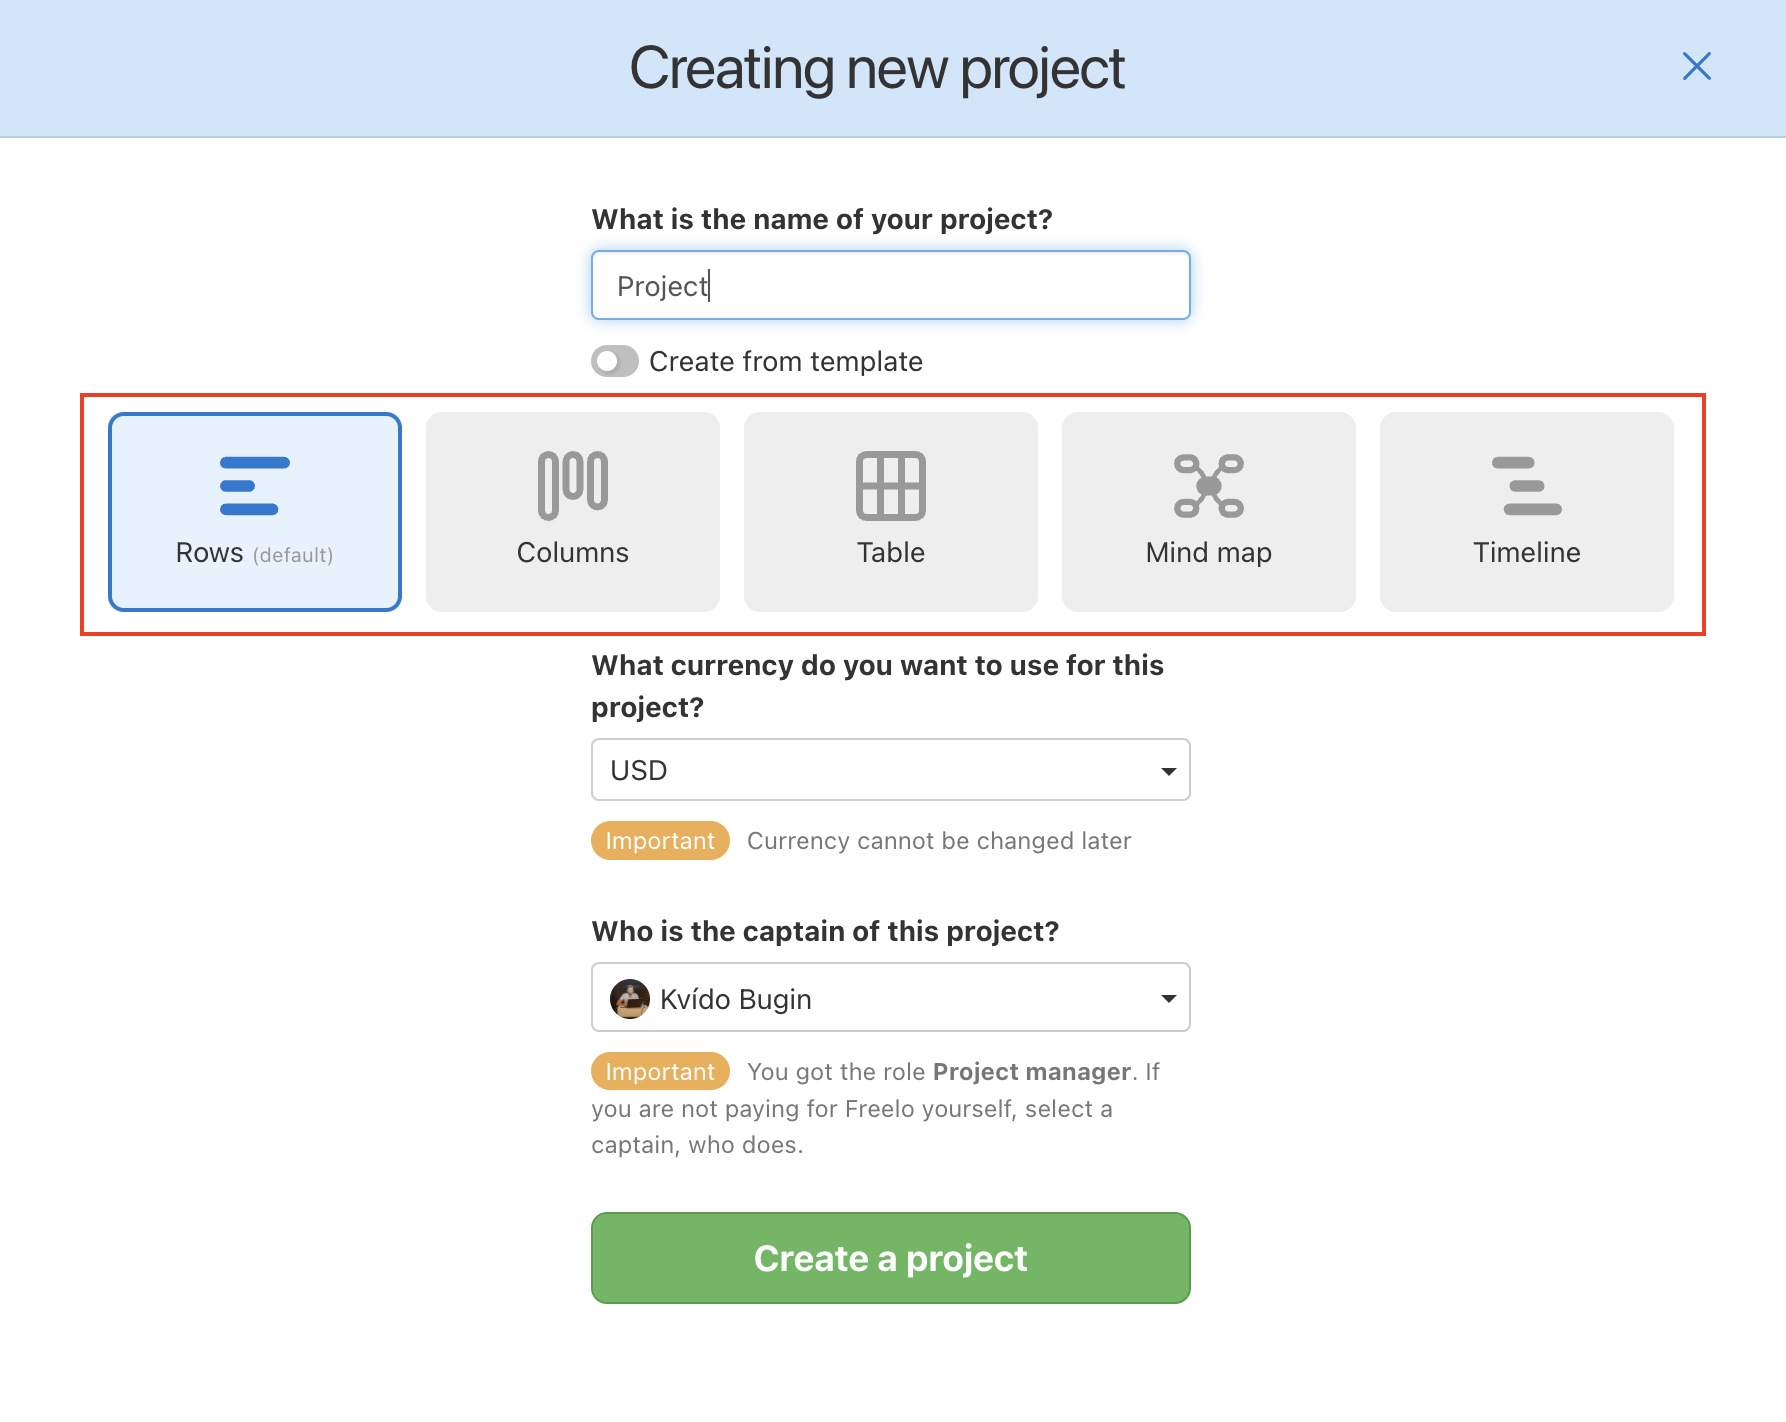
When creating a new project
When creating a new project, you can set the view to be Rows, Columns, Table, Mind Map or Timeline.
How to switch view in an existing project
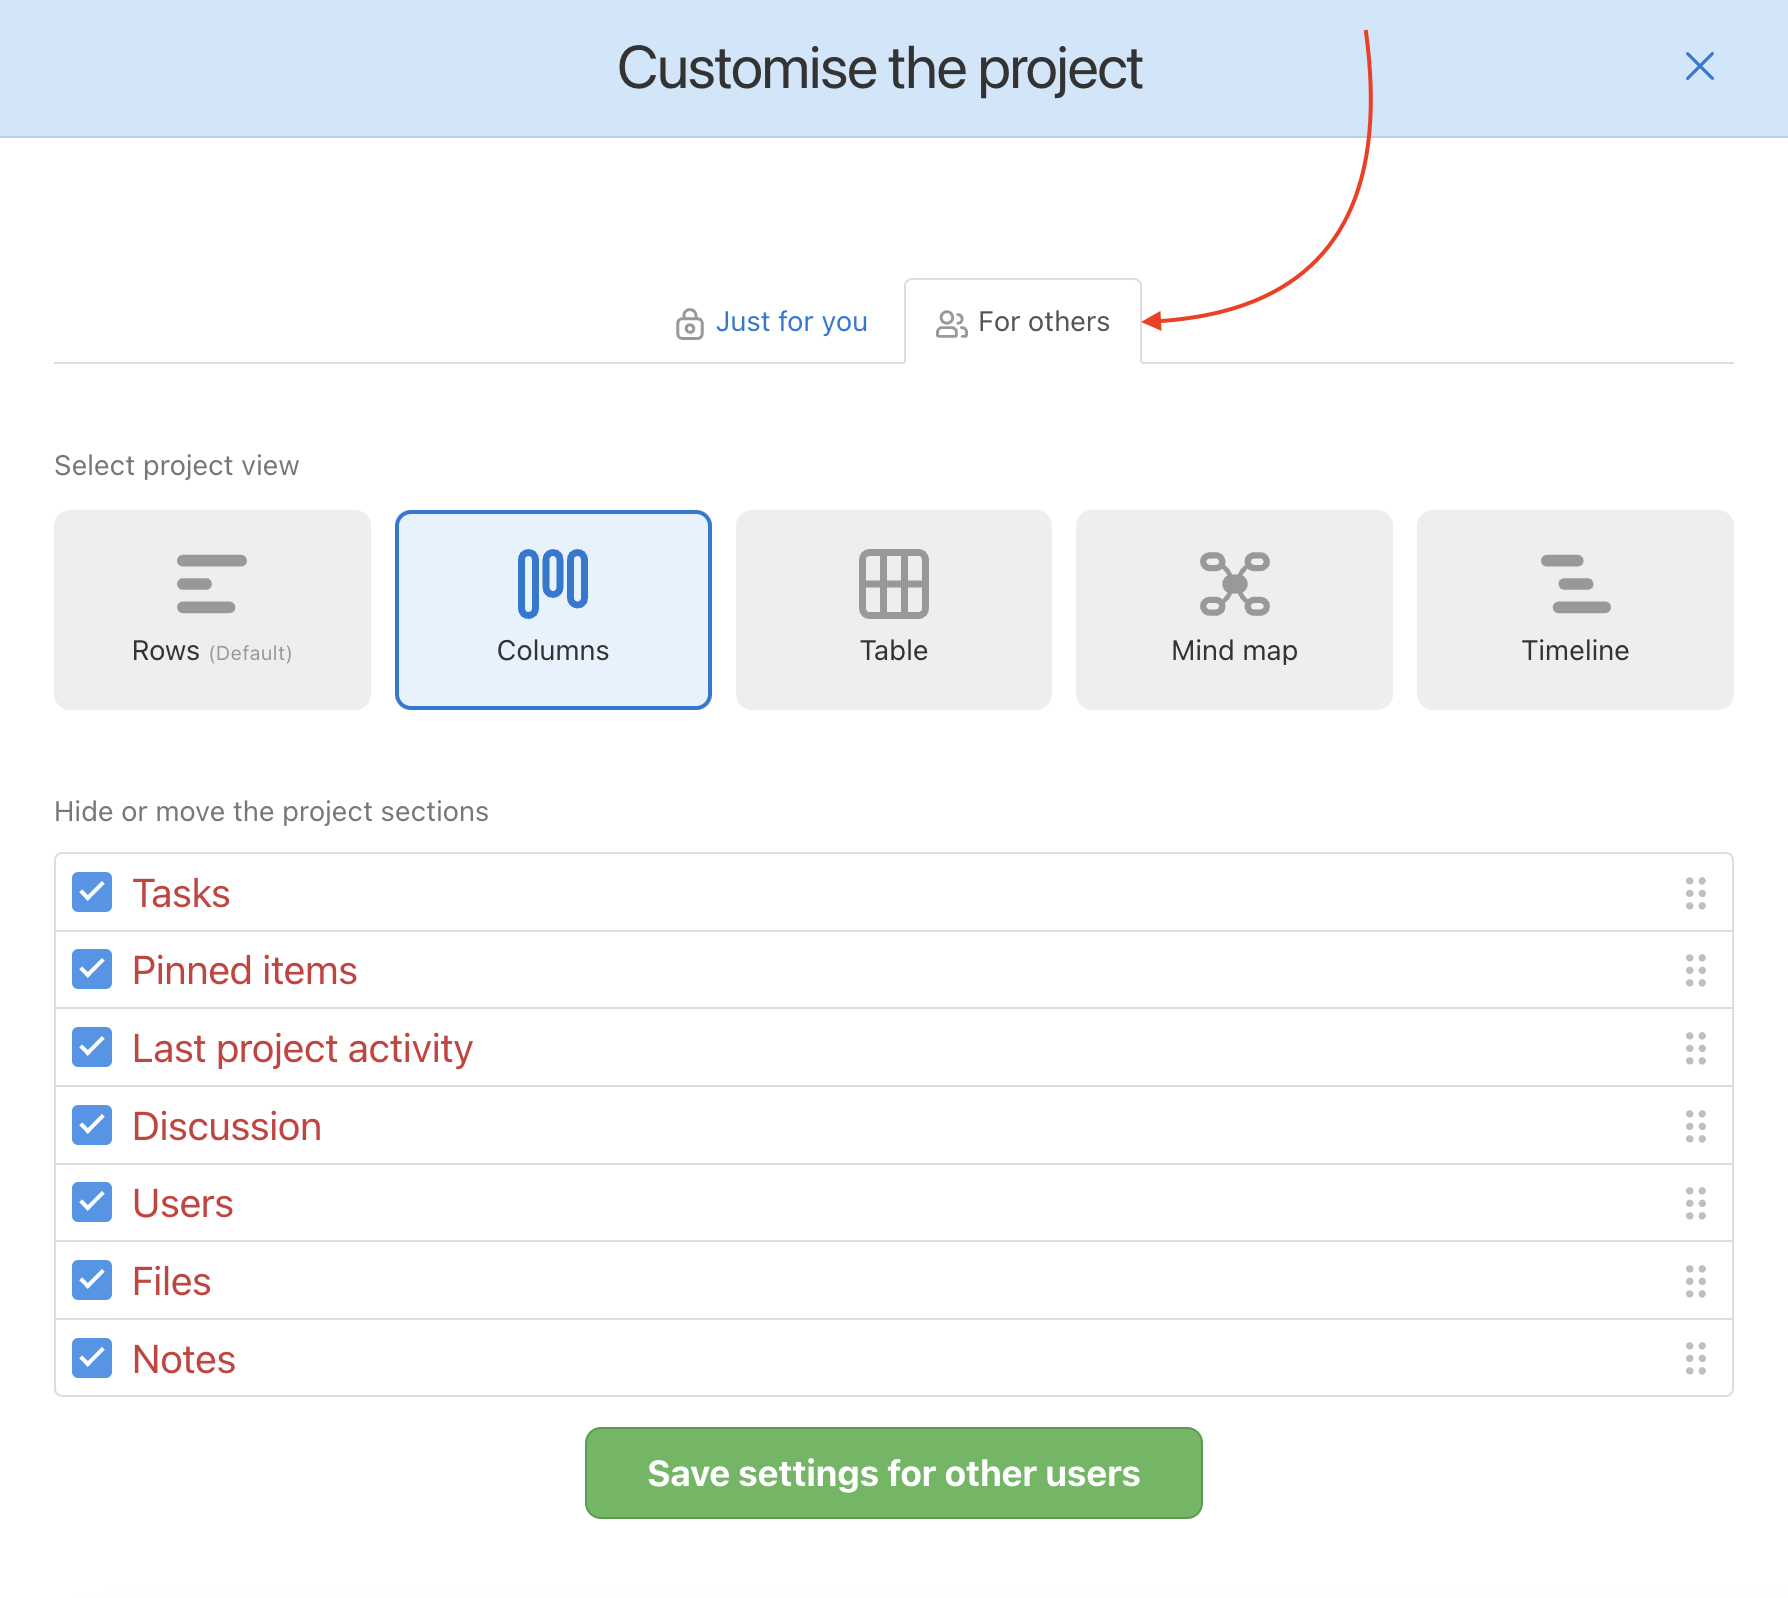
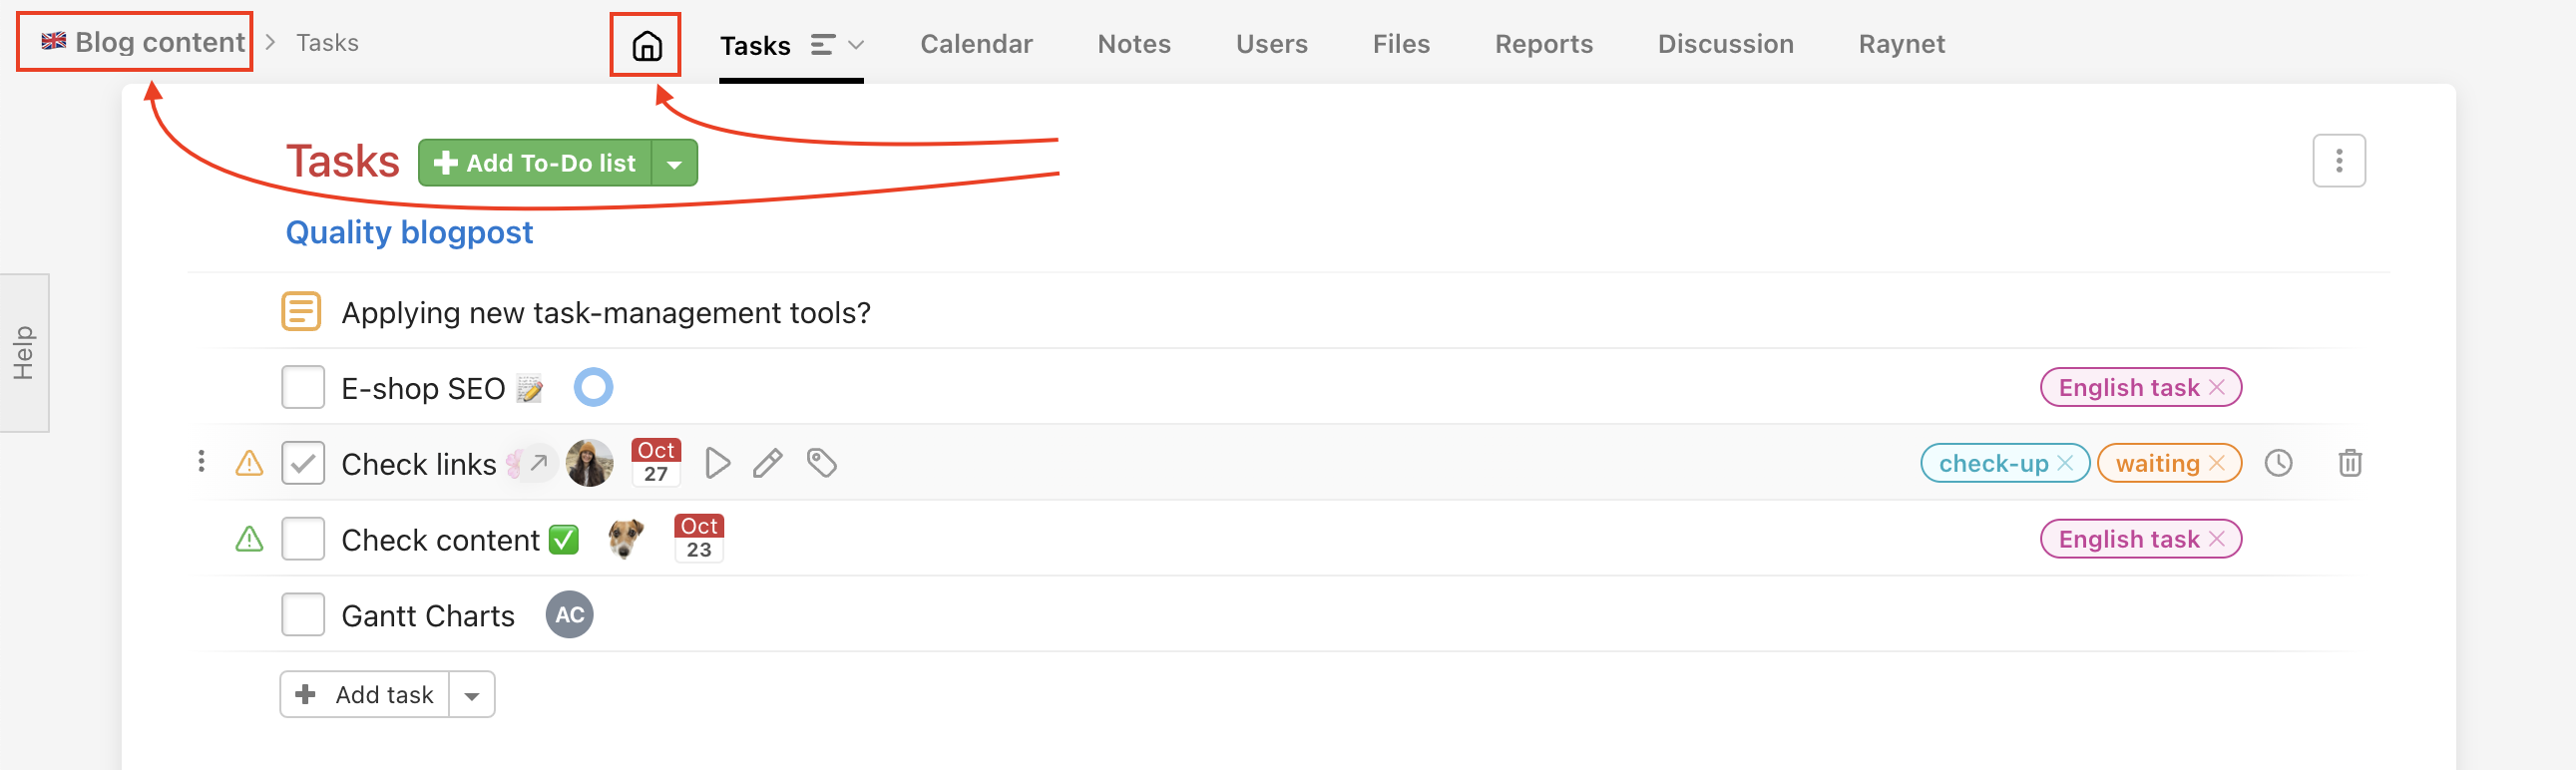
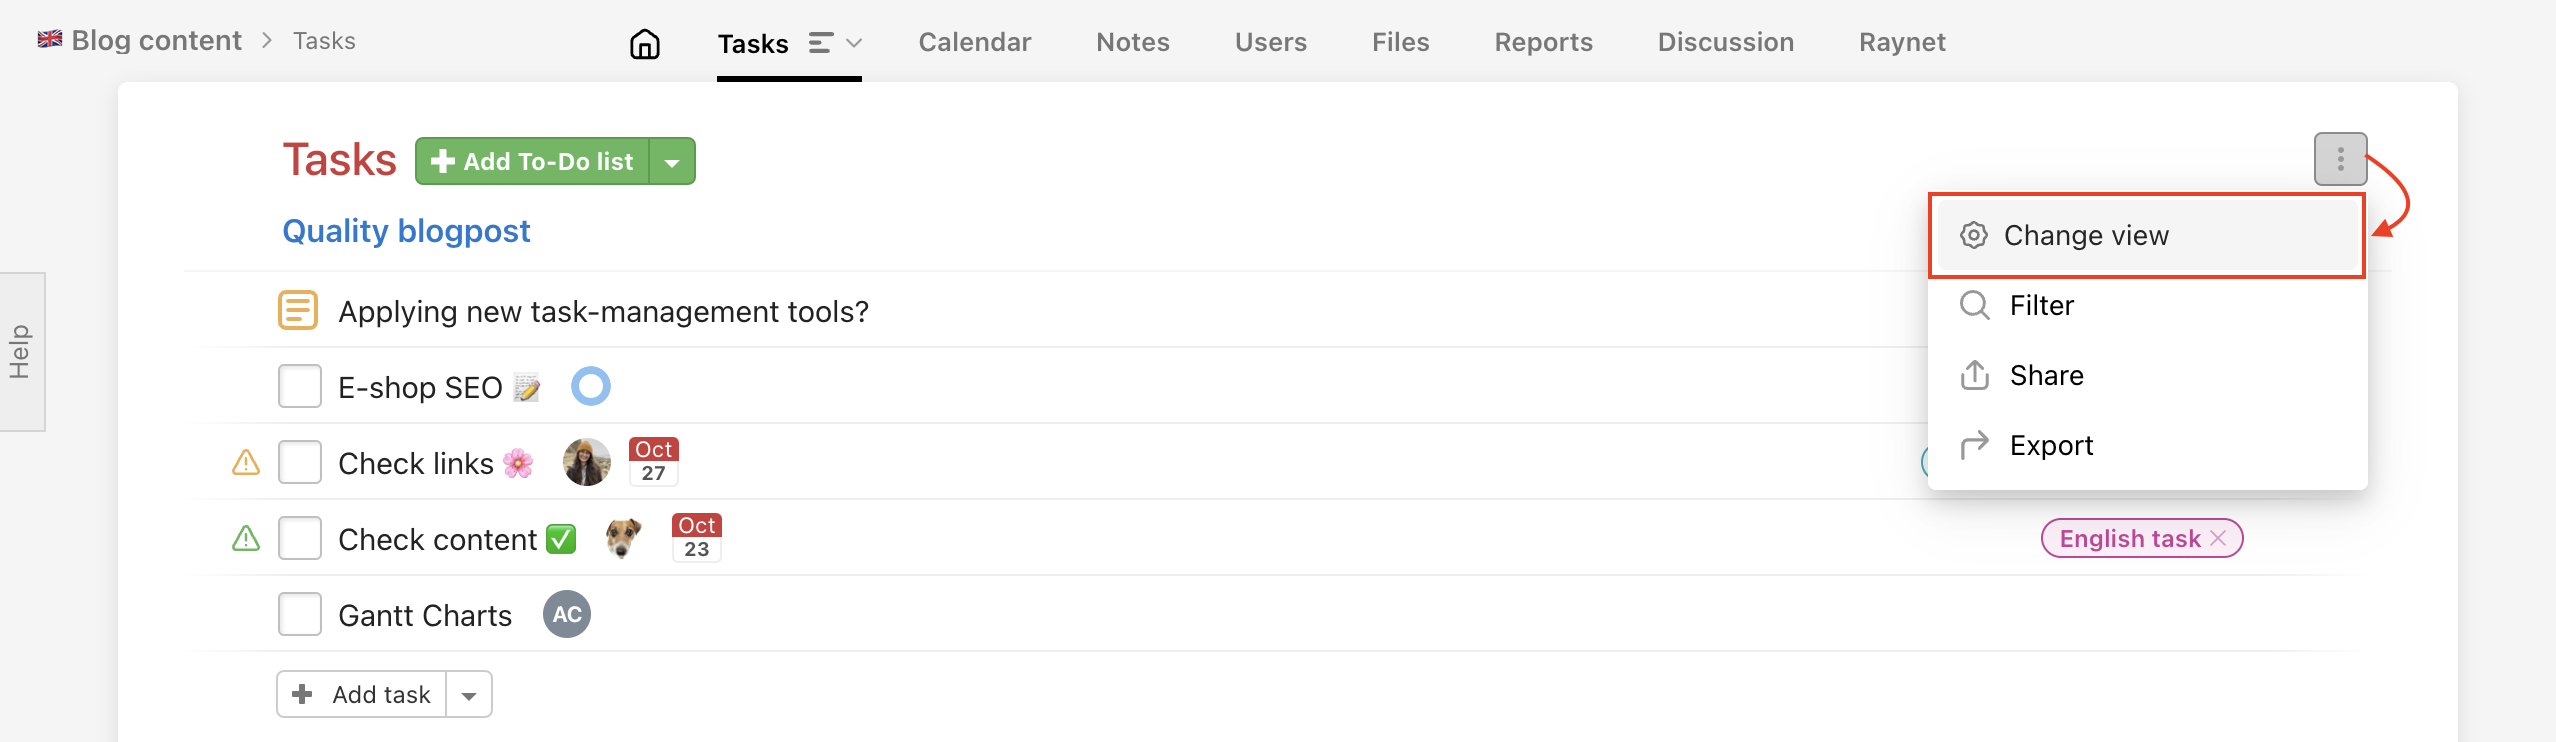
In all projects, be it your own ones or those you were invited to, you can change the view from rows to columns or any other view. Go to the project detail page (house icon in the project menu) and click on the Settings icon > Project settings.
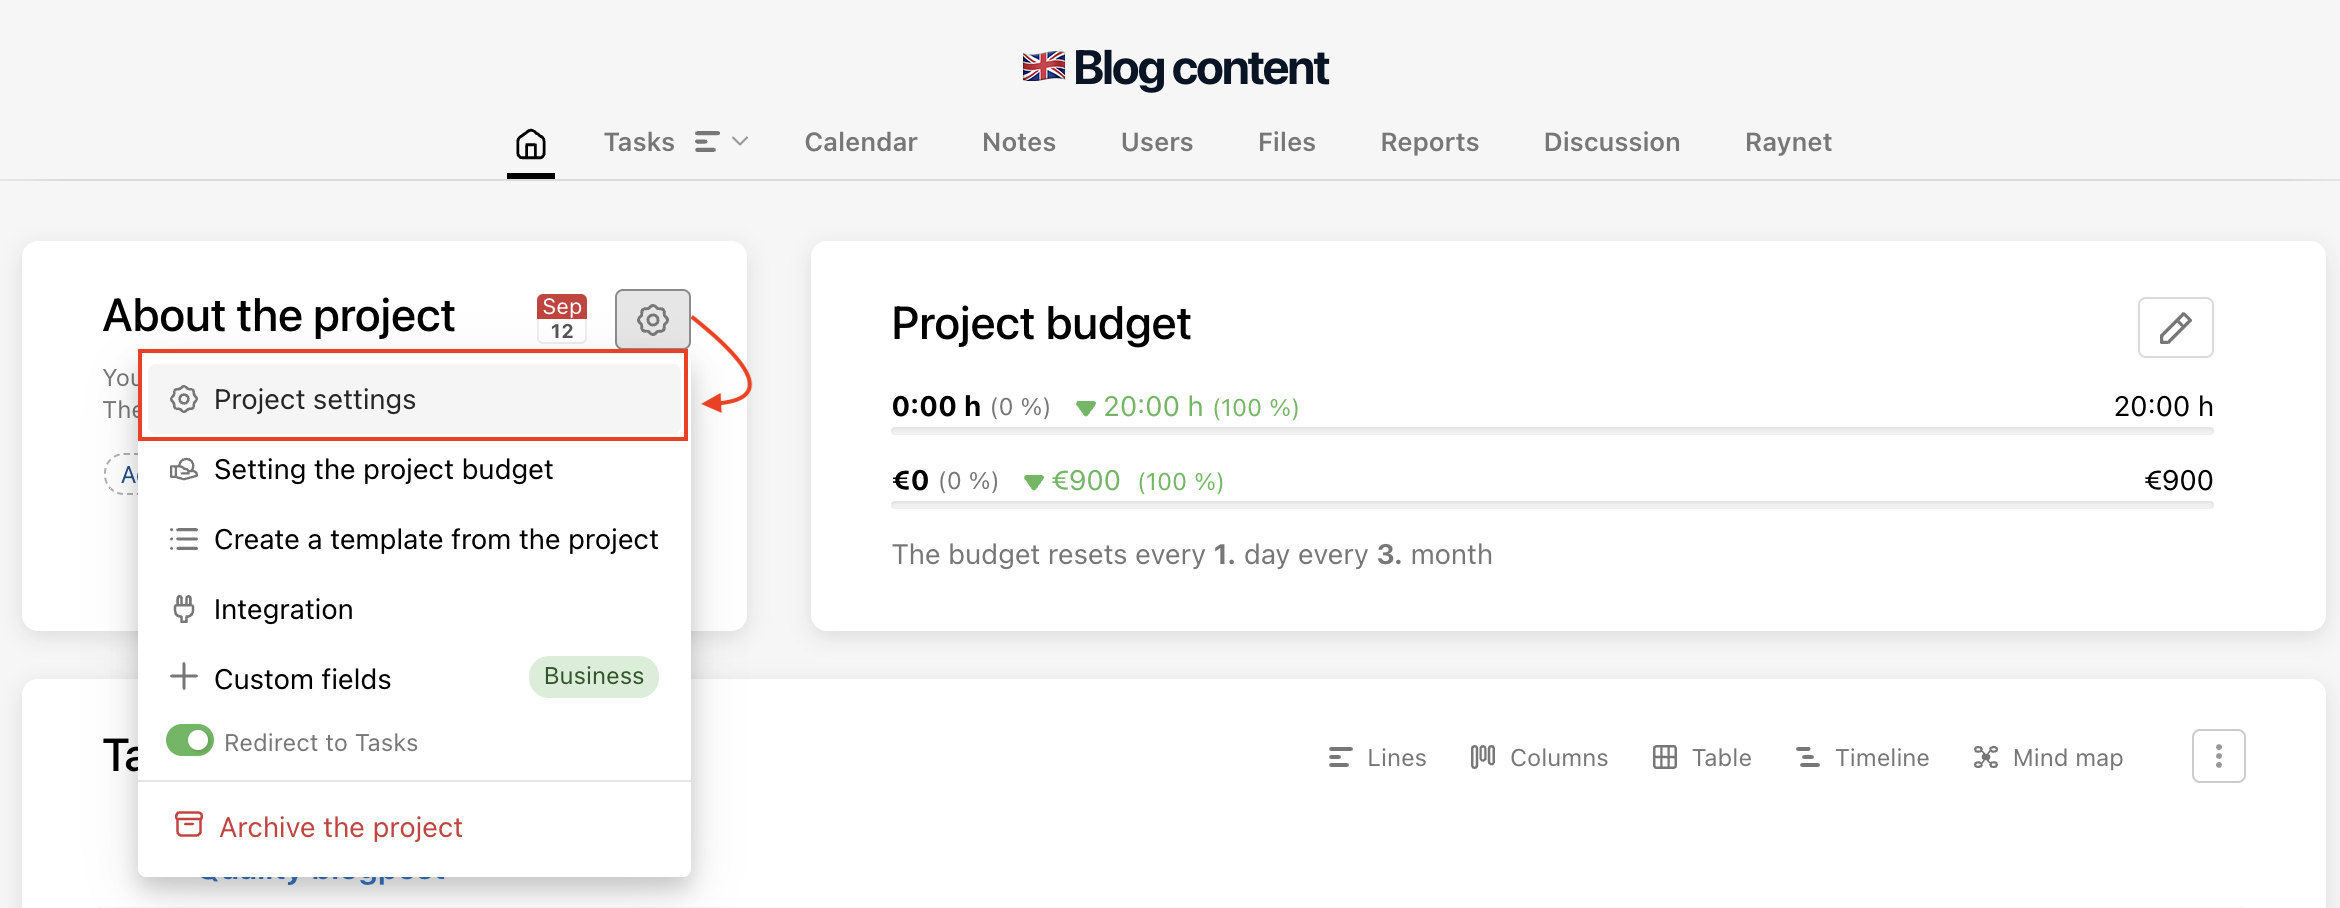
If you are the owner or the admin of the project, you can set rows or columns as a default task layout for other users as well. If you are an invited user, you can set the chosen layout for yourself only.
Select Rows, Columns or any other view and confirm via Save settings for this project.
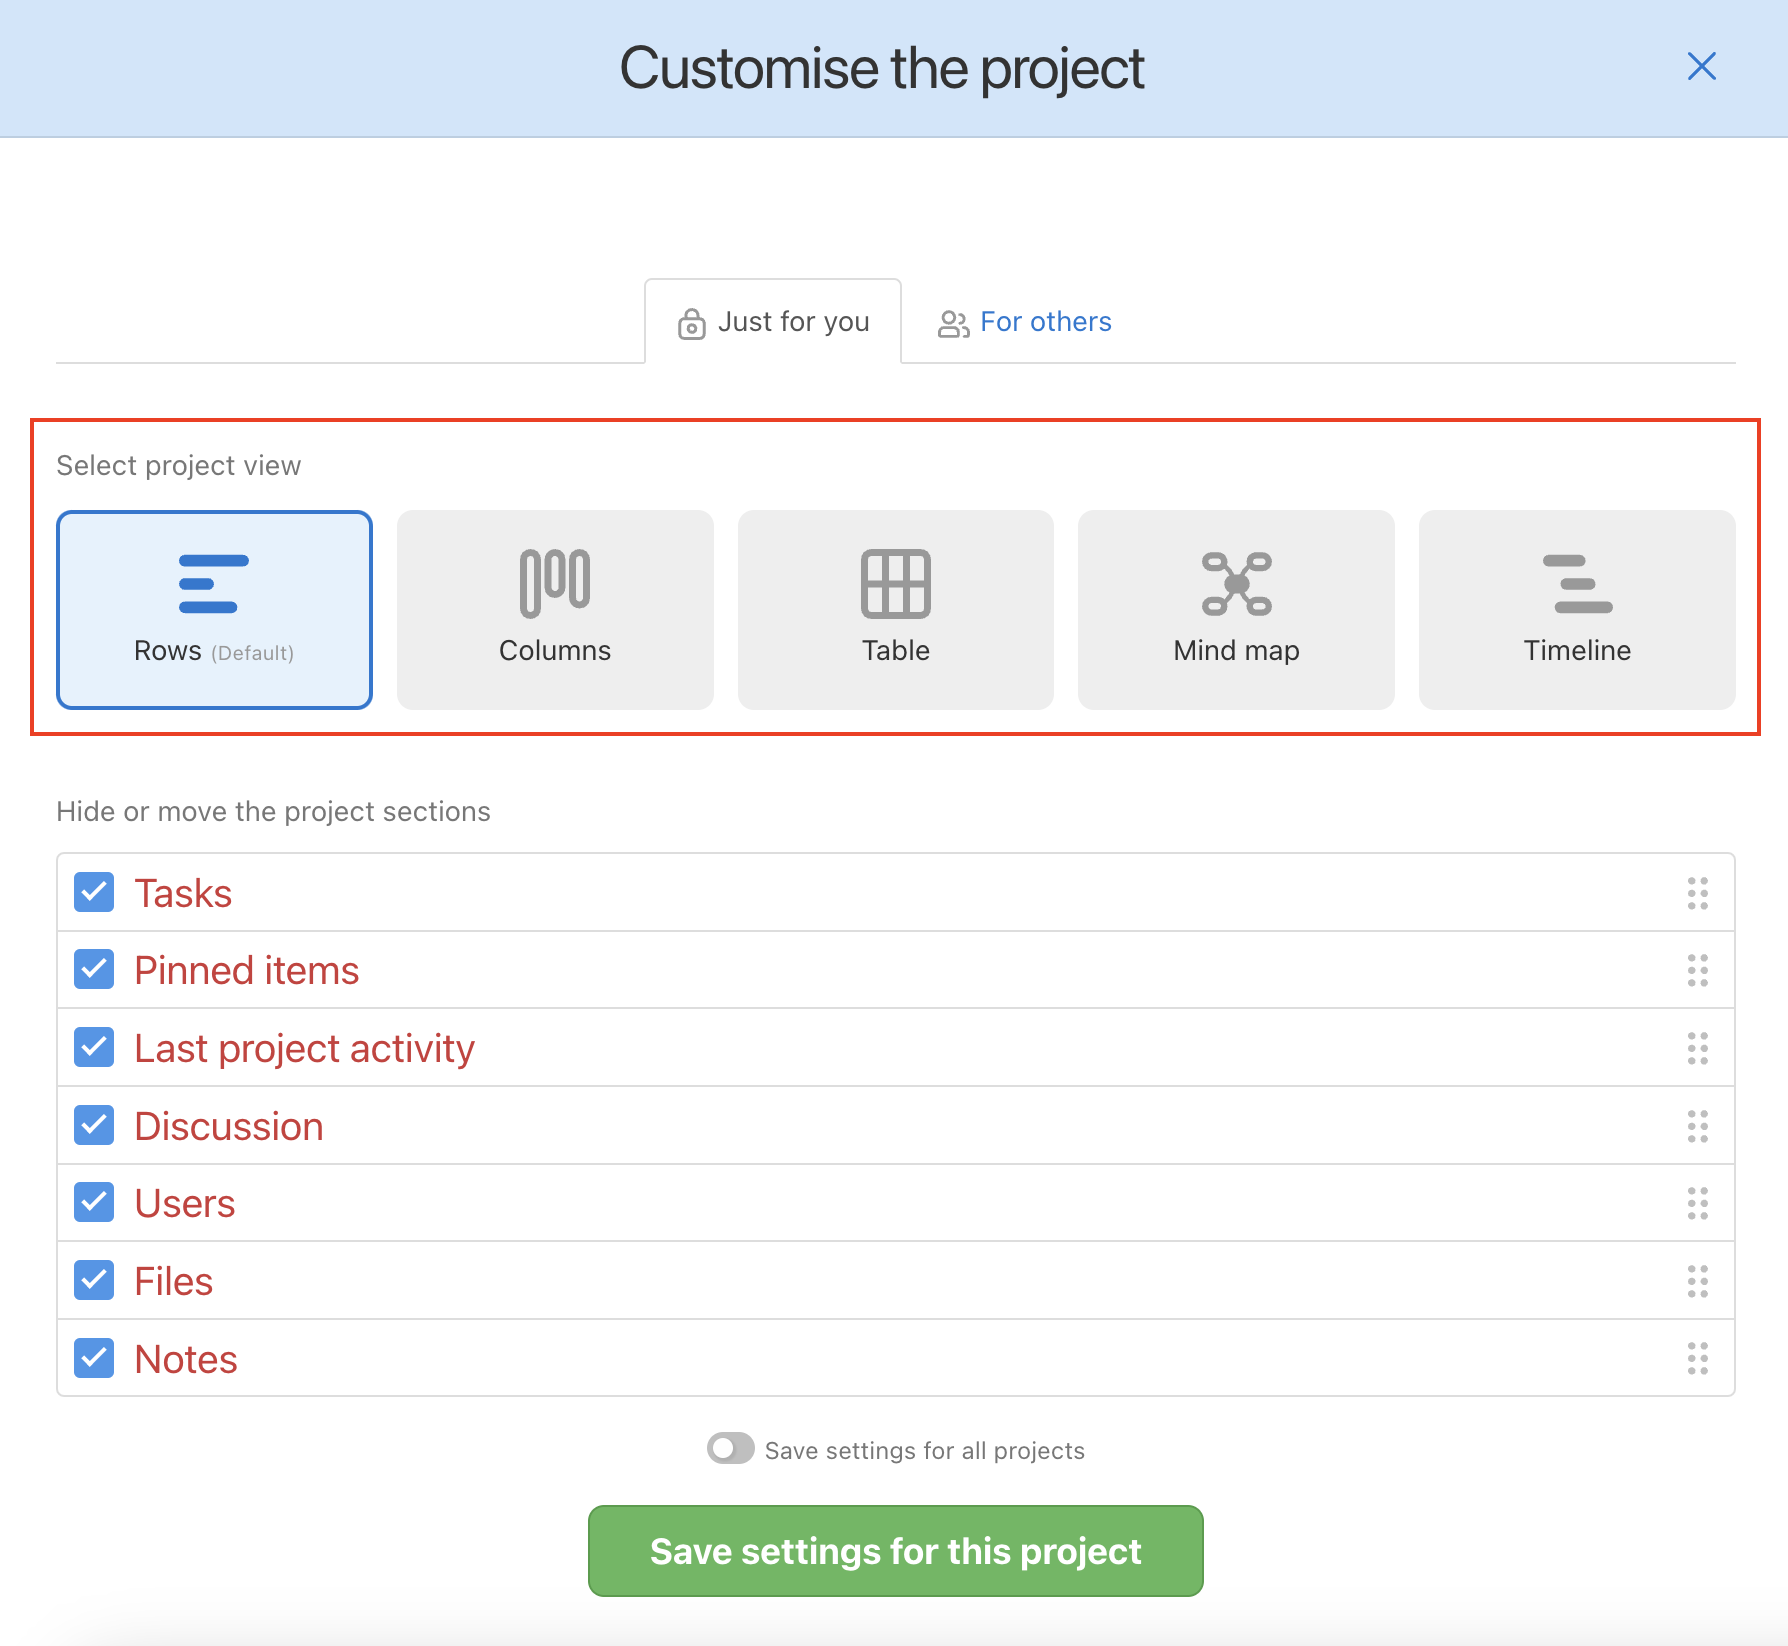
You can decide if you want to switch the project to Kanban view for others.
Row view
You can go back to the project detail page via clicking the name of the project on the left or the house icon in the top section when you are in any part of the project, such as Notes, Users, Reports etc.
You can switch back to rows from any other view in the top-right section.
Freelo will remember the next time you see it in the columns for the project, so you will not have to set it up anymore. You always click on the To-Do list
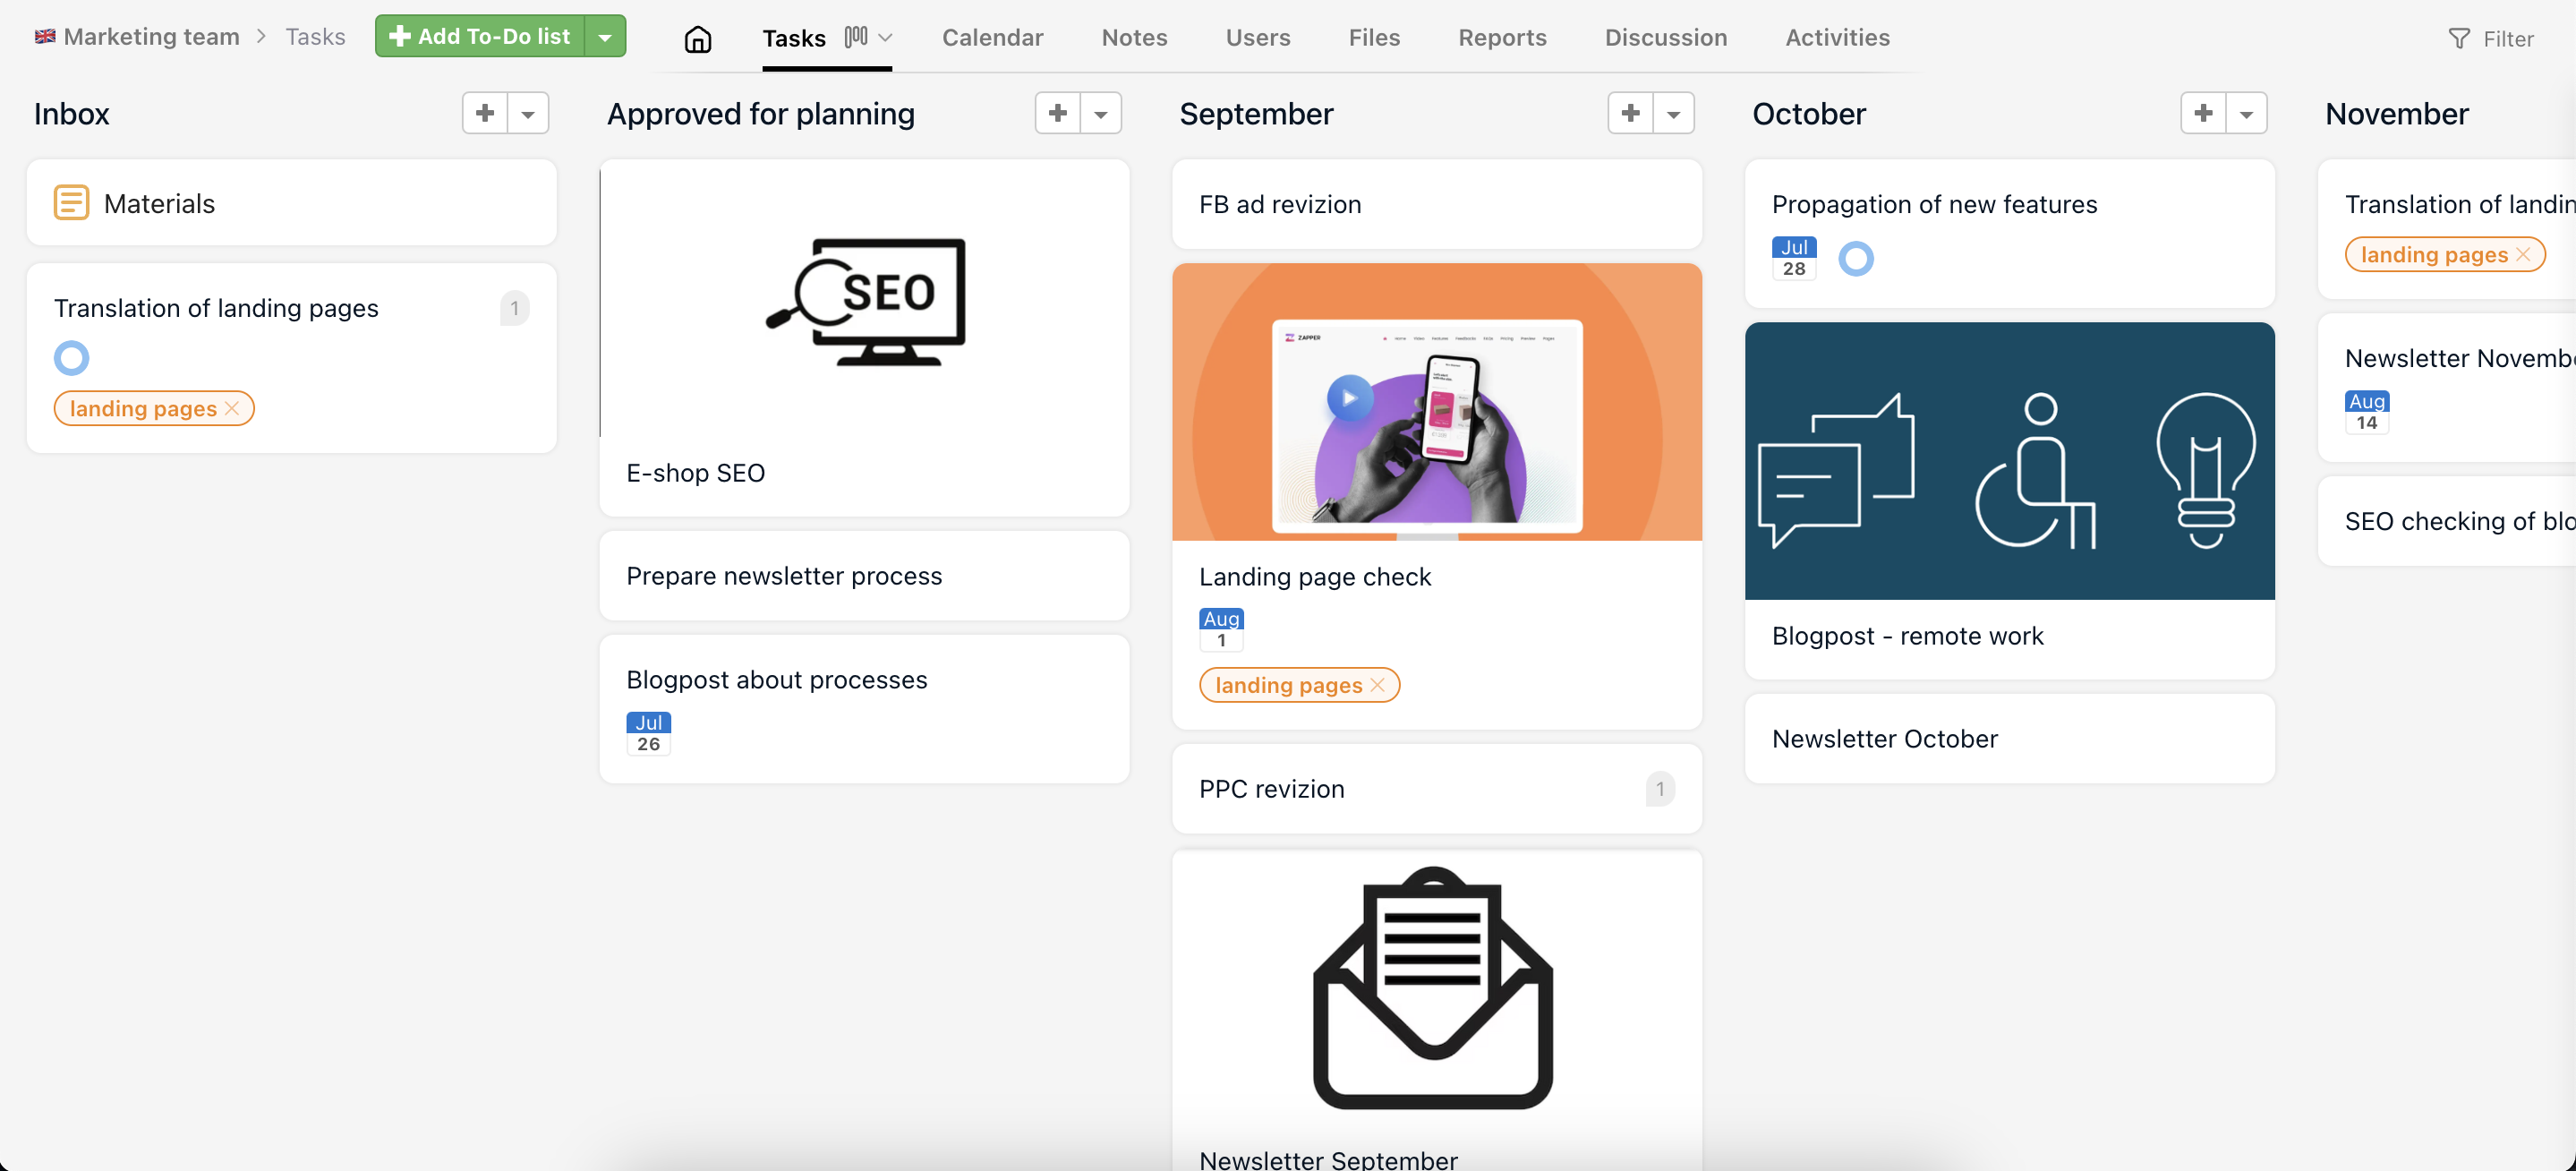
Move tasks between columns
Now you can start moving tasks between columns according to the current task status using drag&drop. You can even move tasks that have already been completed.
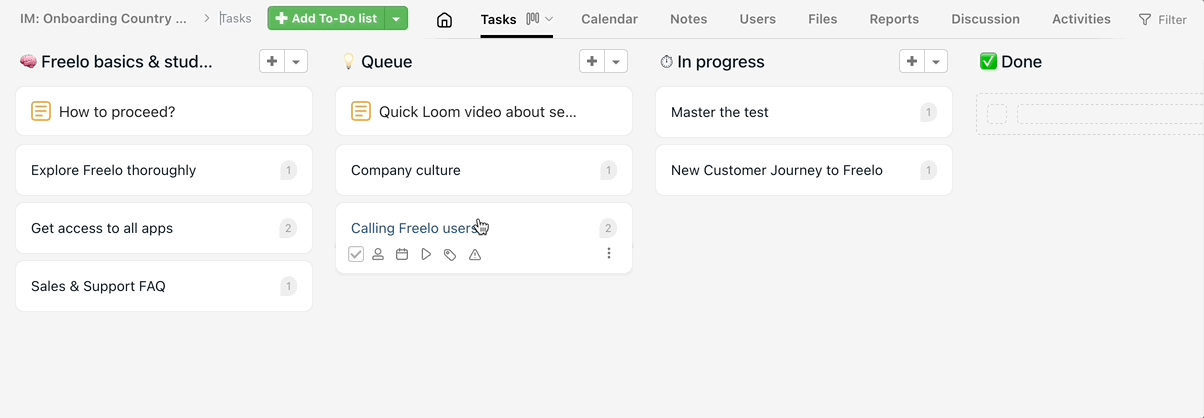
This also works when you want to reorder the tasks in your To-Do lists (move them higher or lower).
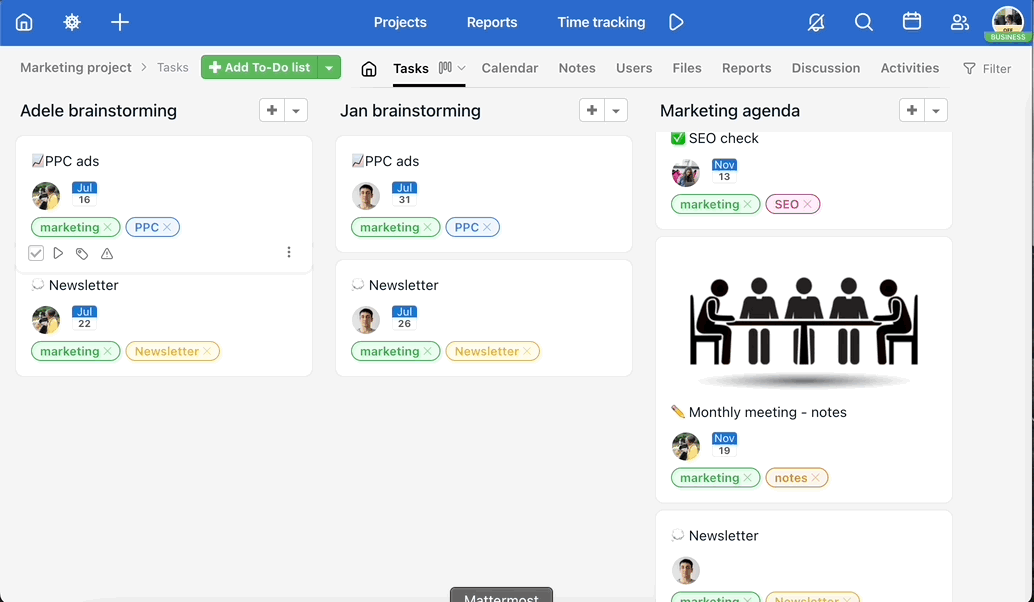
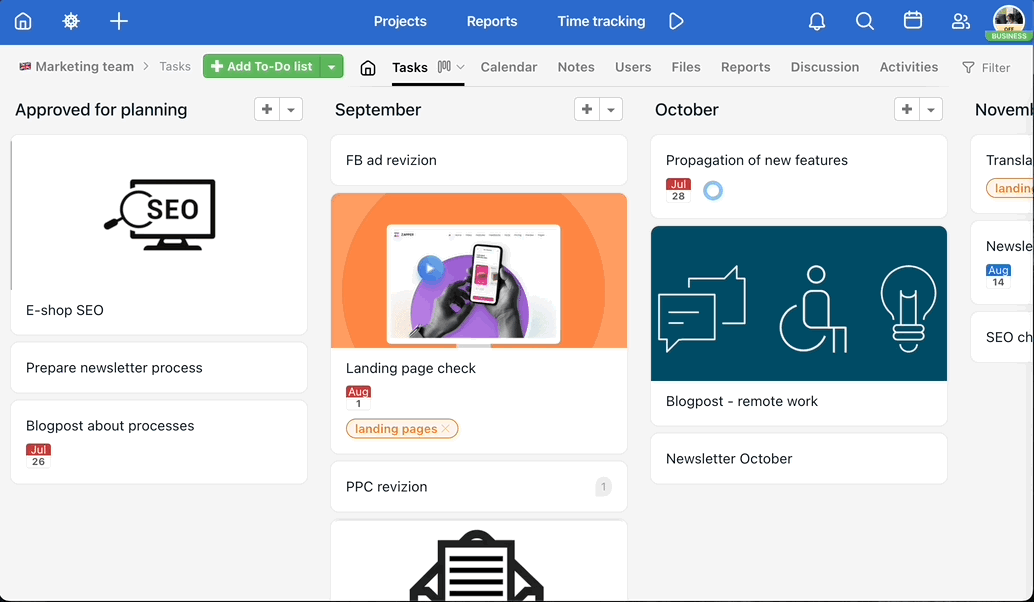
Setting the cover image of a task
On the kanban view, you can differentiate tasks using an image. The image can be a company logo or pictograms of individual activities.
Click on the three dots on the task and then choose Set the cover image. After this, you simply select the image you want to attach to the task and use as its cover photo. You have a choice of several placement options here – in the middle, at the bottom and at the top.
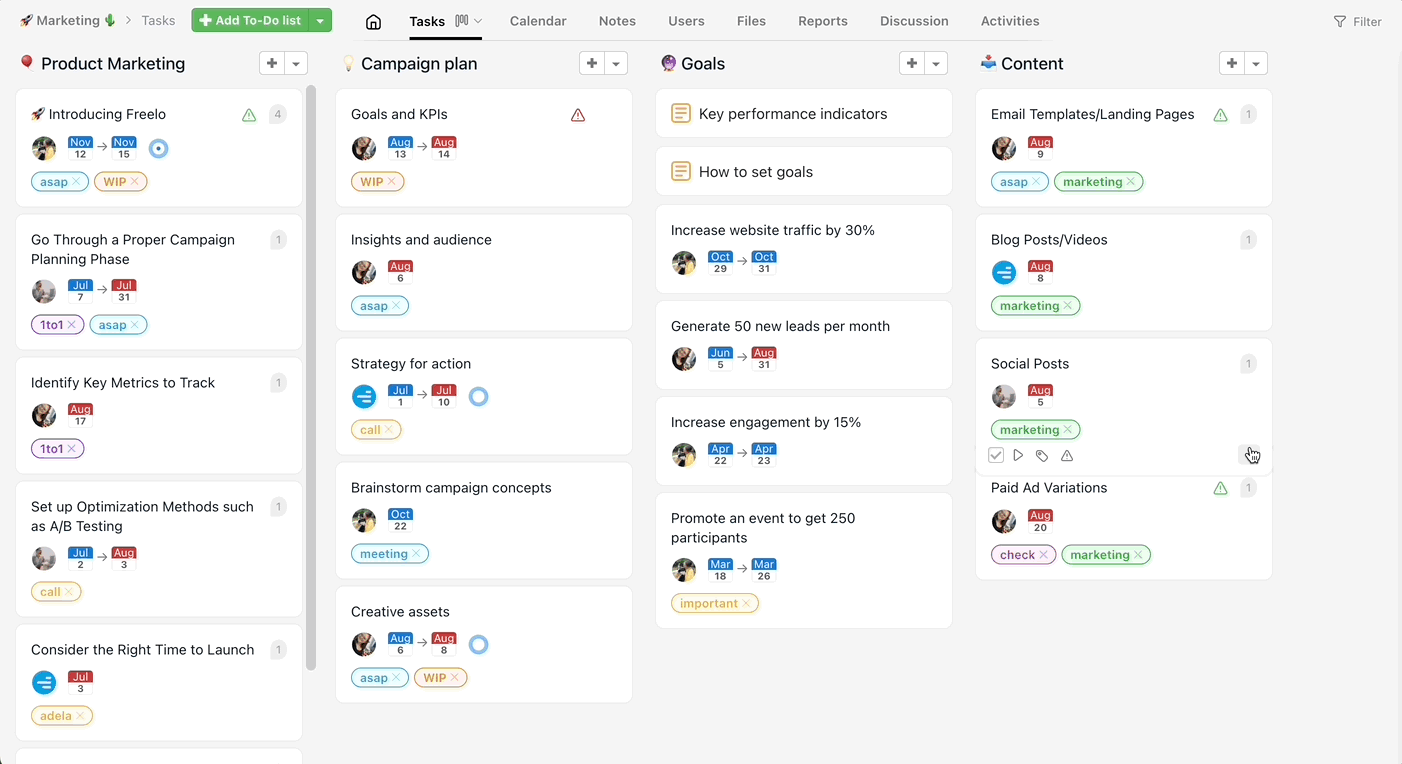
The cover image will also be displayed in the modal window. Just click on the title image for the given task.
Removing the cover image of a task