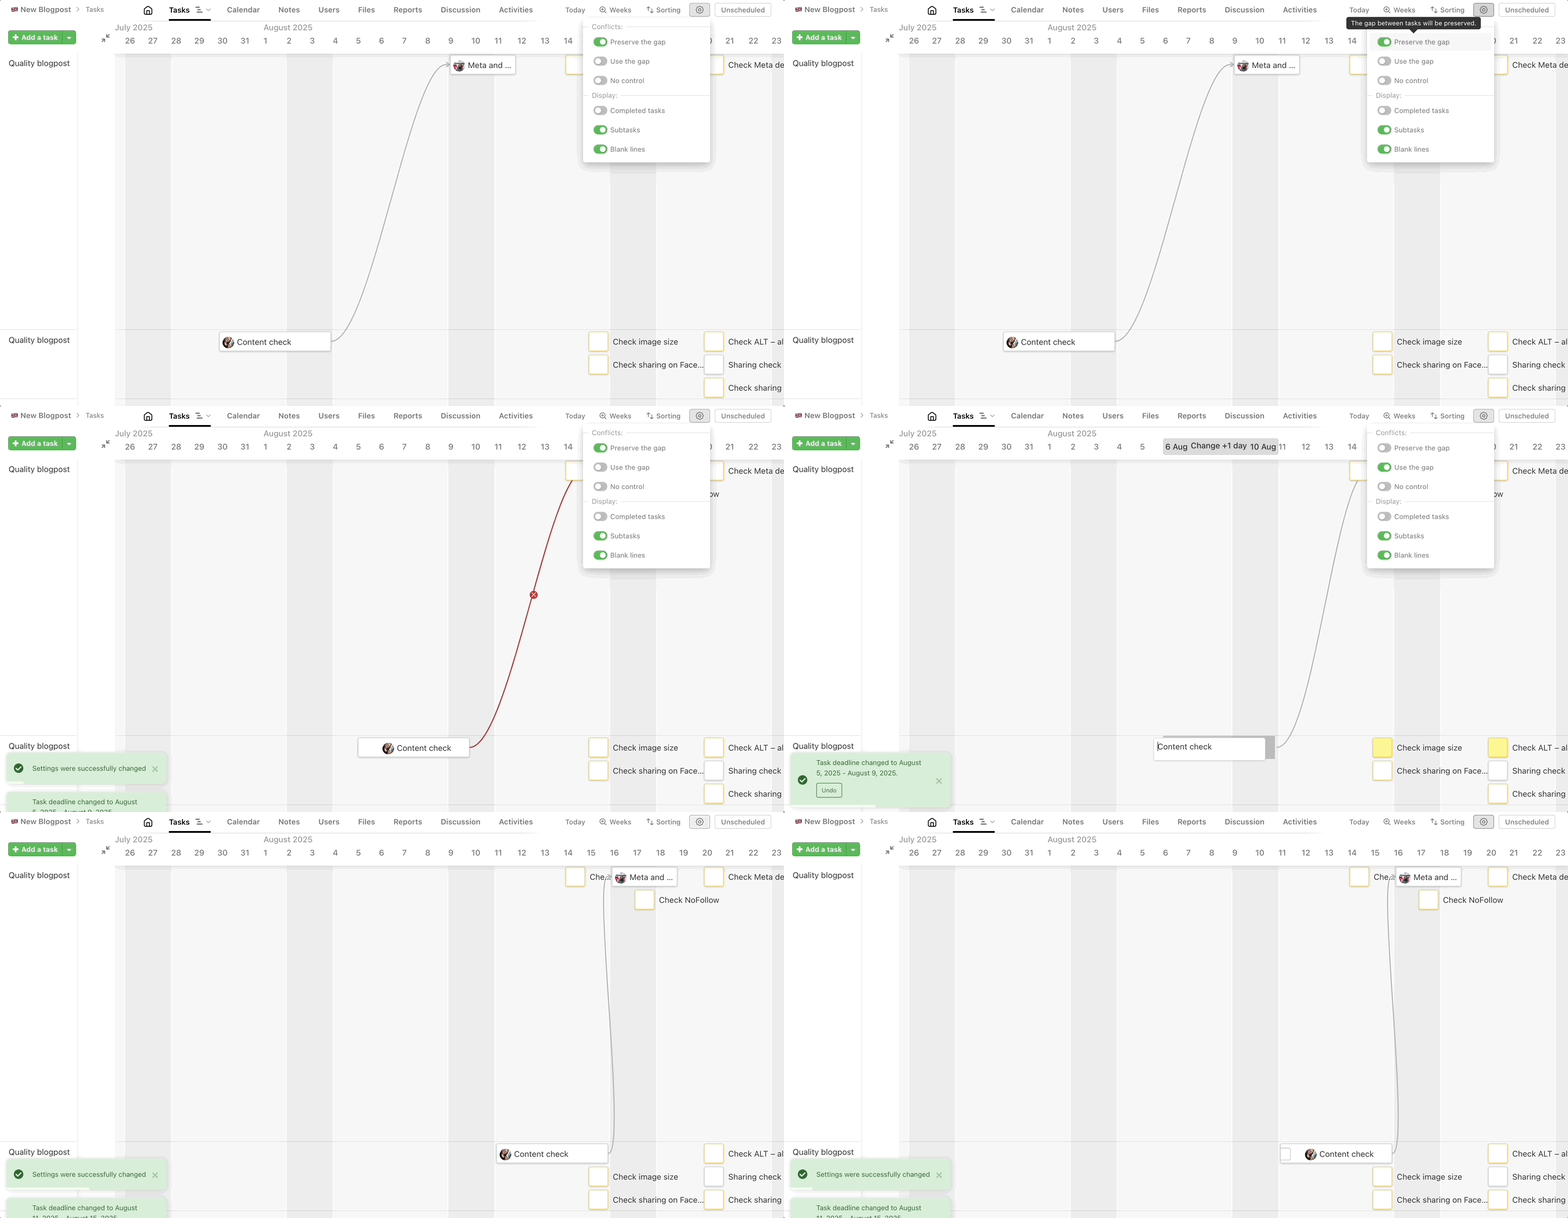
The Timeline (Gantt chart) feature gives you a linear view of the project on a timeline. In the Timeline, you can work with tasks, easily change deadlines, move deadlines in bulk, or create task relations.
Advantages of Timeline
The feature makes it easy to keep tasks in your project from overlapping and completing them in time.
Timeline in one project
You can go to the Timeline via the project menu > Tasks.

You will see the project in the Timeline view. If you have already set up task relations, you will see them here.

Setting the Timeline view
You have several options for customizing your Timeline view:
- Set the timeline on which you want to see the tasks. Choose from Days/Weeks/Months/Quarters/Half a year/Years.
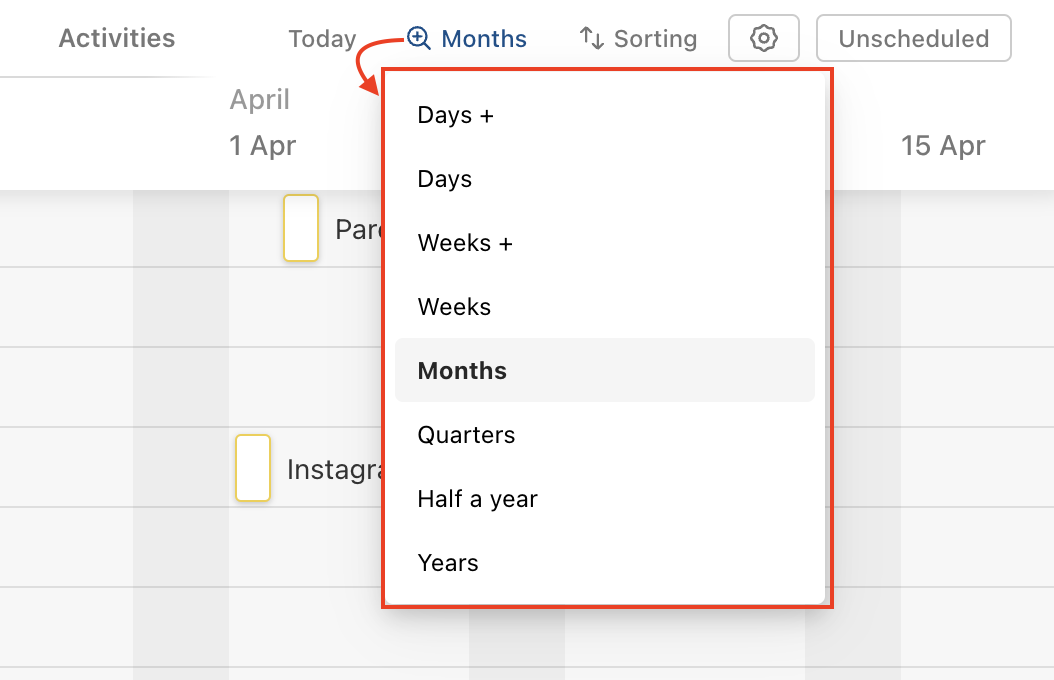
Set the project overview to daily, yearly or any other that works for you. - Sort by the Beginning/Deadline/Assignee or To-Do lists, to create new tasks or To-Do lists via the green button.
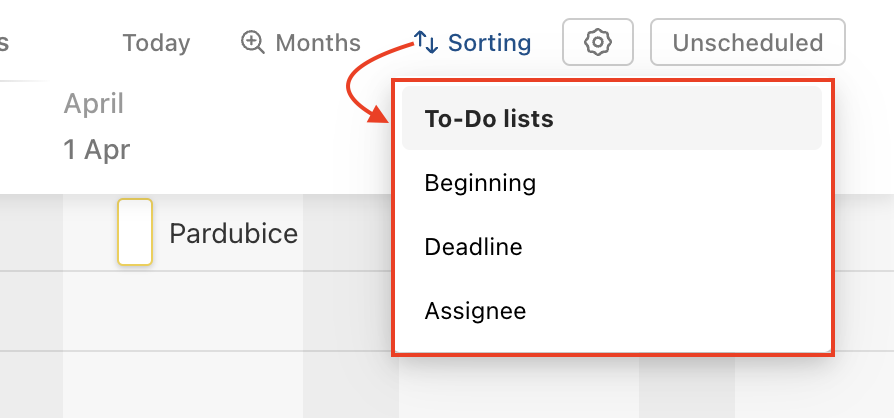
Options for sorting tasks in the Timeline. - Use the settings icon to display the subtasks and completed sub/tasks on the Timeline using the checkboxes as needed.
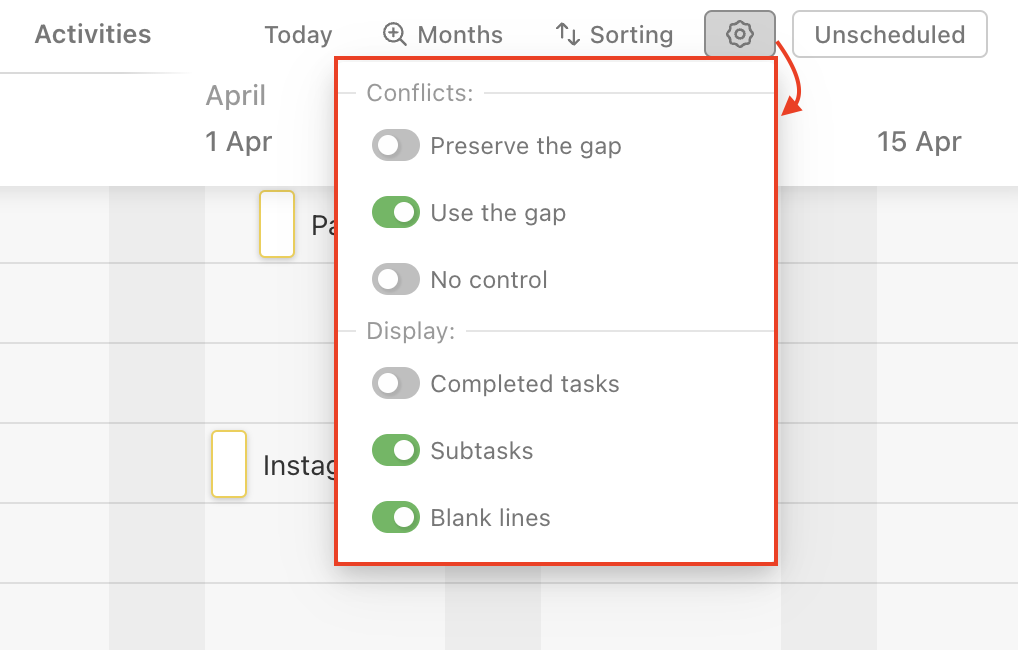
Work with sub/tasks in the Timeline
The Timeline shows tasks and subtasks with due dates, which you can complete directly in the Timeline. Subtasks are marked with a yellow box. The Timeline of a project is always displayed next to the current day marked with a blue vertical line.

If you lose your way while working in the Timeline, you can always return via the Today button on the top right.

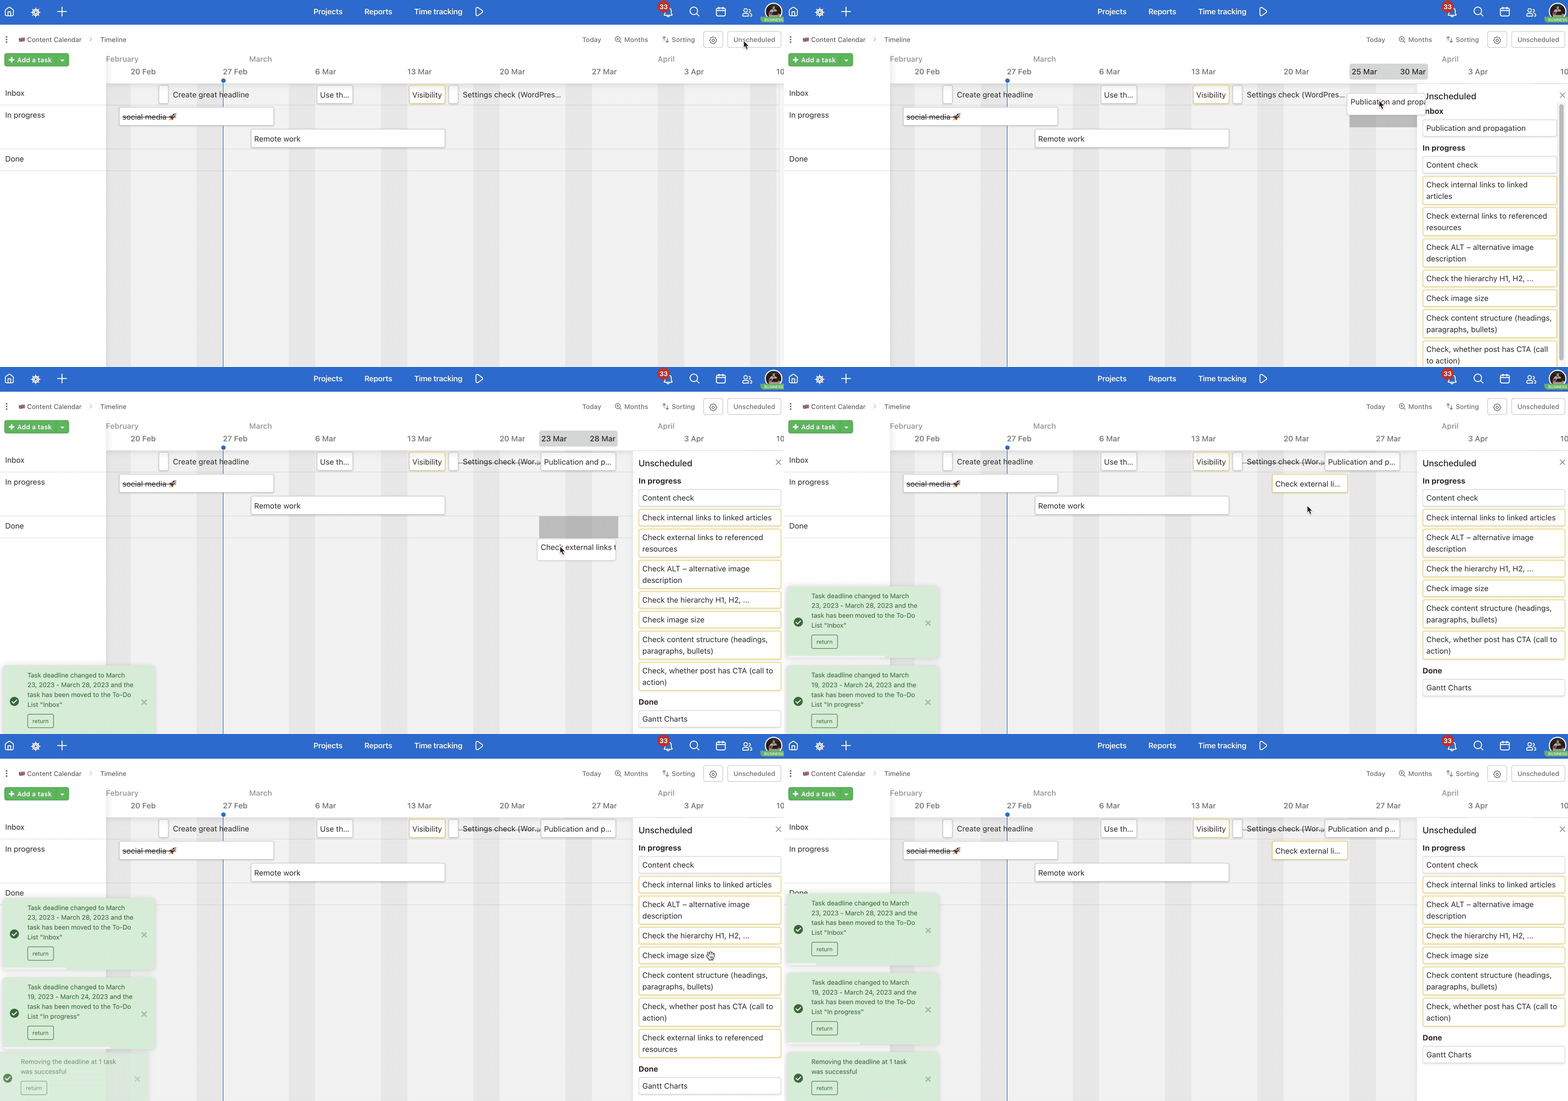
Unfinished tasks and subtasks without a deadline are listed under the Unscheduled section. From here, you can use drag & drop to schedule them on the Timeline. You can also use the drag & drop feature to move scheduled sub/tasks around, changing their due dates, assignees or To-Do list placement.
How to add a task
There are several ways to create a new task directly in the Timeline:
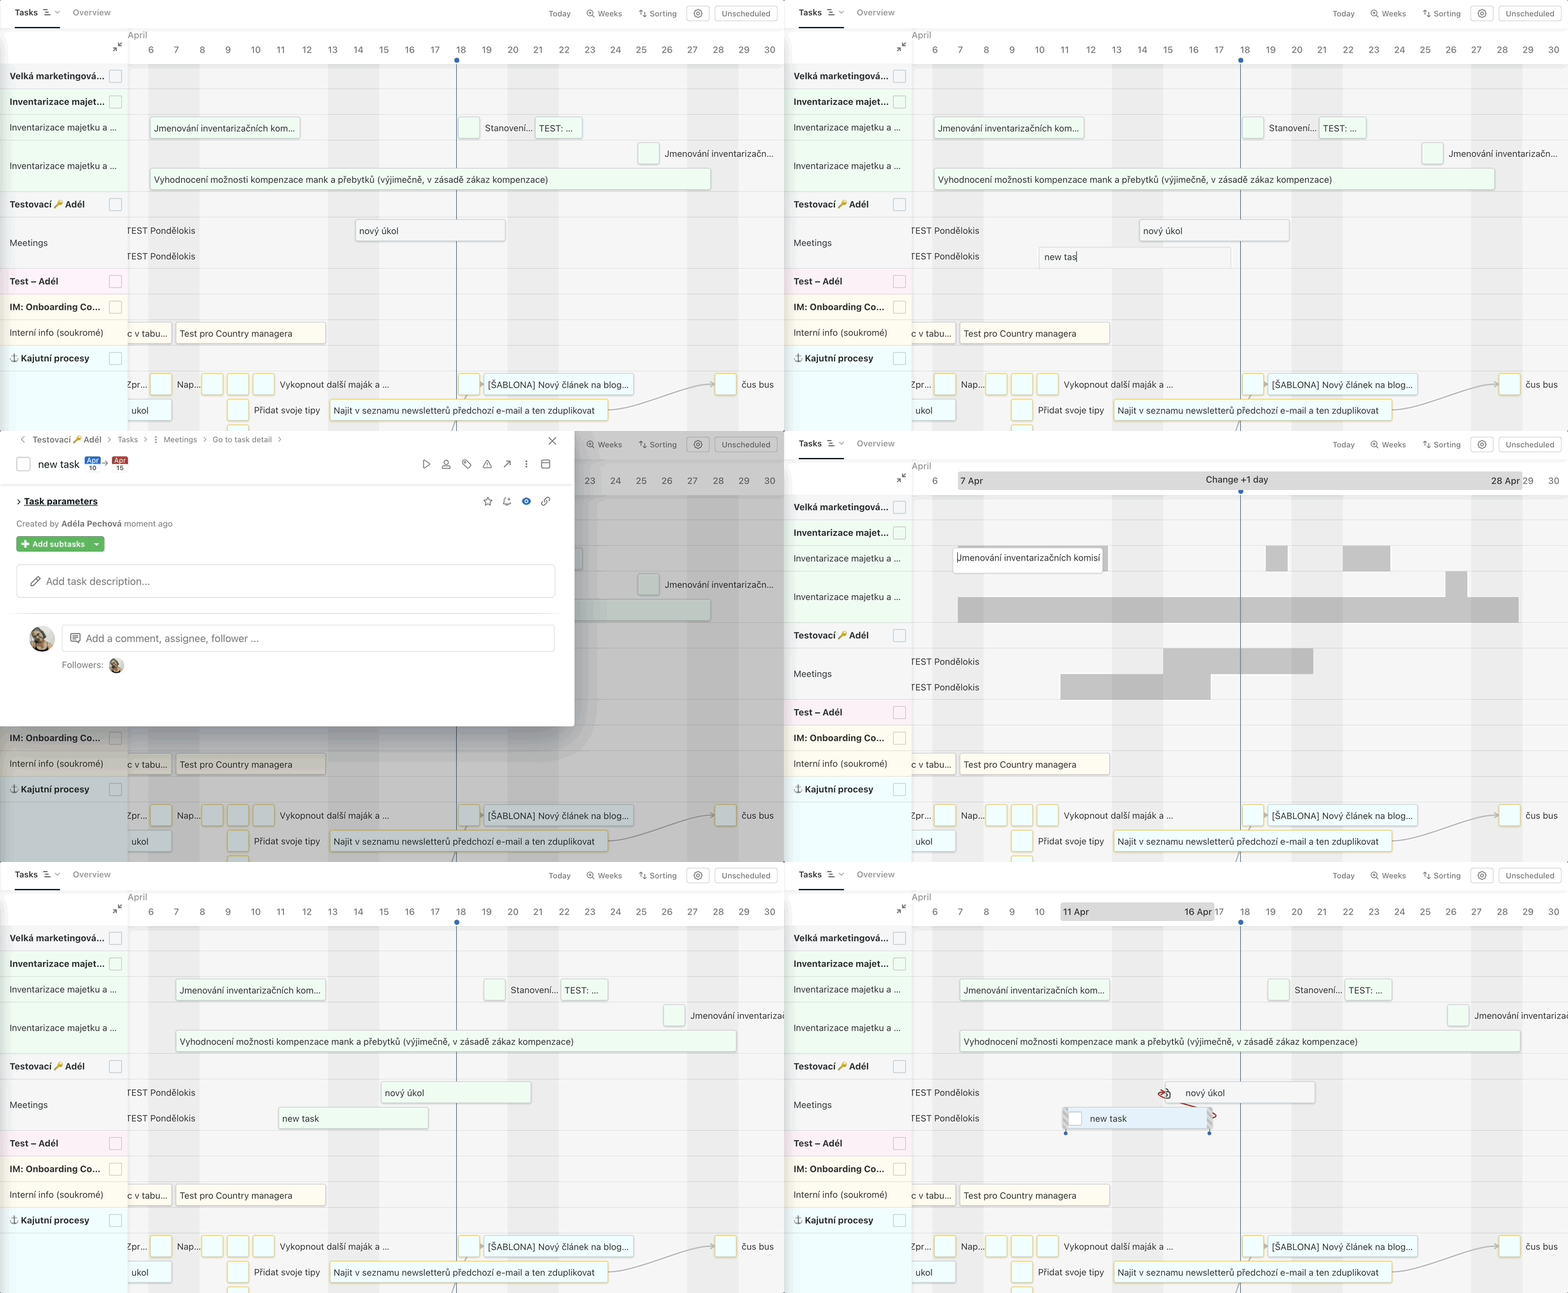
- Click in the Timeline row where you want to create the task. Write its name and confirm with Enter or click outside the new task field.
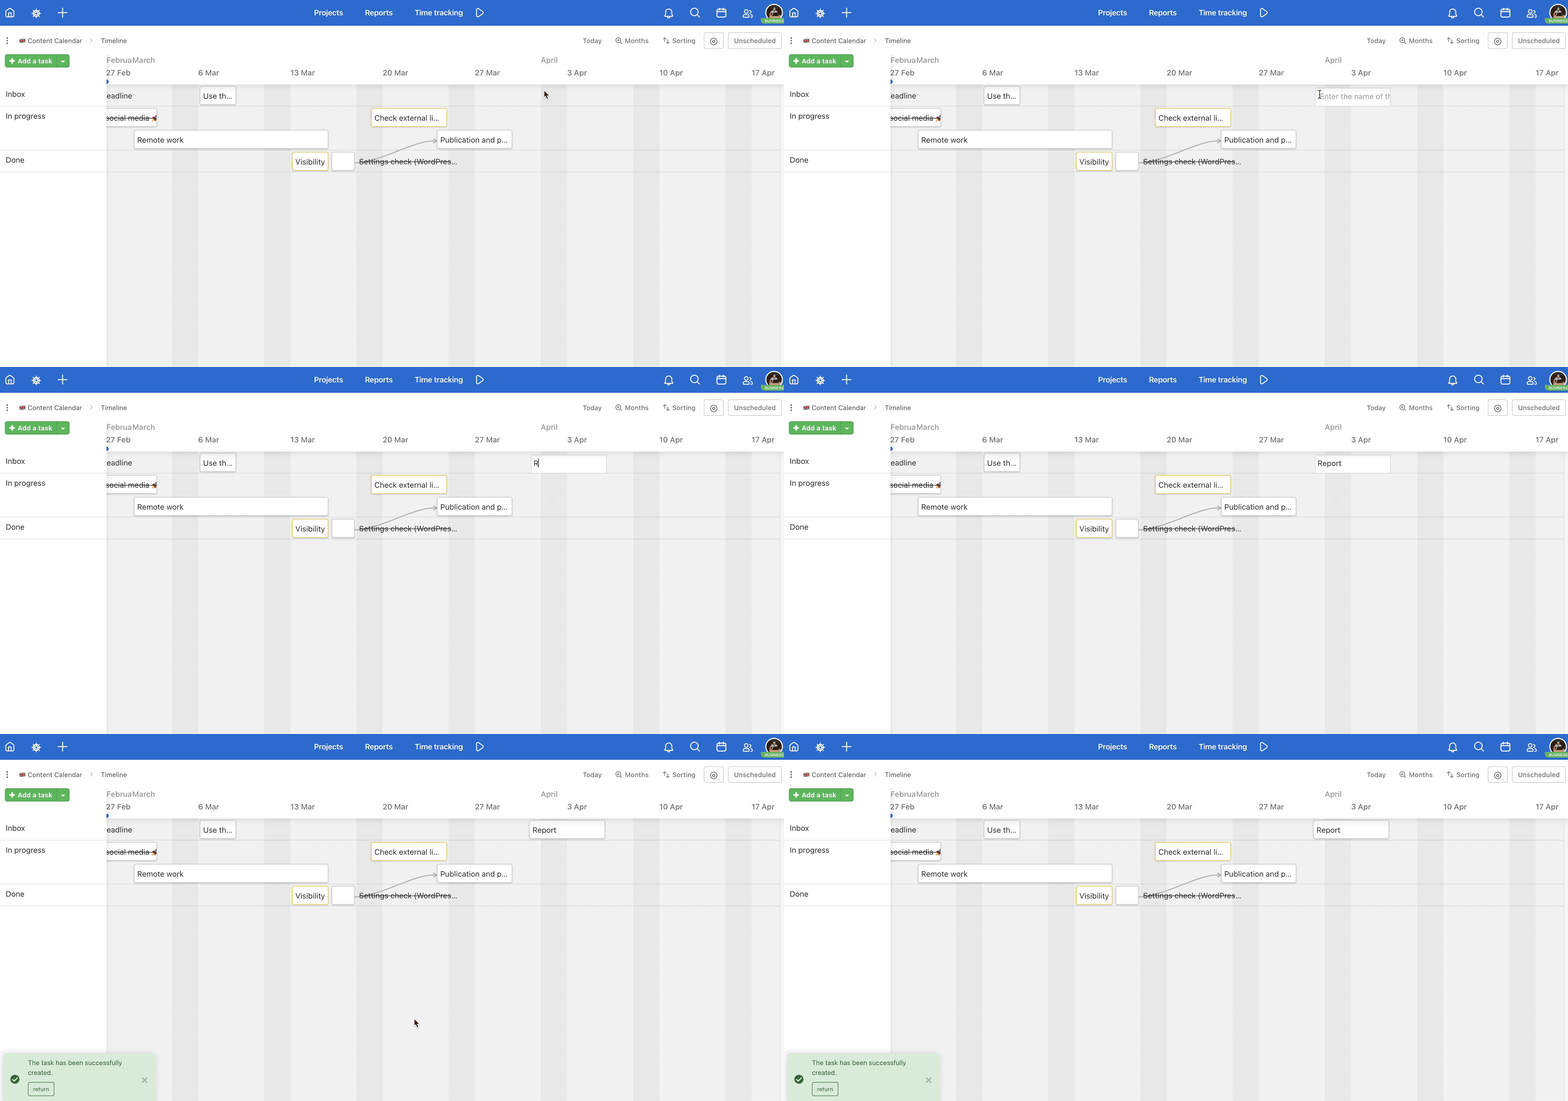
Option how to add a task to the Timeline. - In the To-Do list view you can add a task via the Add a task button on the top left. Click on it and you will see a field to write the name of the task next to today’s date.
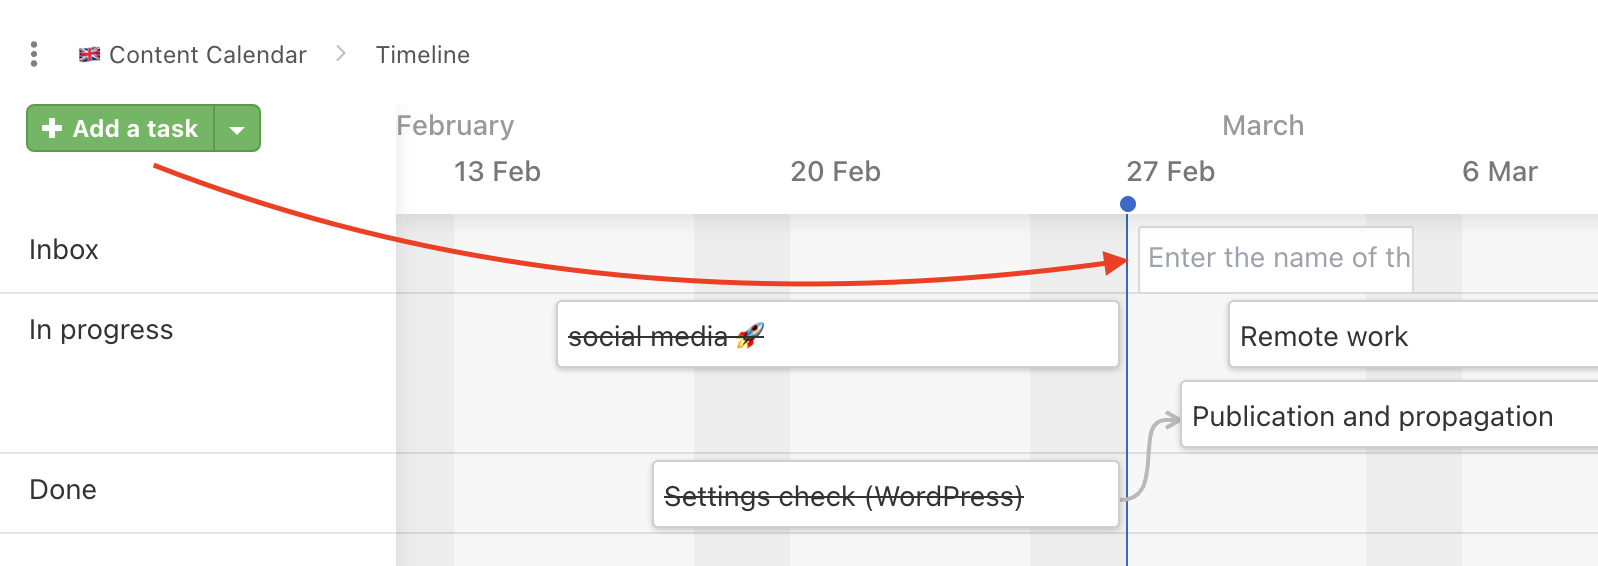
Example of how to add a task to the Timeline via the green button. - Via the Alt/Option + Shift + N keyboard shortcut – a form will pop up to add a new task.
Easy control
Use keyboard shortcuts for faster planning:
- assign sub/tasks to yourself – the cursor on the task + M,
- preview a sub/task – the cursor on the task + Q,
- edit a sub/task – the cursor on the task + E,
- set a reminder for a sub/task– cursor on the task + R.
Via drag & drop you can easily and comfortably:
- plan or replan a task,
- change the time range of a task,
- bulk change the deadlines of marked tasks,
- create blocking relations between tasks.
Multi-project Timeline
In Freelo, you can use the Timeline view (in the Business plan) on the Dashboard as well as in a single project. That can come in handy when you wish to work with tasks from multiple projects effectively, want to see in one place how certain projects are doing or for example want to move tasks between To-Do lists while changing their due dates etc. You can also combine saved filters and the Timeline view.
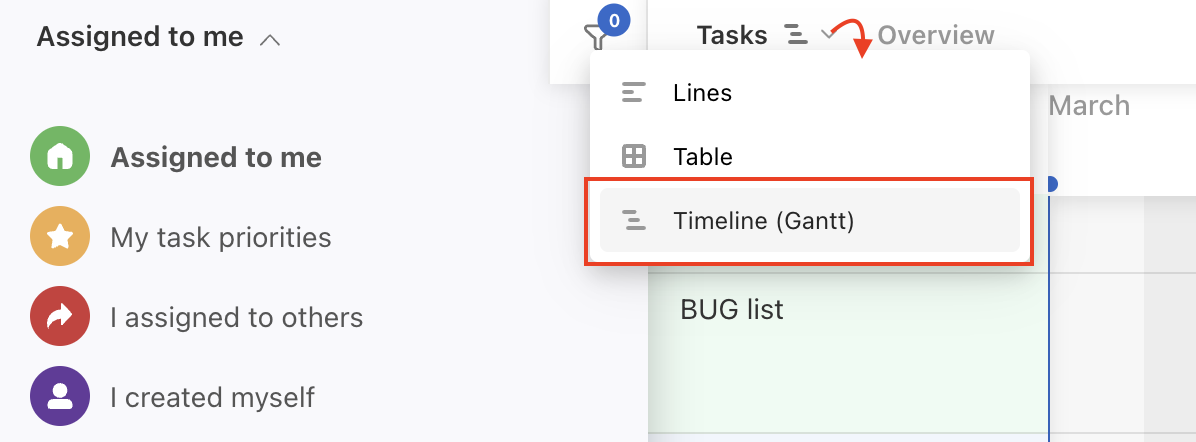
Projects and their tasks can be distinguished by color. This setting can be personalised based on your own preference.
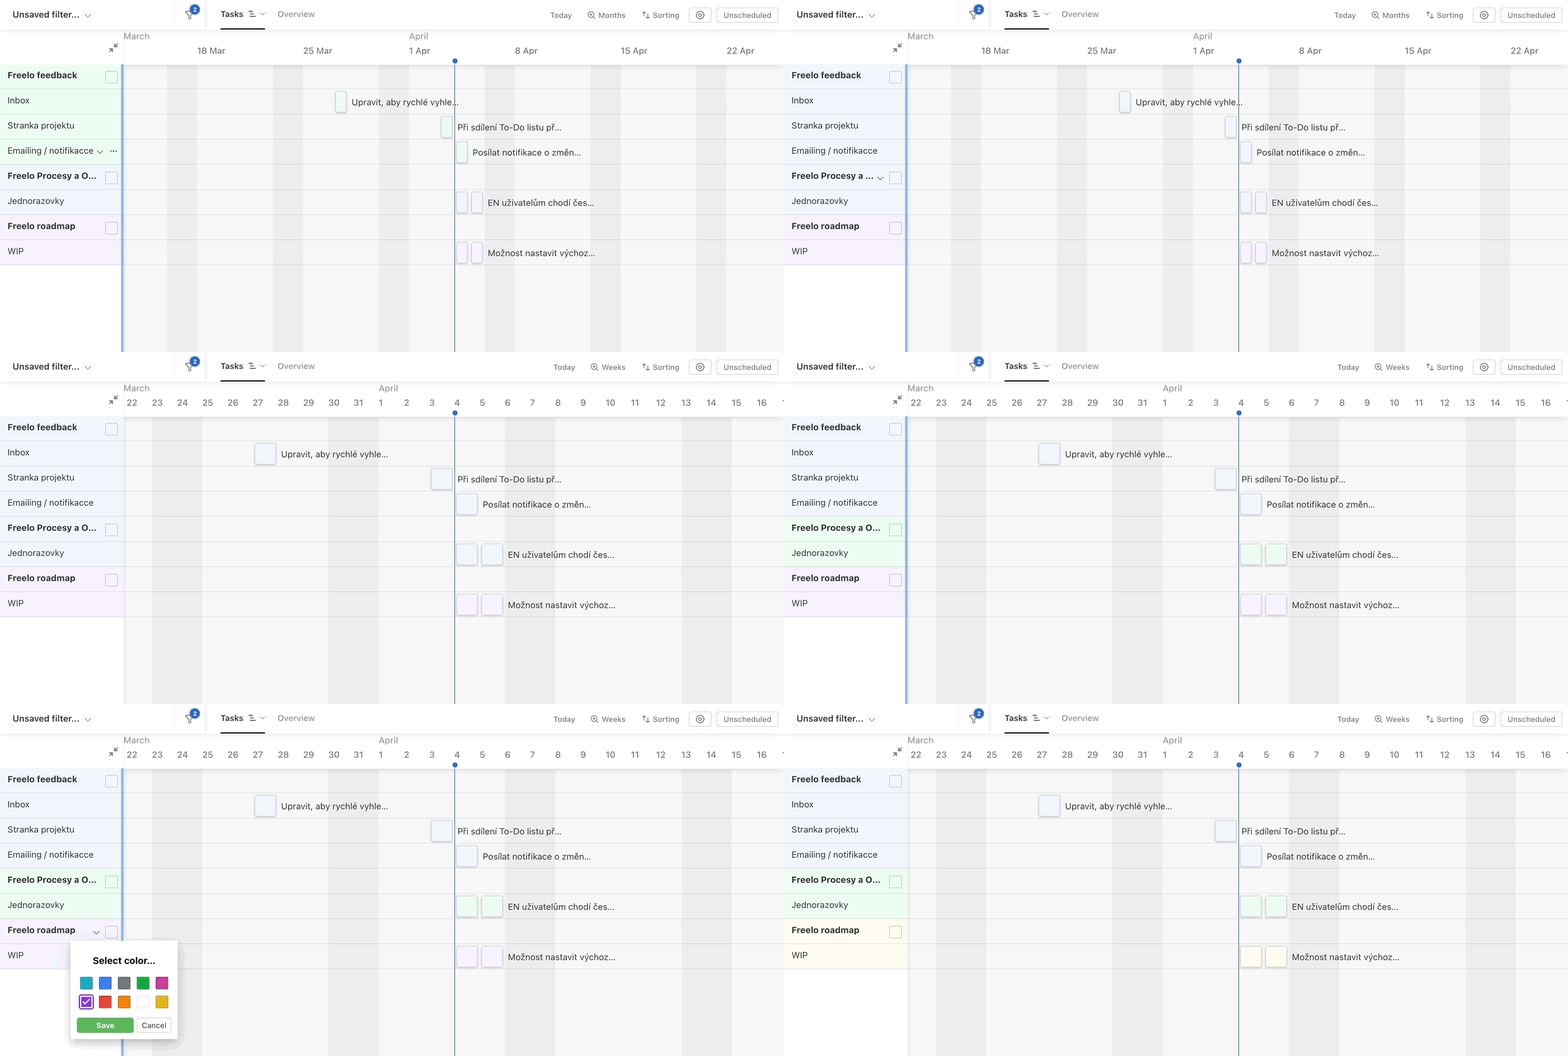
Settings options in the Timeline on the Dashboard
Whether you’re setting the displayed Time period or changing the sorting, you can adjust the Timeline view just as you would in the Timeline of a specific project.
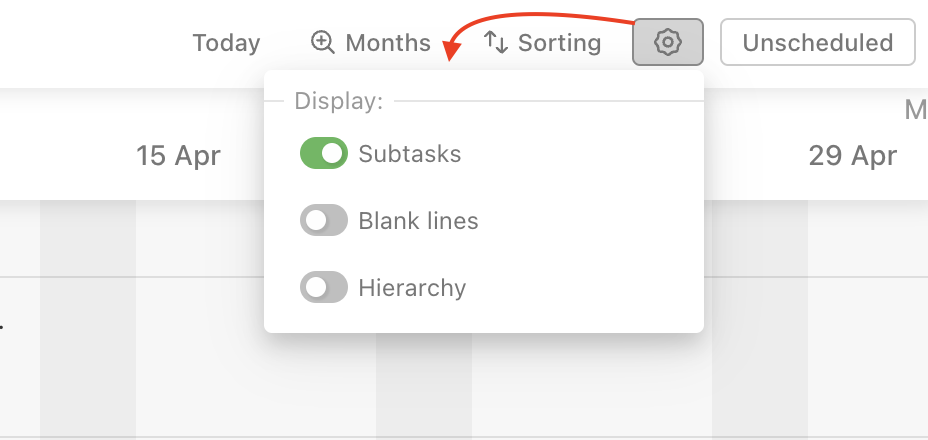
If you click the settings icon, you can change the settings of the relations conflicts check. Additionally, you can choose what you actually want to see on the Timeline and what you don’t. The viewing options are as follows:
- Subtasks
- Blank lines – if this option is enabled, you will see all corresponding lines (referring to To-Do list etc. based on the settings) across all shown projects, even if there are no tasks from them to be shown in the Timeline (so the line stays empty)
- Hierarchy – this options shows you exactly in which To-Do list and Project each task belongs
Navigating the Timeline on the Dashboard
The principles of working with sub/tasks stays the same as in the Timeline in one specific project.
You can create new tasks directly in it, simultaneously change the tasks, create blocking relations etc. Using the Timeline has many advantages.
Relations in the Timeline
To make what is related obvious to everyone, Timeline offers the function of relations.
Blocking/Is blocked by prevents the task from being closed/completed before all preceding tasks have been completed. The blocked task will have a lock symbol visible to everyone in every view of the project (Kanban, Mind map,…).
Relations conflicts check
The feature Sub/task conflicts check is there to make sure the correct relations of tasks and subtasks stay in the Timeline.
You’ve got 3 options:
- Preserve the gap – this option means that if you’ve got two tasks (one being blocked, one that is blocking the other one), moving the date of the blocking one will automatically postpone the due date of the other one plus save the gap between them (if it’s for example 3 days, it will stay that way).
- Use the gap – this option means that if you’ve got two tasks (one being blocked, one that is blocking the other one), moving the date of the blocking one will automatically postpone the due date of the other one. However, the gap between them won’t be saved (the blocked task will get a new due date directly following the new date of the blocking task).
- No check – in that case, if you move the blocking task (and change it’s due date), it won’t automatically postpone the task that’s being blocked.
