The main place for user communication in Freelo is undoubtedly the Discussion. For this reason, it is important for us to make it as comfortable as possible for everyone to use. This is why we have also taught the Discussion to record screen and voice messages.
Voice messages
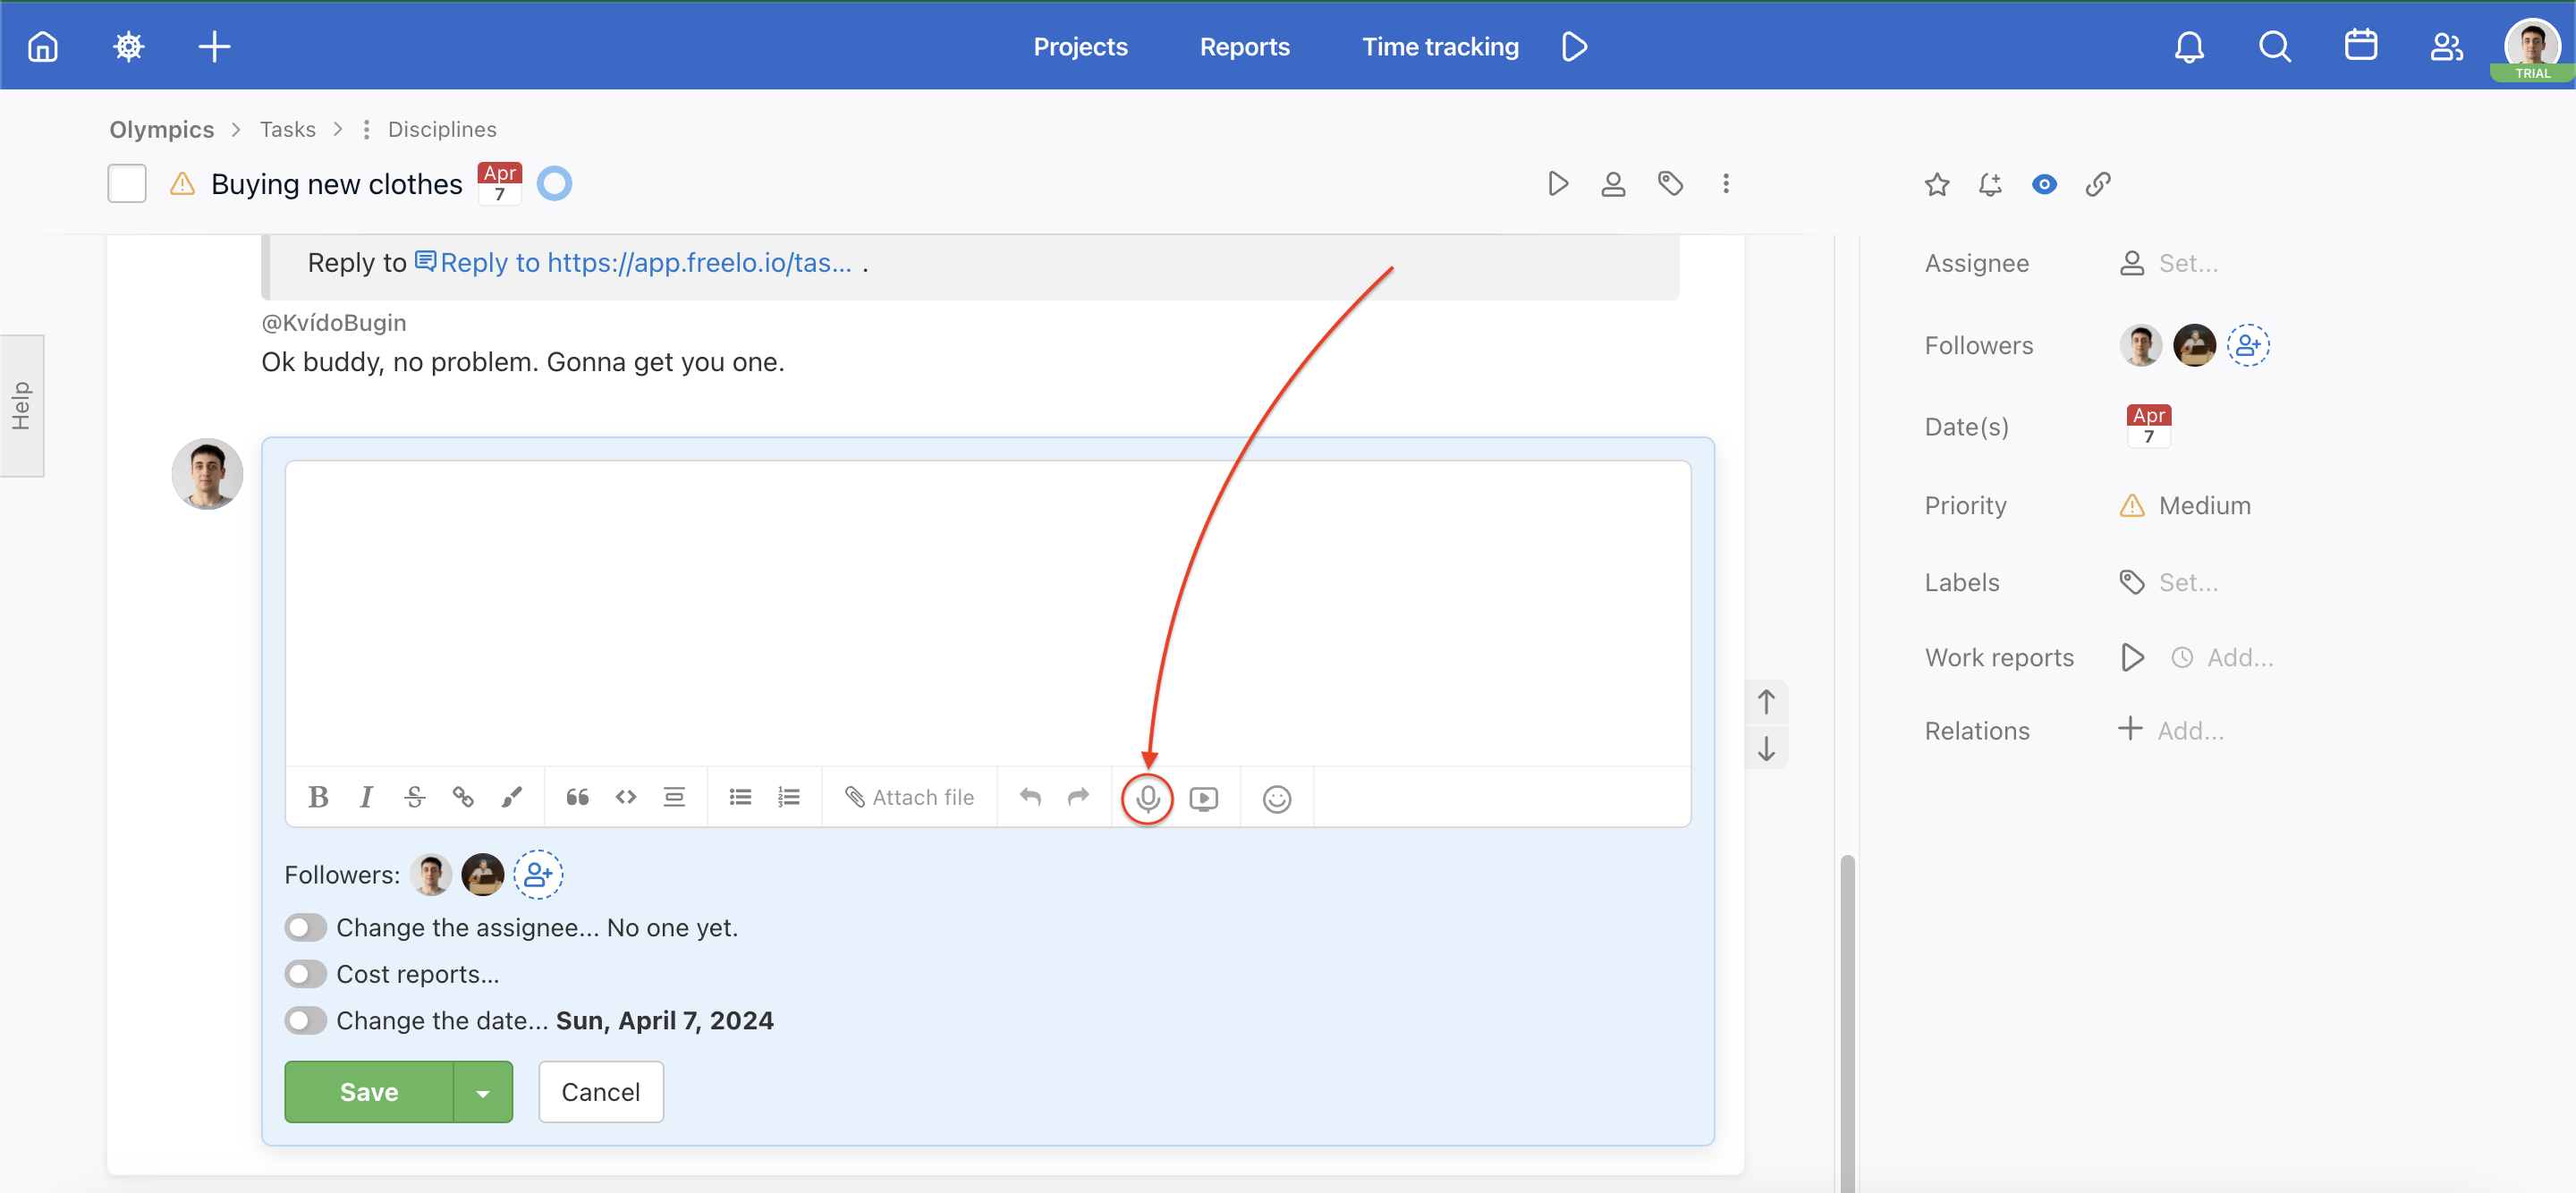
Recording a voice message in a comment
If you need to quickly describe a task, or give a more complex answer and you don’t have time to write a long comment, our voice messages can help. These allow you to simply attach a recording with a few clicks to explain everything verbally.
Recording a voice message via + in the menu or a keyboard shortcut
You can start recording a voice message from anywhere in Freelo. Start recording via + in the blue menu > Record voice:

Or use the keyboard shortcut Option/Alt + Shift + A:
The recording will be saved in the Files section of a project you select. You can also select a specific folder. Before the first recording, the settings will automatically pop up for you and will be valid for future recordings.
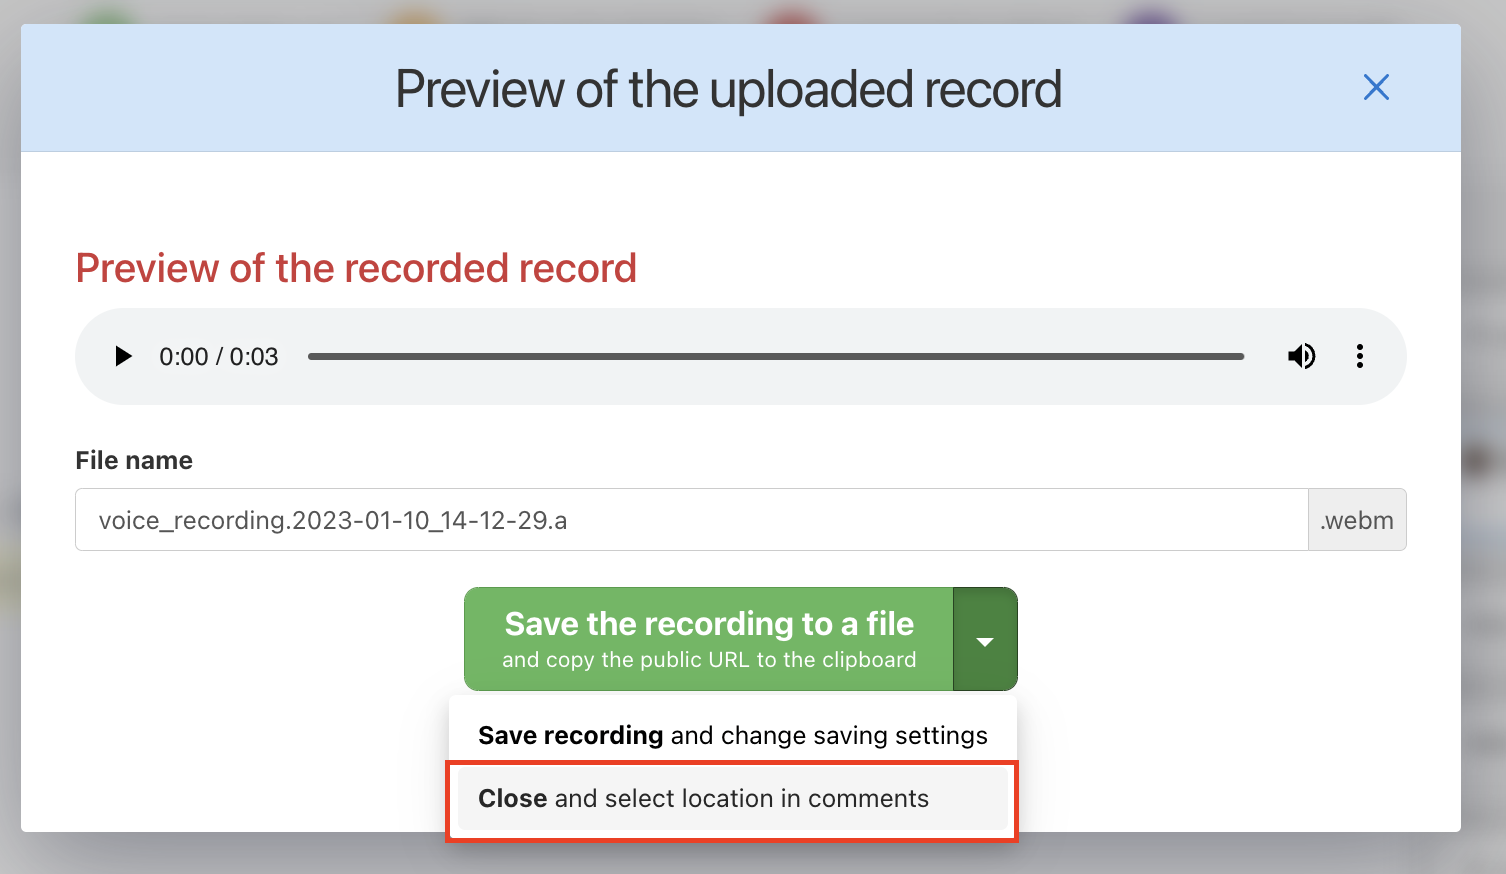
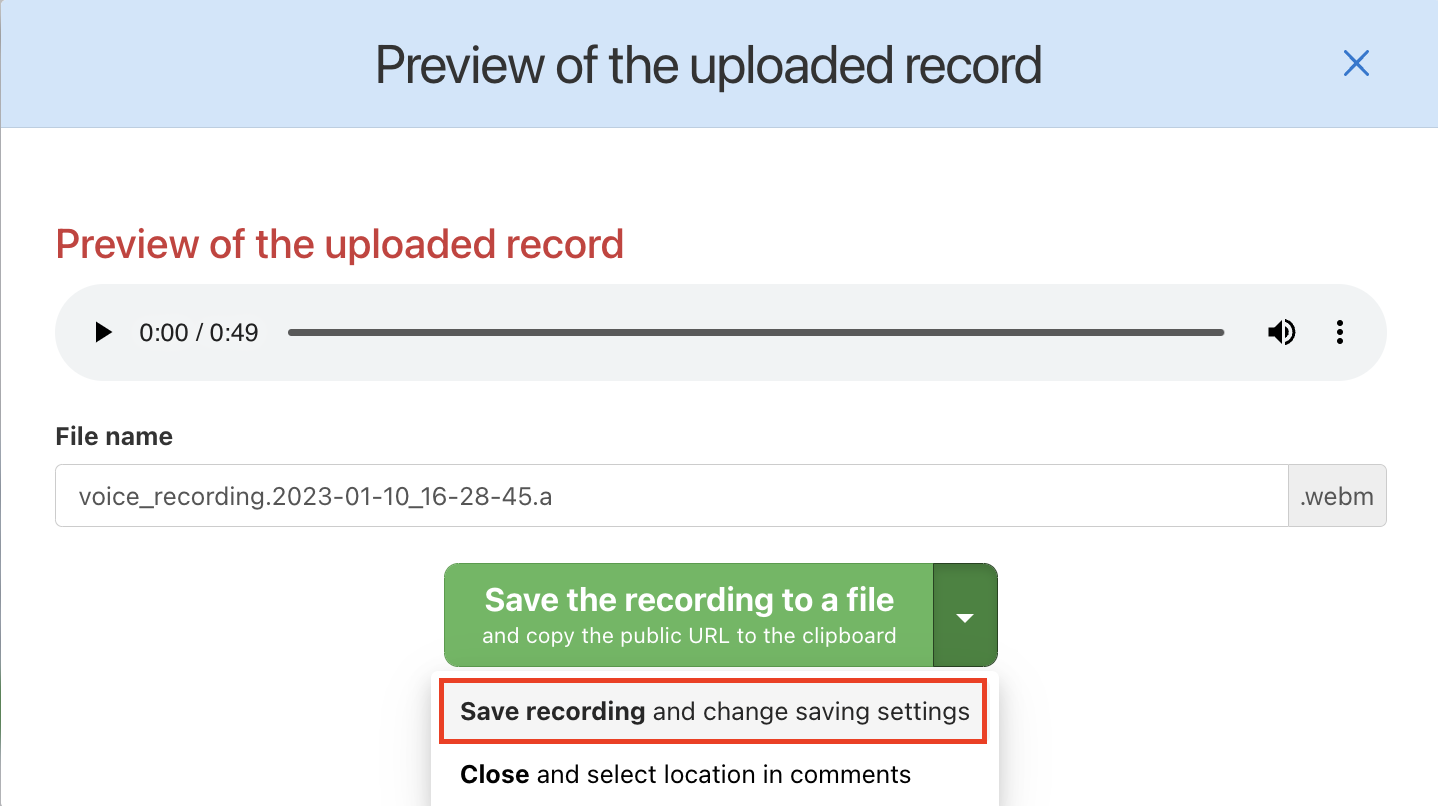
You can change the settings for saving a voice message for future recordings after it has been recorded. Click the arrow in the green box > Save recording and change the saving settings.
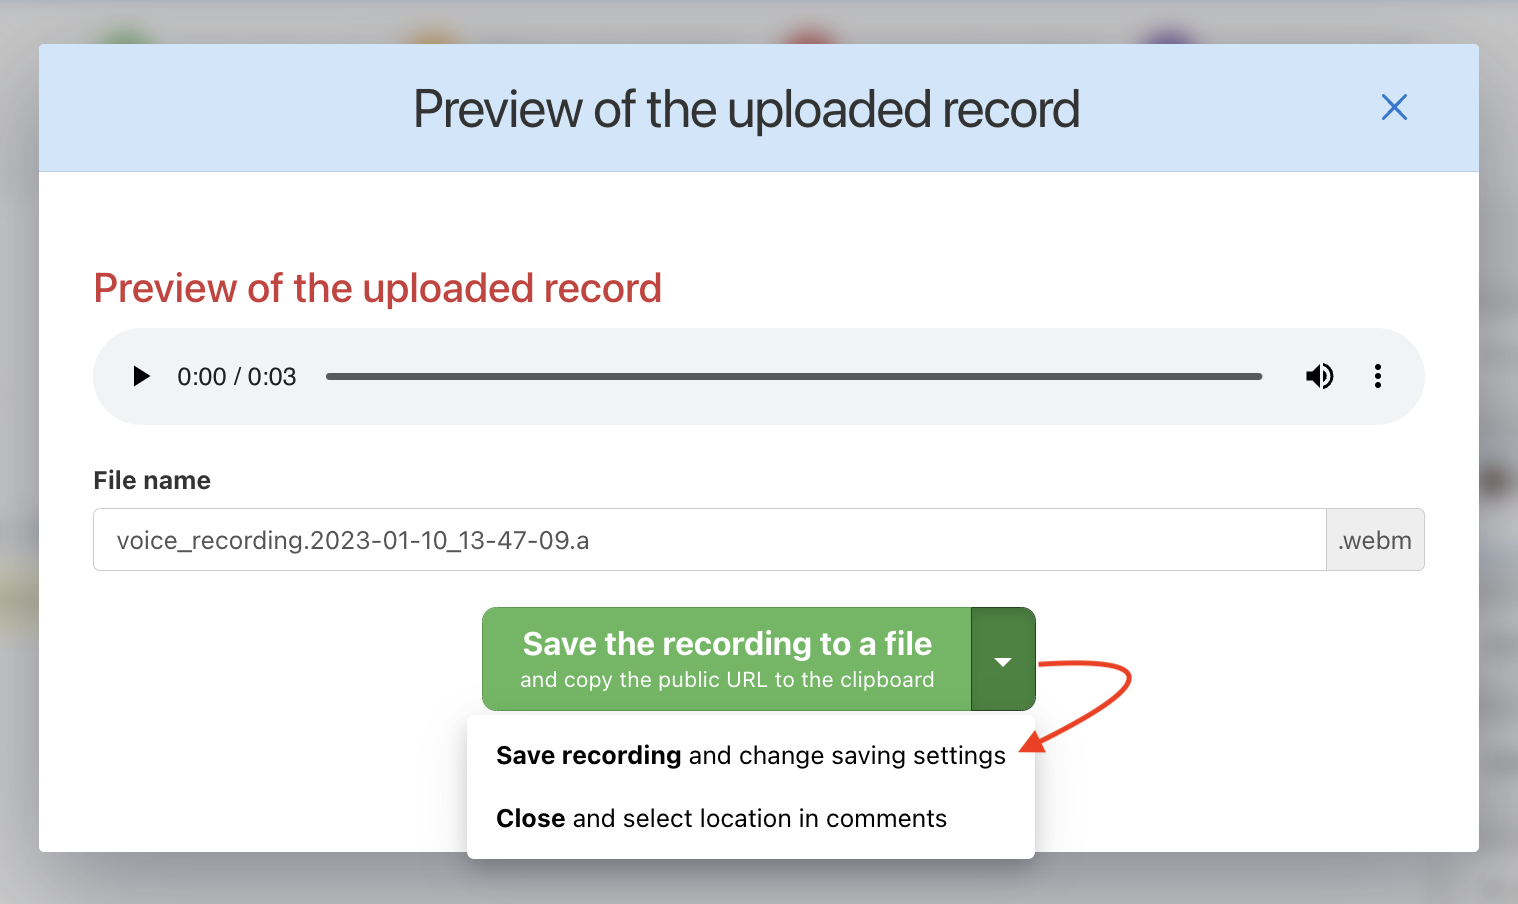
If you want to save the voice message in a comment to a sub/task, select the option after recording via the arrow – Close and select location in comments.
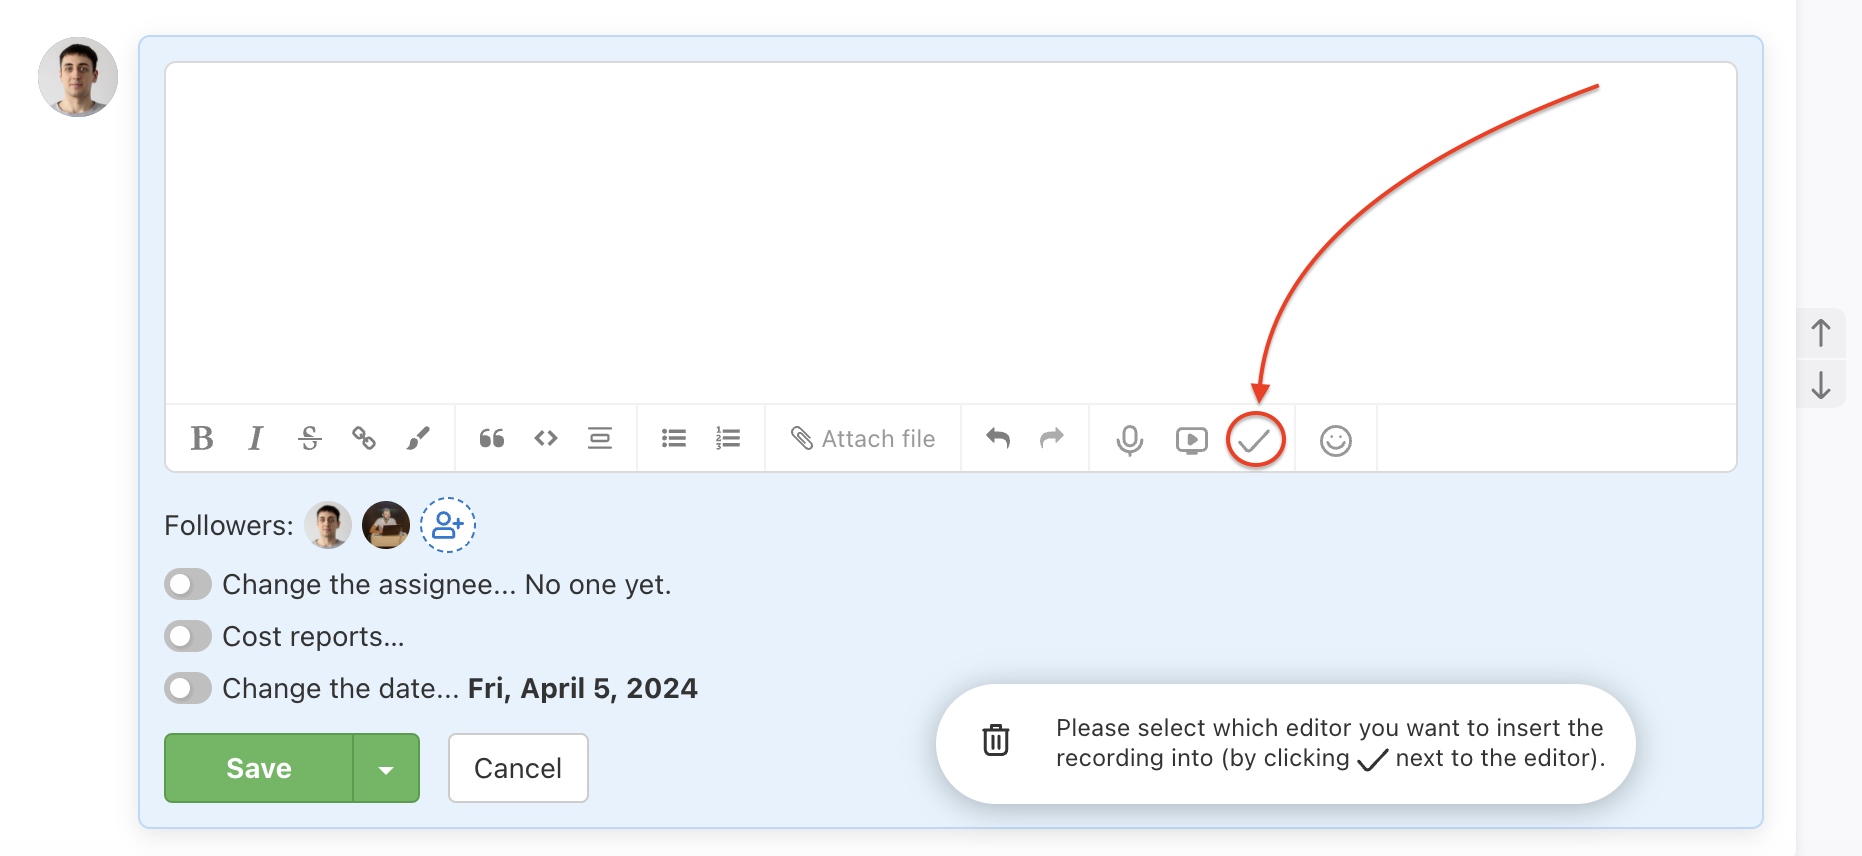
After choosing this option, go to the details of the selected sub/task and insert the voice message to a comment, which will then be saved.
Screen recording
Sometimes a picture is worth a thousand words. Showing something in a visual way can save a lot of time compared to writing it out at length. When you and a colleague aren’t sitting next to each other in the office, screen recording can be a useful tool.
Screen recording in comments
You can find this feature here:
Screen recording via + in the menu or a keyboard shortcut
You can start recording a screen recording from anywhere in Freelo. There are two ways to do this.
- From the main menu go to the + > Record screen:
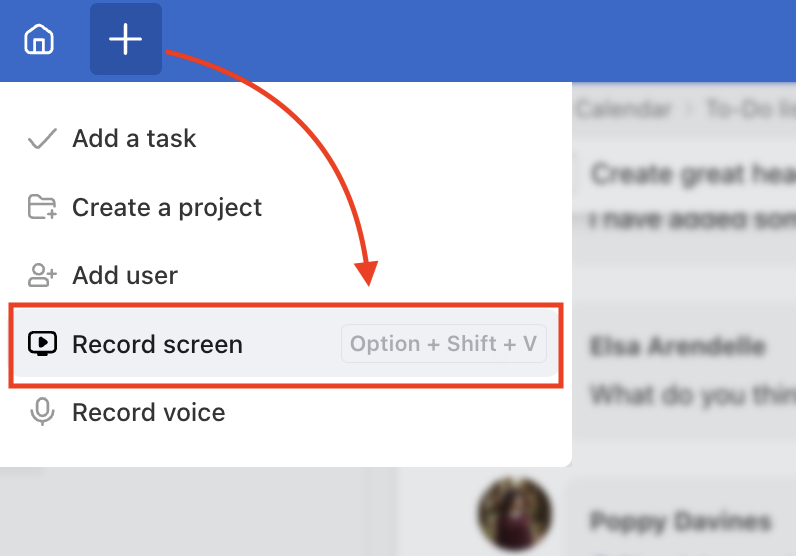
The screen recording function is on the + icon in the main menu. - Or use the keyboard shortcut Option/Alt + Shift + V.
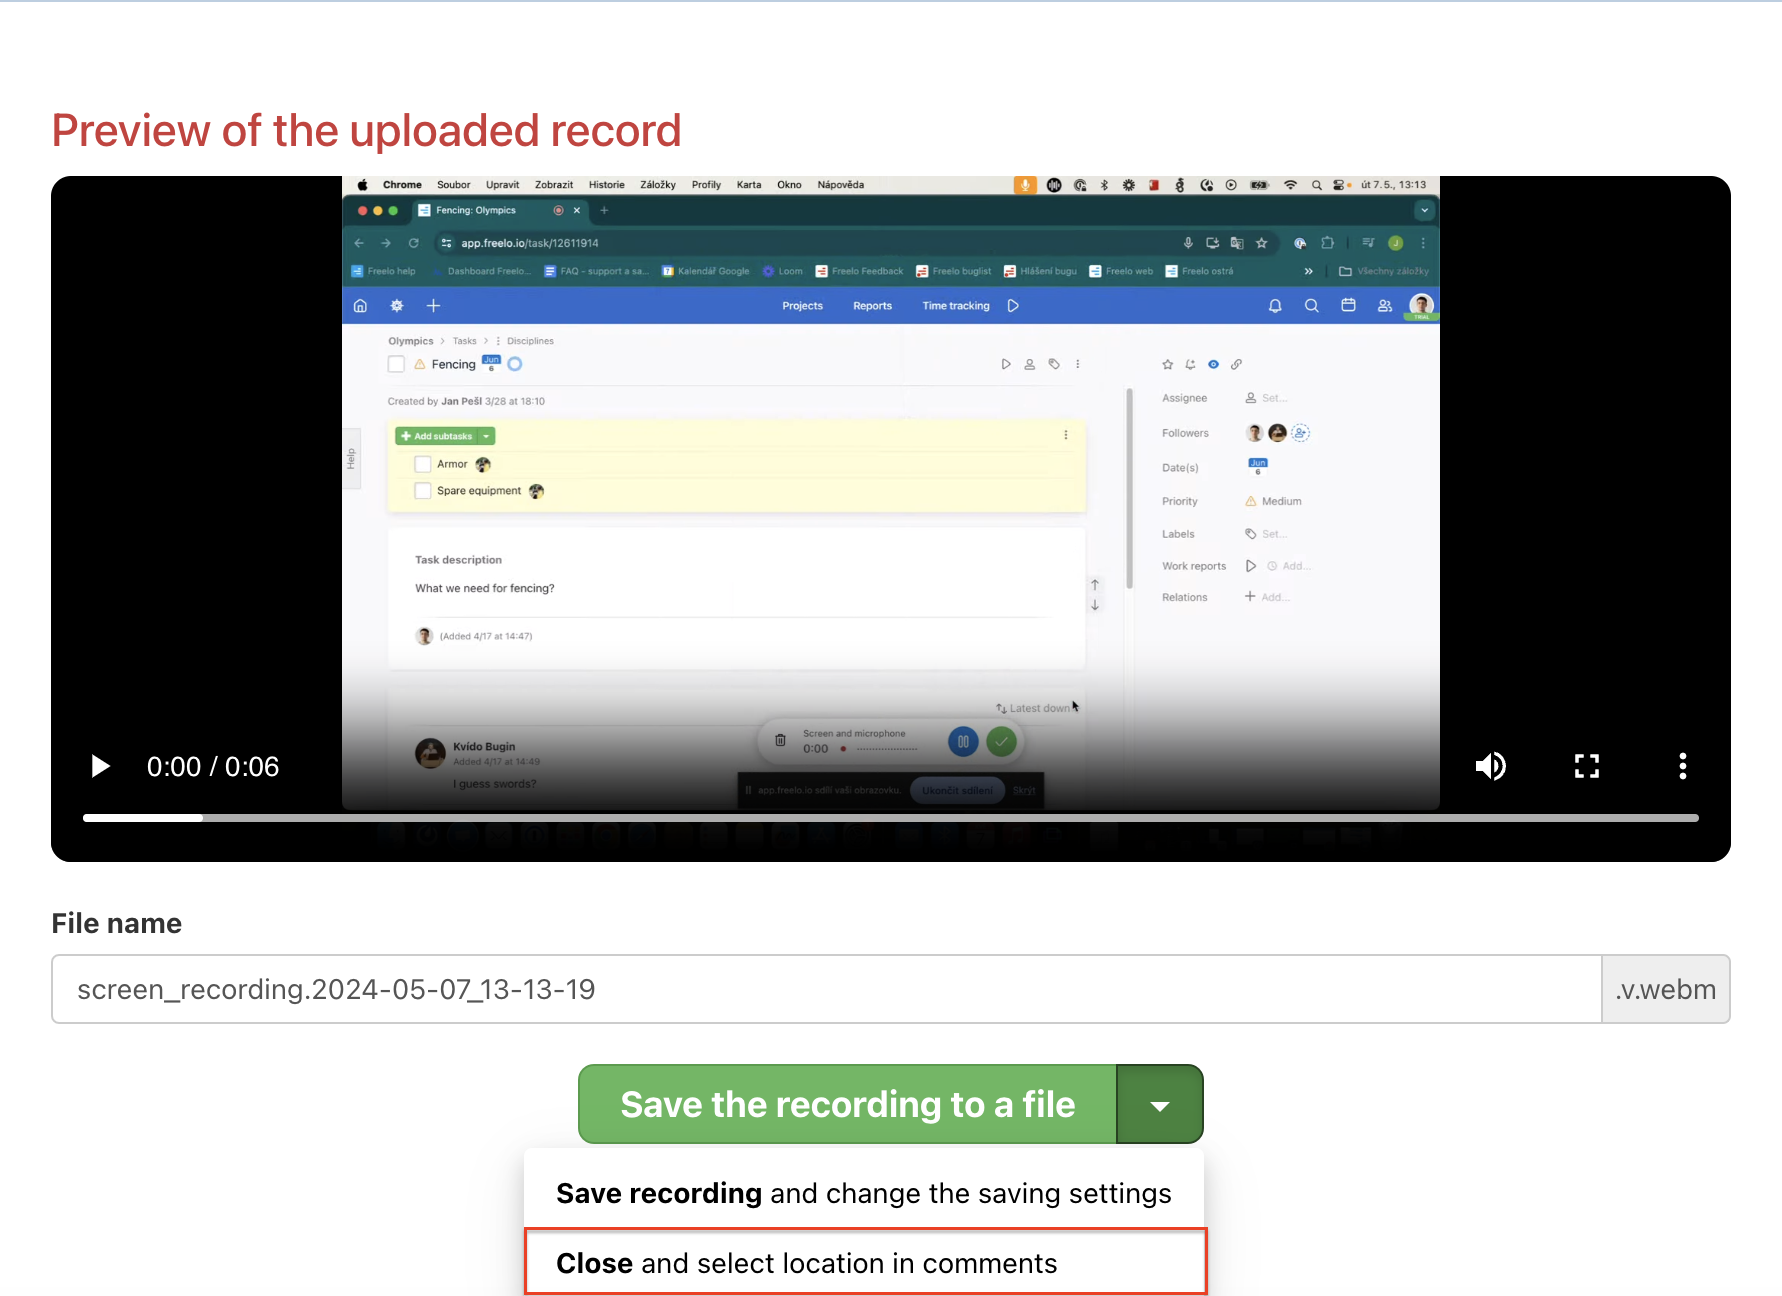
The screen recording will be saved in the Files section of a project you select. Before the first upload, the settings will automatically pop up. This will also apply to future screen recordings.
Or put the screen recording in the comments of a specific sub/task. In the preview of the uploaded recording, select Close and choose a location for the comment.
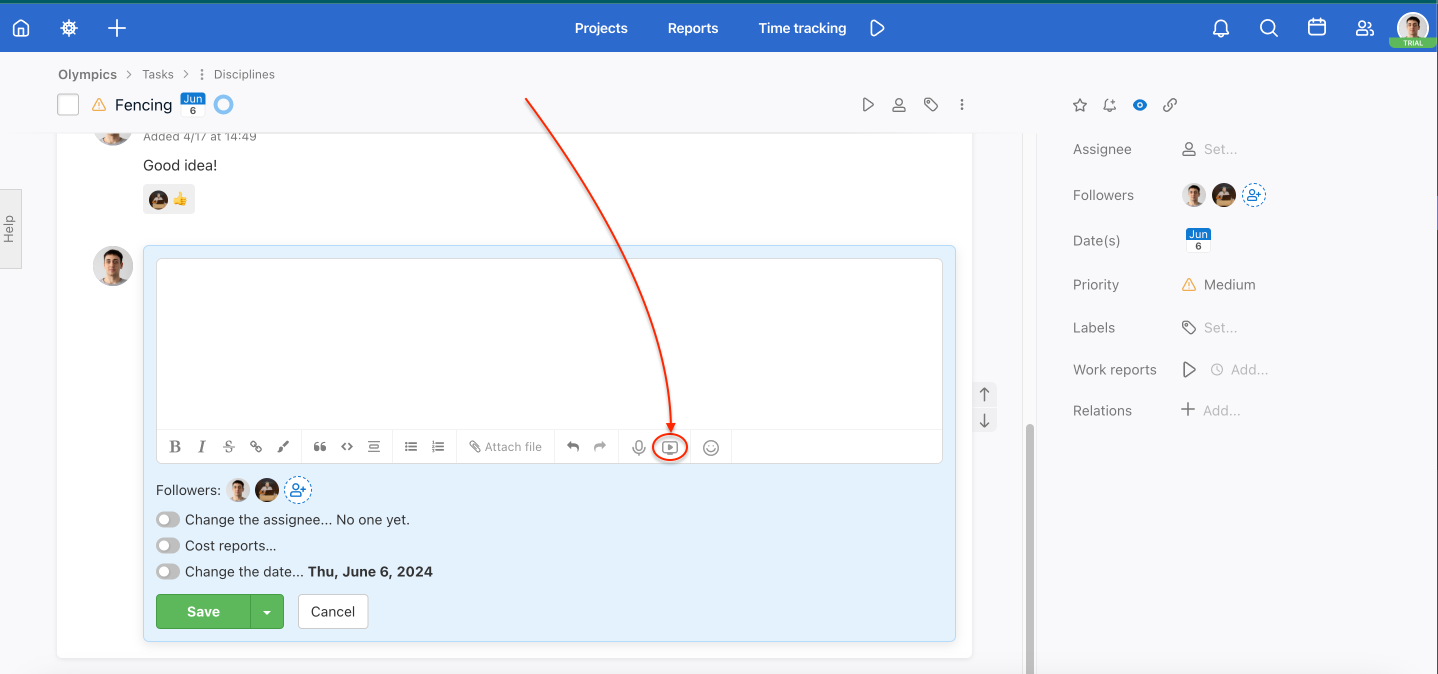
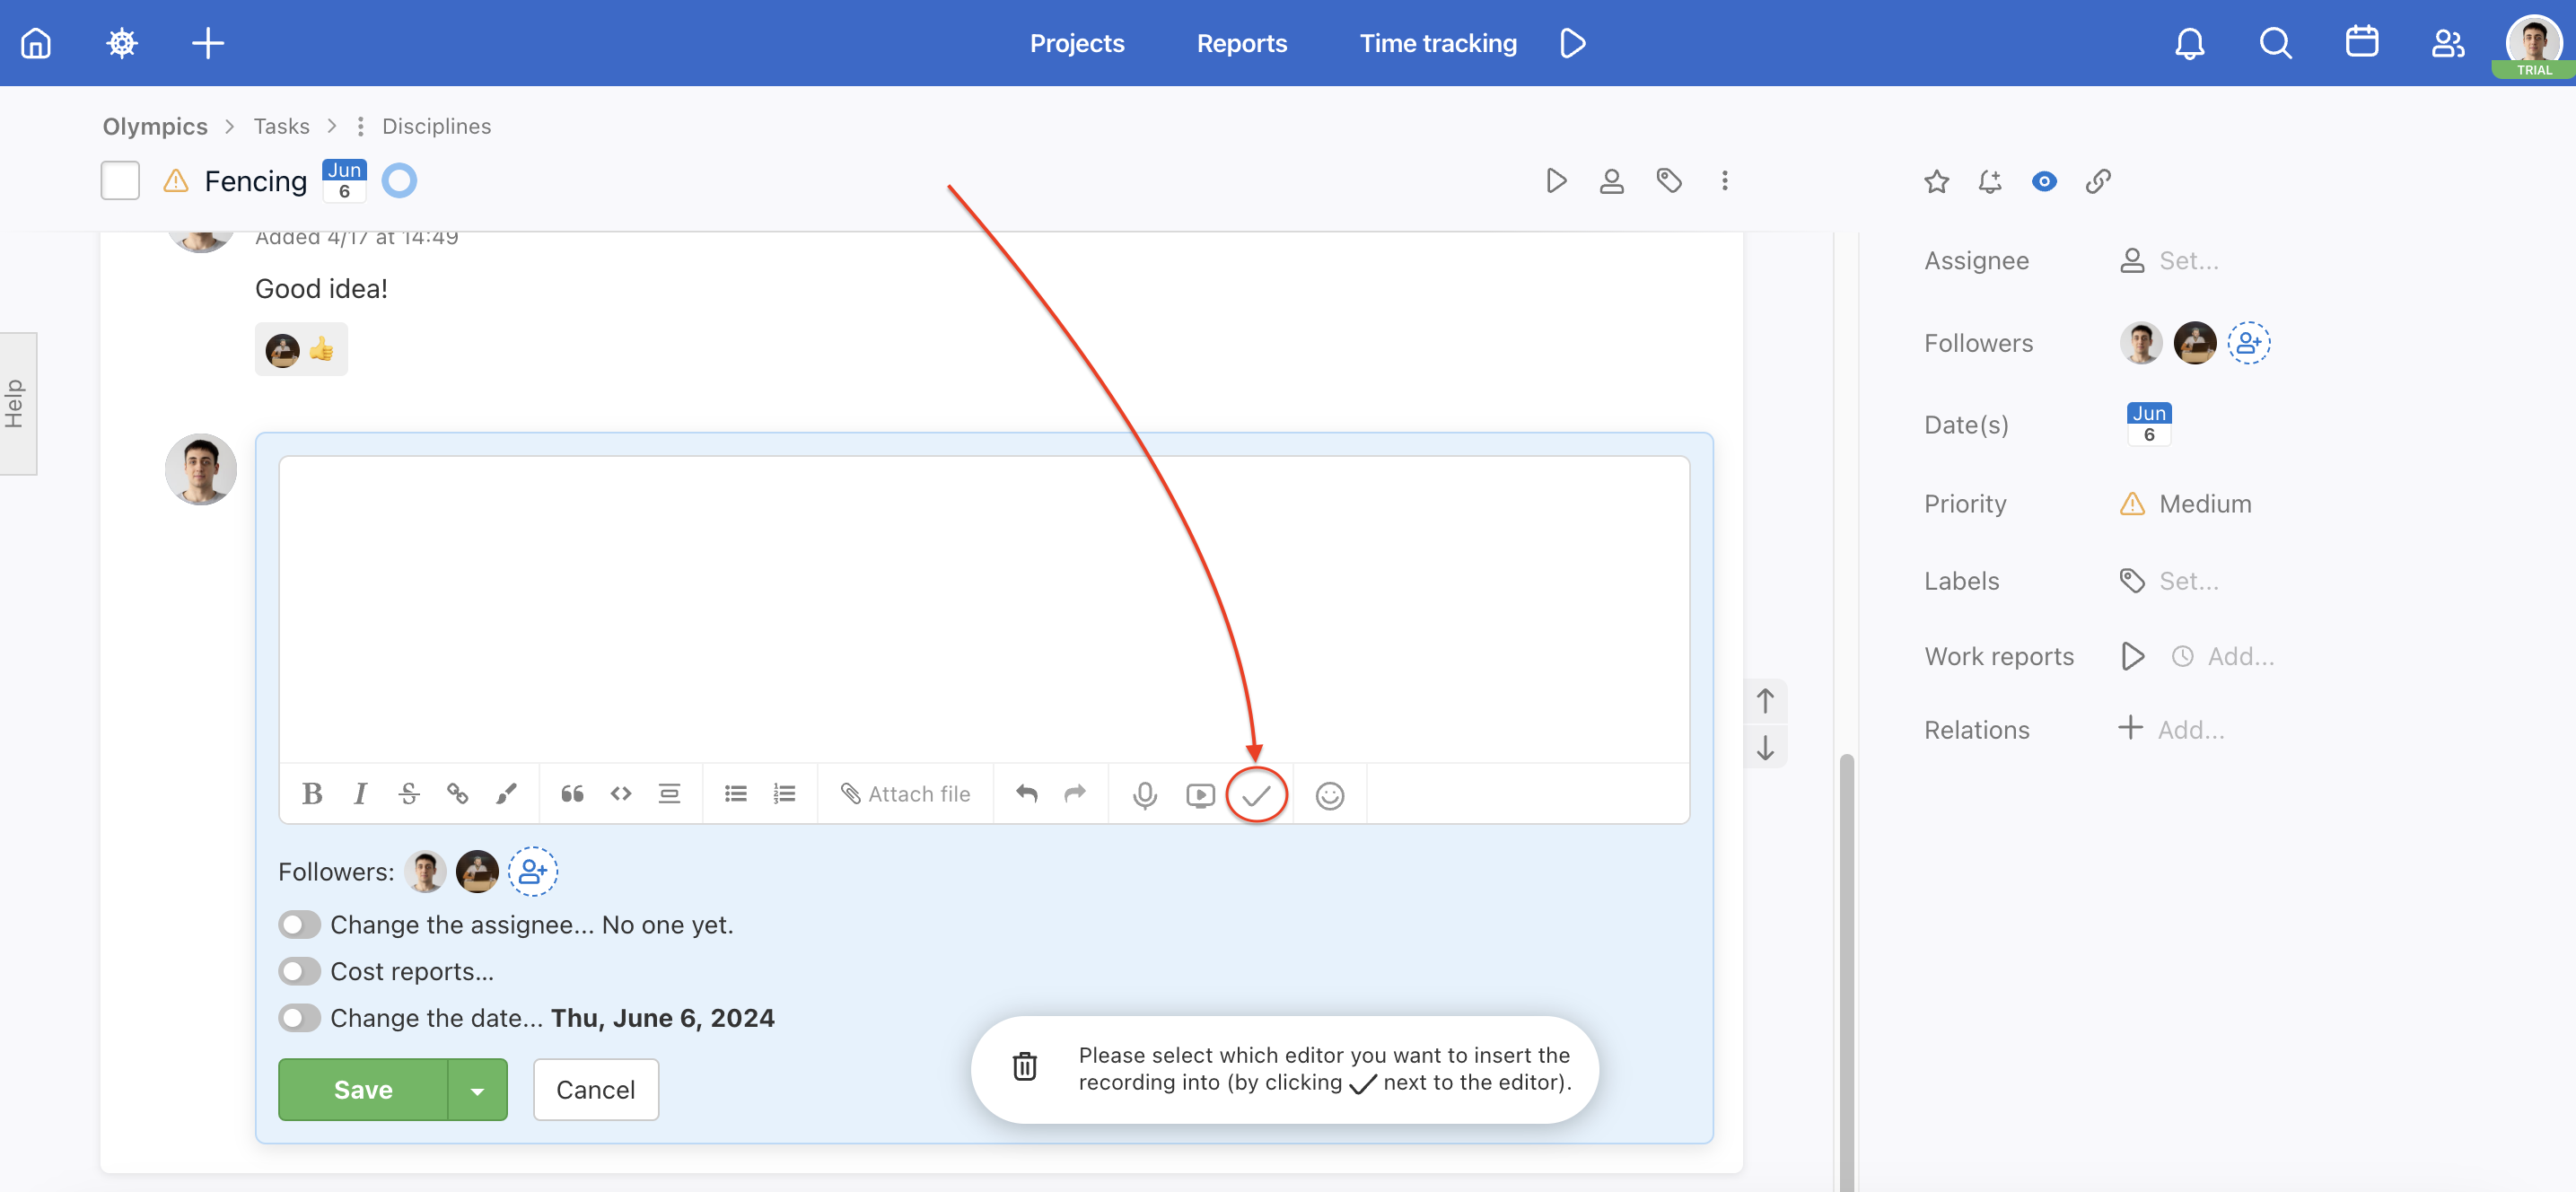
Then just go to the details task or subtask, where you insert the video record via the pipe. Don’t forget to save your comment!
Internal and public links of recordings
For screen recording and voice messages via the + symbol or keyboard, you can set it to automatically copy the internal or public URL of the recording to your clipboard. You can easily send the link to a teammate who has access to the project or to someone who doesn’t work in Freelo.
Change the settings after recording and saving by selecting > Save recording and change saving settings.
In the settings window, go to the bottom and use the checkboxes to set the feature to:
- enable automatic copying of the public URL to the clipboard,
- or enable automatic copying of internal URLs to the clipboard,
- or not to turn automatic copying on.
