In Freelo, we do our best to ensure that no third party can have access to your confidential information. One of the steps we took to enhance the security levels, we added a feature to verify a user’s or a company’s domain.
In case you have company domain, eg. @freelo.io, all your invited users should log in to Freelo with an email address from this domain. Thanks to having a verified domain, you can:
- Protect your data
- Manage user’s personal information (account name, avatar, language)
- You can edit the settings of multiple users at once using the Settings Template
How to verify domain
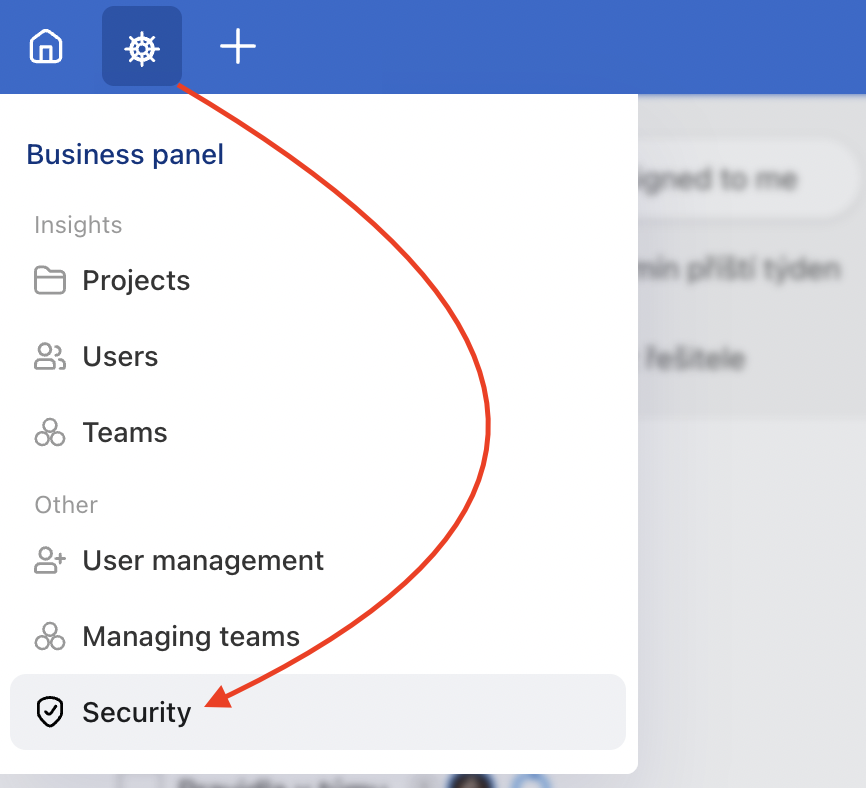
Access the Security page via the Business panel icon > Security. Without a verified domain you cannot manage users. You can have multiple domains saved in Freelo.
Set the domain verification via the green + button.

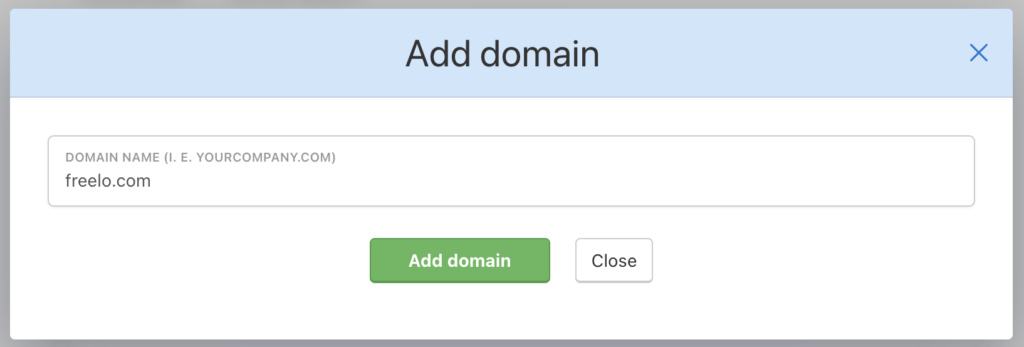
A form will appear where you add your domain. Write only the text after the @ symbol and click Add domain.
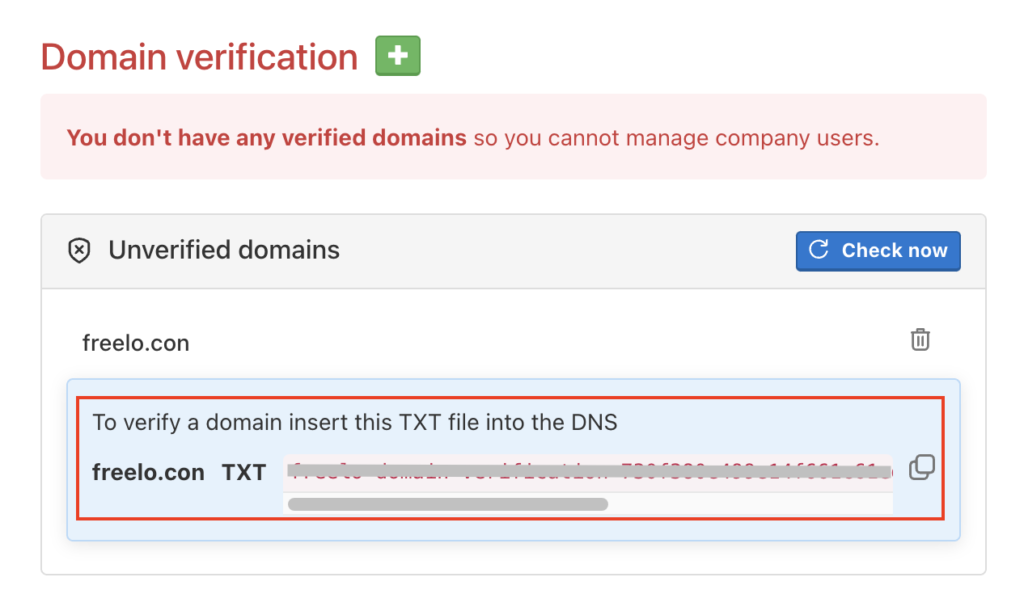
The new domain is unverified at first. It is necessary to add the TXT to DNS by the domain admin.
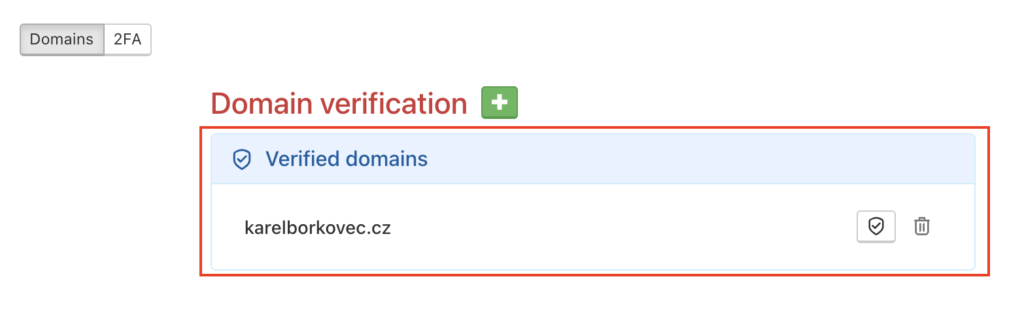
A correctly verified domain looks like this:
How to Verify a Company Domain Using TXT Records
Verifying your company domain is an important step to improve the security of your Freelo account, manage users more effectively, and enable the Guest accounts feature.
What is Domain Verification and Why It Matters
Domain verification is the process of confirming that you own and manage a given domain name. In Freelo, verifying your domain allows you to:
- Improve the security of your company data – ensure that only authorized people with your company email address have access to sensitive information
- Centralized user management – manage names, avatars, and language settings for all users at once
- Enforce two-factor authentication (2FA) – require 2FA for all users under the domain
- Use Guest accounts – grant free access (as part of the Business plan) to clients or external co-workers
How TXT Record Verification Works
TXT records are a type of DNS record used to store arbitrary text. They are commonly used for:
-
Verifying domain ownership for services (Freelo, Google Workspace, or Microsoft 365)
-
Security configurations such as SPF, DKIM, or DMARC for email
-
Authorization and configuration of external services
Freelo generates a unique verification string (token) that you need to add to your domain’s DNS settings as a TXT record. Once the record is detected, Freelo confirms that you control the domain.
General Instructions for Verifying Your Domain via TXT Record
The process is similar across different hosting providers (such as Wedos, Forpsi, Active24, Websupport, etc.). The interface may vary, but the steps are essentially the same:
1. Generating a verification TXT record in Freelo
- Log in to Freelo and go to the Business Panel → Security section.
- In the Domain Verification part, click the green + and enter your domain name (without “www”, only e.g. “company.com”).
- Freelo will then generate a unique verification text for the domain.
2. Logging into your hosting provider’s admin interface
- Find the section for domain management – it’s usually called DNS, DNS records, DNS settings, or something similar.
- Select your domain to manage its DNS records.
3. Adding a TXT record
- Choose Create new record or Add new record.
- Set the record type to TXT.
- Leave the Name / Host / Hostname field empty or enter “@”.
- Paste the verification text from Freelo into the Value / Data / Content field.
- Save the changes.
4. Waiting for DNS propagation
- After adding the record, wait until the DNS changes propagate.
- Once the DNS record is active, return to Freelo and check the domain status in the security section.
5. Completion and feature access
- Once your domain is verified, you’ll be able to manage users more easily, enforce two-factor authentication (2FA), and take advantage of Guest Accounts.
Useful links to guides for individual hosting providers
- VEDOS (Wedos) – Domain Records
- Blueboard – DNS Records
FAQ
-
DNS does not propagate: Wait and check with a DNS lookup tool to confirm the TXT record is visible.
-
Verification fails: Make sure there are no extra spaces or quotation marks in the name or value.
-
Cannot find DNS settings: Look for sections named “DNS”, “Domain Settings”, or “Domain Zone”. You can also contact your hosting provider’s support for assistance.
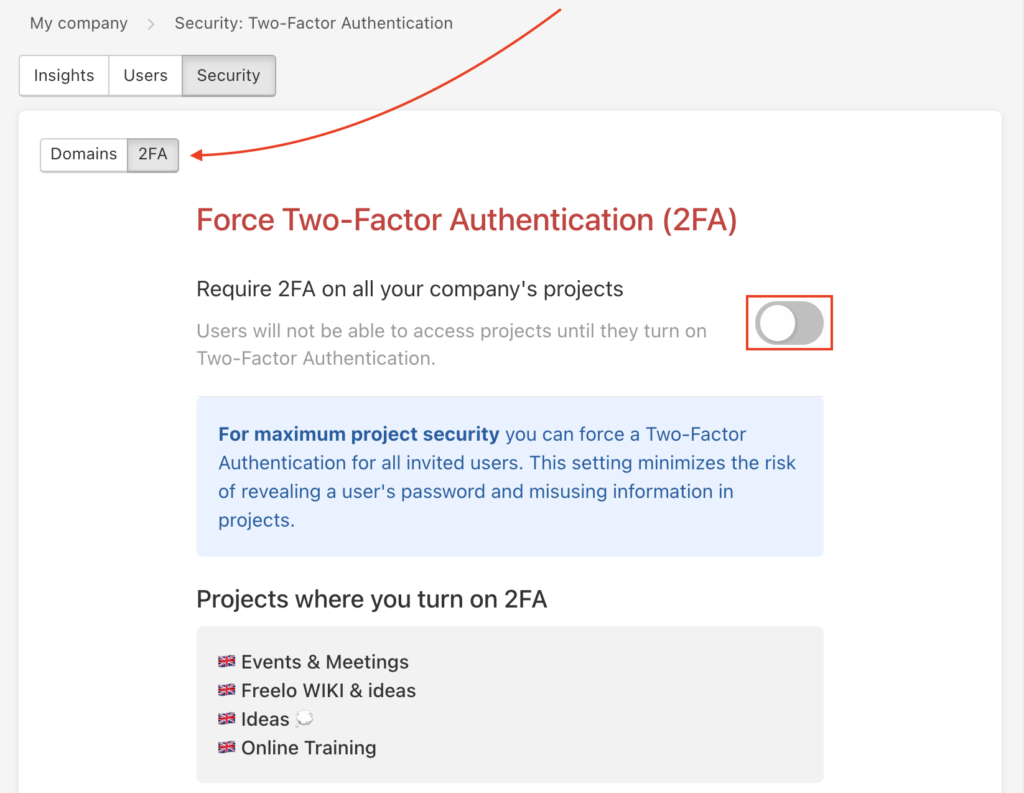
How to turn on the Two-Factor Authentication
On the Security page, there is a 2FA section. The captain and the Company captain can set two-factor authentication as an obligatory requirement for the users to access their projects.
Go to the 2FA section and force two-factor login to all your projects. Just click the switch button.
After this step, a user cannot enter the projects without the activated two-factor authentication. Learn how to turn on two-factor authentication.
Successfully activated 2FA has a green switch button next to it. Right after activating it, a note confirming this action appears in the bottom left corner of the screen. The two-factor authentication always applies on all your projects.

And what if you lost access to your 2FA? Take a look on How to Disable Two-Factor Authentication.