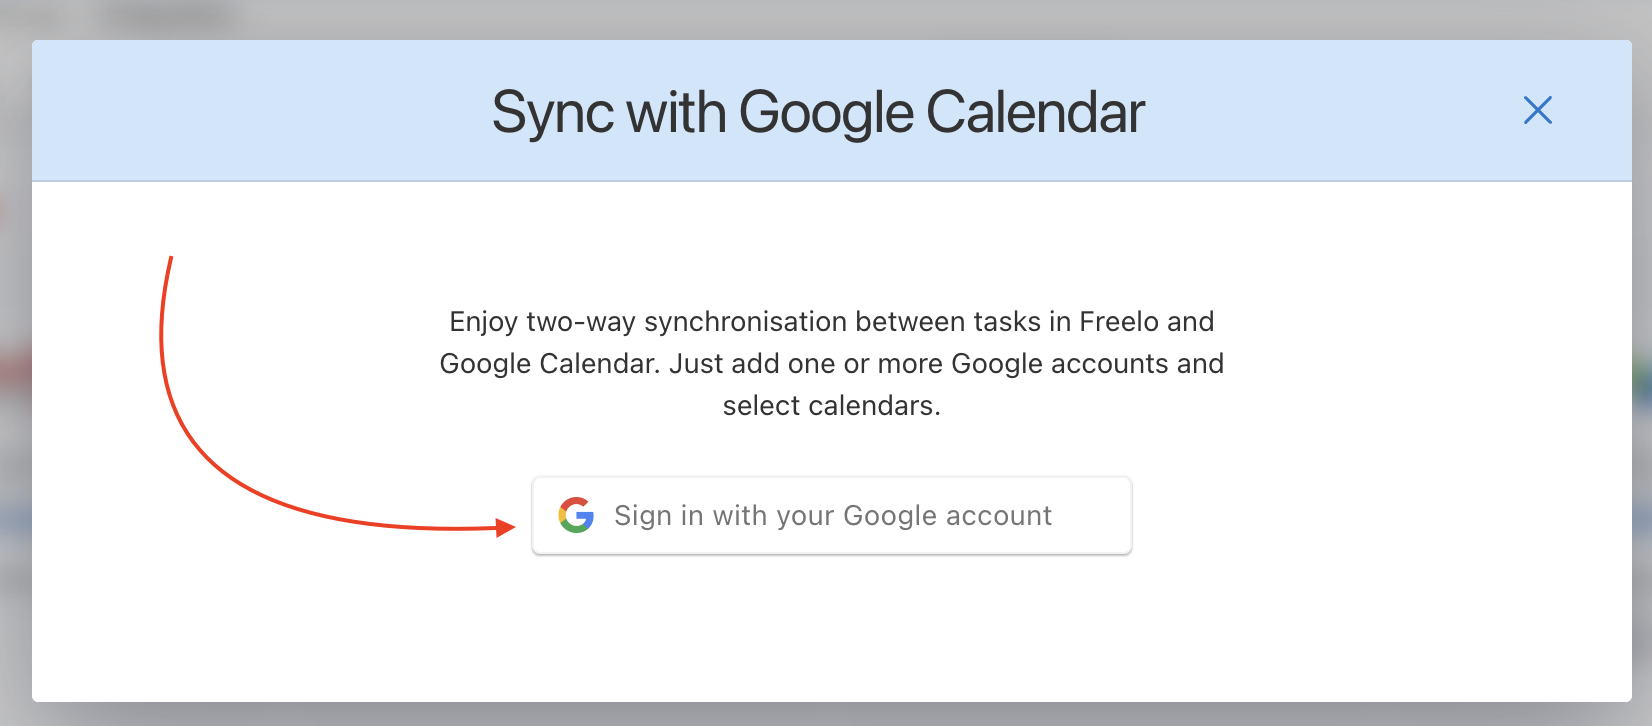
To enable the integration, click on the Avatar in the top right corner > Settings > Integration and select Google Calendar.

Then, add the Google account that you want to link to Freelo.
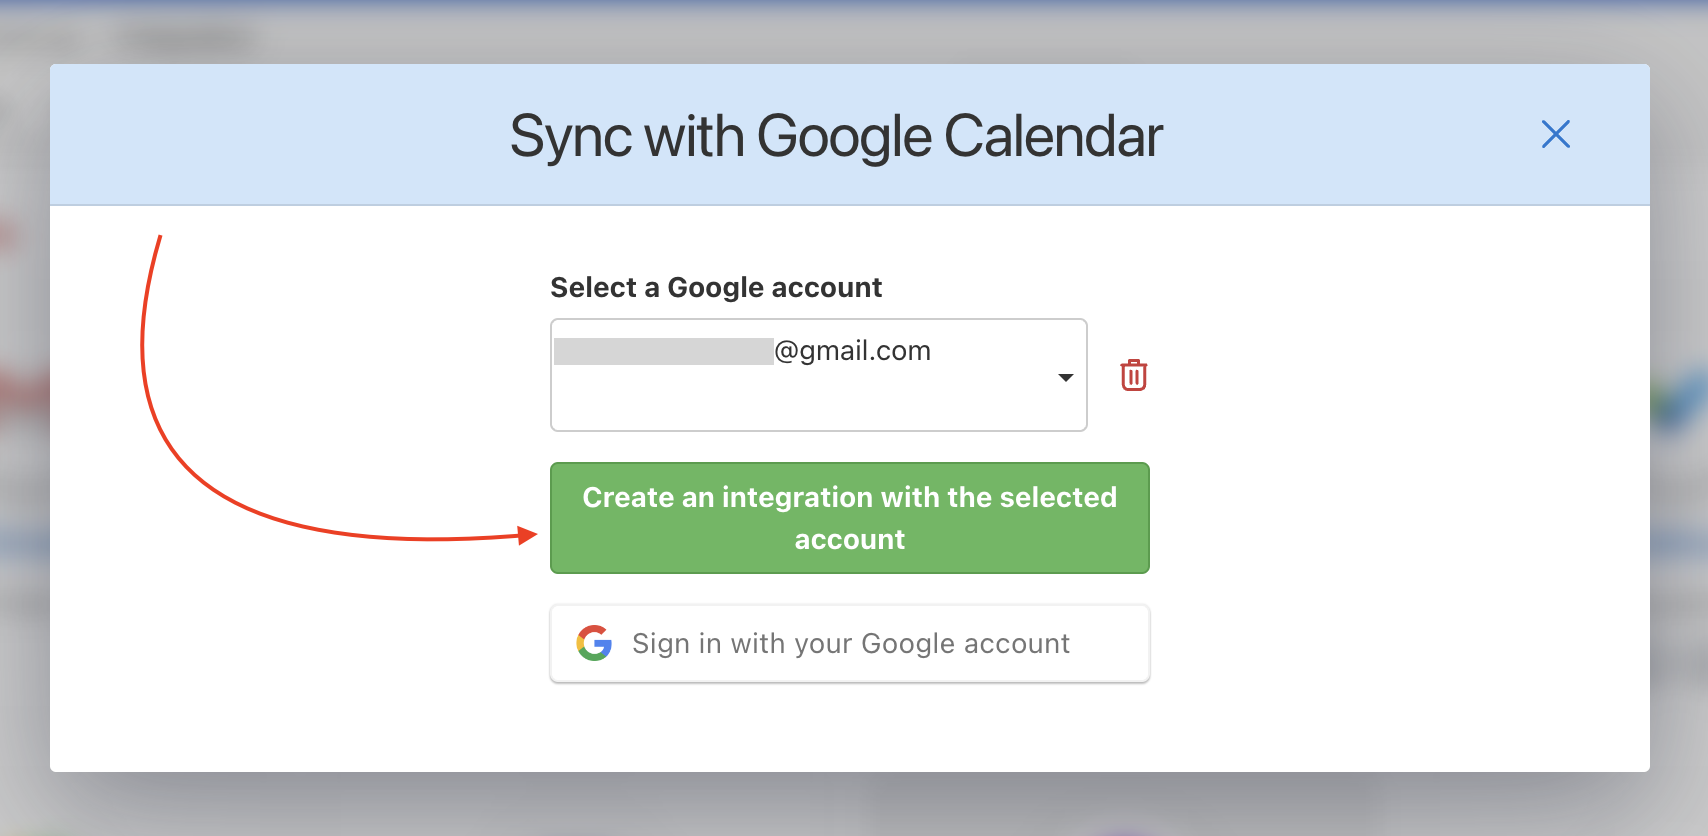
After signing in with your Google account, simply confirm the integration for your account.
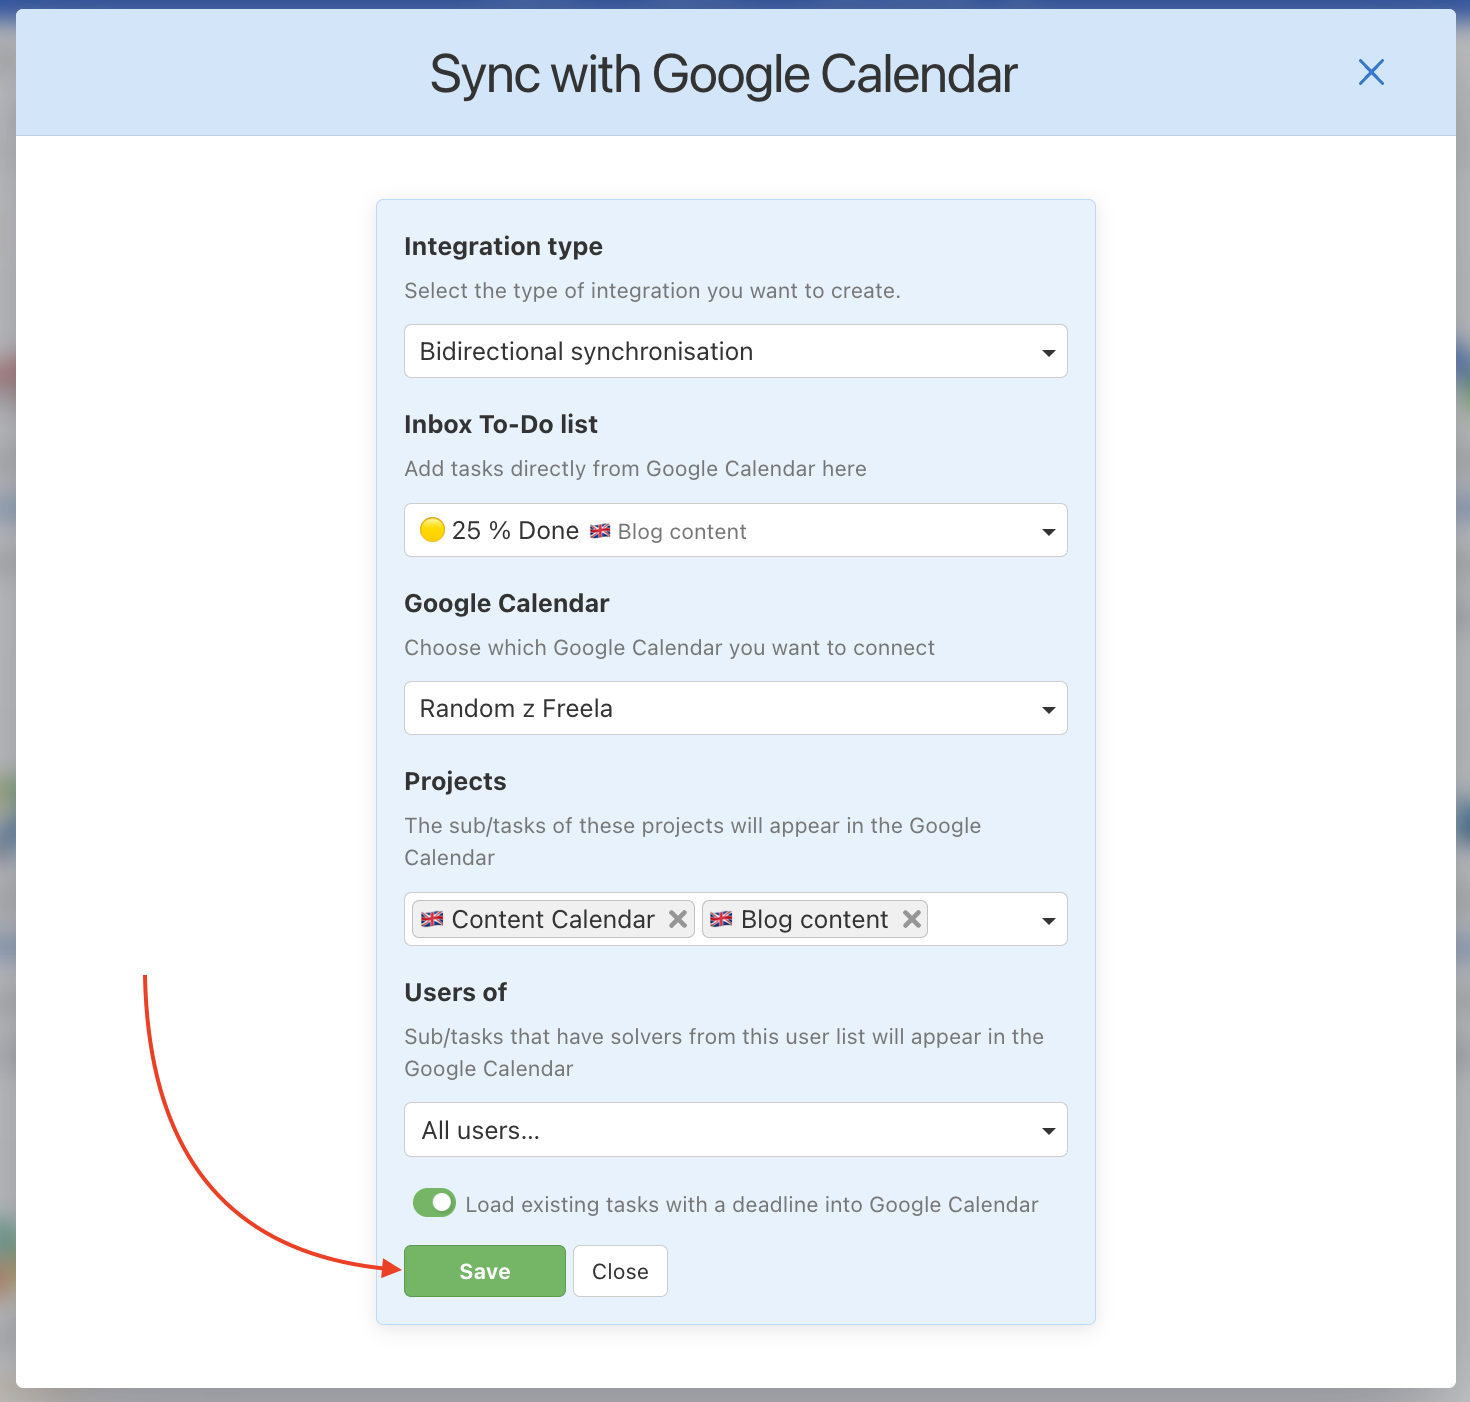
Now you just need to choose the following:
- Integration type – you can choose Two-way Integration, sync from Freelo to Google Calendar, or just from Google Calendar to Freelo. If you choose the Two-way integration, you can create tasks in both of them (Freelo and Google Calendar), depending on your preferences.
- To-Do list, where you will add tasks directly from the calendar. You can then move them to another To-Do list or project.
- The Google account you currently want to link.
- The projects that you want to integrate to your Google Calendar (sub/tasks from these projects). These can be all projects or just some of them. If you want to enter tasks from the Google calendar into Freelo, you need to set the default asignee in the Inbox To-Do list.
- The solvers whose tasks you want to have in your Google Calendar.
- Lastly, you can load existing tasks in Google Calendar. If you do not choose to have them included, you will only see the tasks created in the future.
Once you’ve saved your settings, you’ll have a two-way Google Calendar connection. So, as mentioned before, you can change the dates directly in Google Calendar and it will be reflected in Freelo at the same time. You can also create tasks with deadlines directly from Google Calendar.
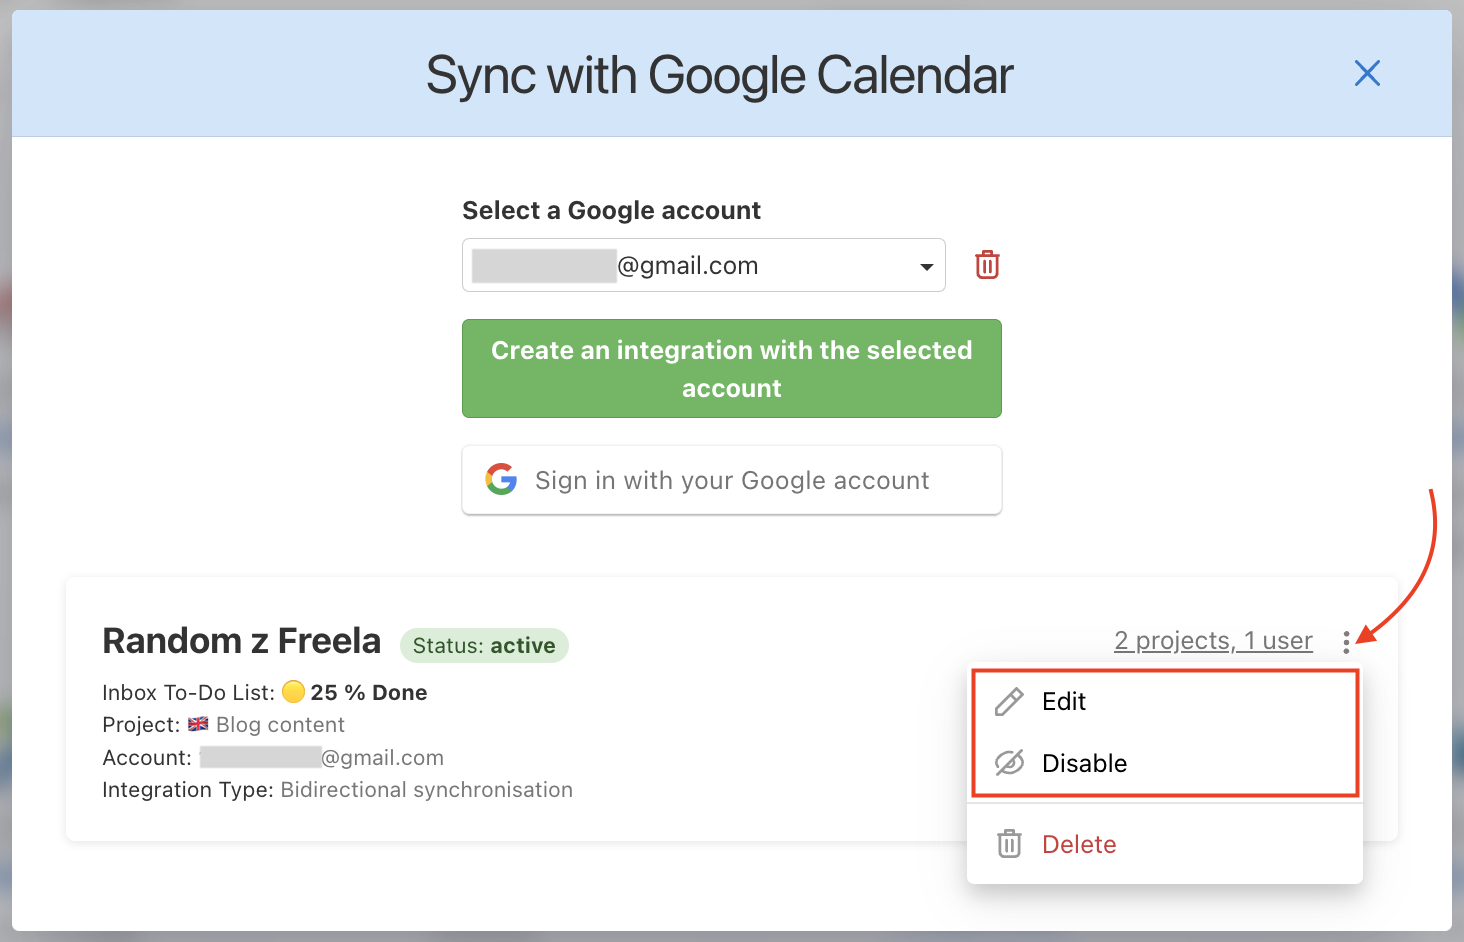
You can adjust the synchronization settings afterward. To edit, click on the three-dot menu on the bottom right next to the number of projects and users. Then click Edit > make the edits you need > click Save. You can also deactivate the synchronization.
Disabling synchronization
You can also disable synchronization and return to it later if needed.
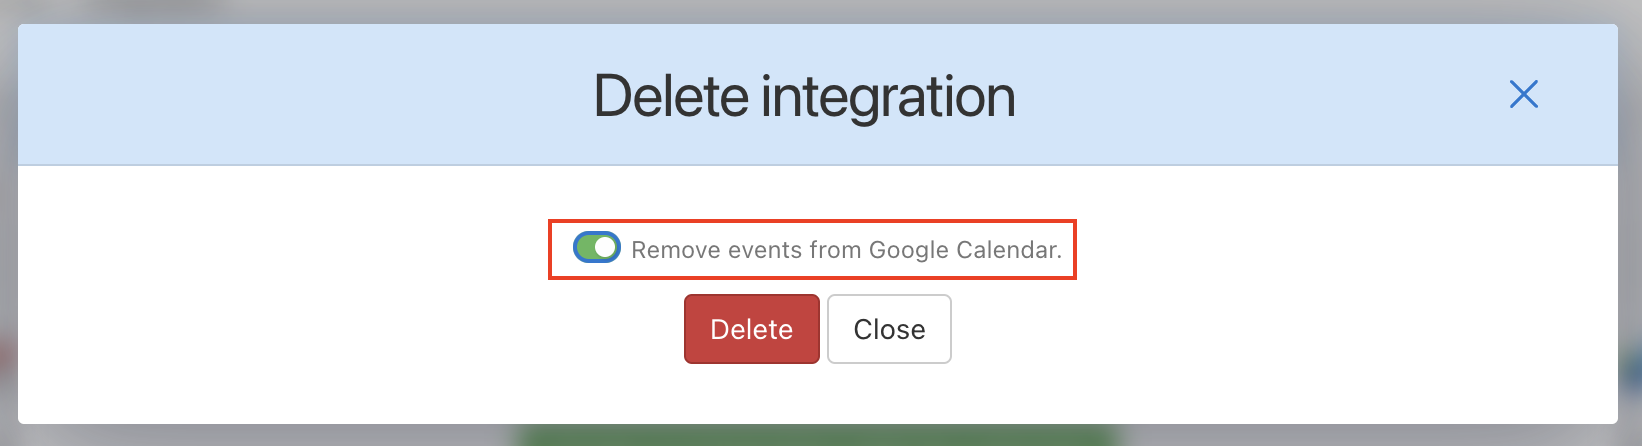
You can completely delete the integration. If you want to remove the events created in Google Calendar as well, activate this feature. By doing so, you will remove tasks created in Freelo and transferred to Google Calendar, while events created in Google Calendar will remain.